Whether you’re a beginning or experienced stamper, you likely look for tools to help make your crafting experience quicker, easier, more fun, or those that help you ‘step up your game’ and make more advanced projects. Today I’ll be sharing with you about the Stampin Up Stamparatus, a stamp positioning tool that has completely changed the ballgame when it comes to stamping. It is perfect to help beginning stampers learn and gain confidence, and it can be used by experienced stampers to try many new techniques. All stampers appreciate that it saves tons of wasted cardstock because it will eliminate so many mistakes in your stamping endeavors!
What Is It?
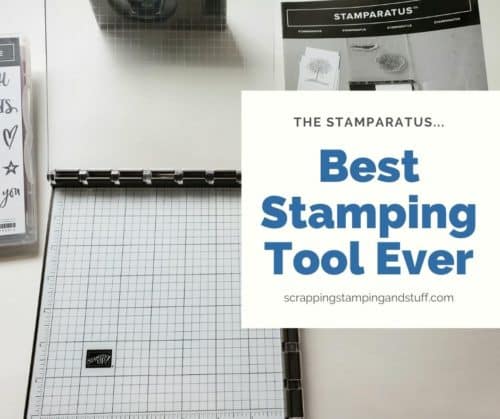
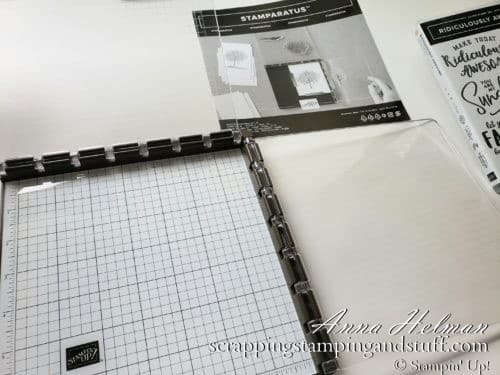
The Stamparatus (#146276) can be described as a stamping platform, a stamp alignment tool, a stamp positioner, stamp positioning tool, hinged stamping tool, or hinged stamp positioner. Regardless of what you call it, it is a precision stamping tool that allows you to get perfect placement of your stamps each and every time.
Benefits
The benefits of using the Stamparatus (and reasons you need this tool in your collection) include:
- Precision stamping each and every time.
- Perfect alignment of your stamps. Greeting stamps will be straight, and two step stamps will be perfectly in place.
- The ability to re-stamp anything that didn’t stamp perfectly the first time in the exactly same place.
- You can make multiples of your project quickly and easily.
- The ability to try techniques that are not possible without the use of this tool!

We will continue to discuss in much more detail, but if you would prefer to watch along in video form, join me in my Complete Guide To Using The Stamparatus video below.
Let’s carry on and talk about features of this amazing product!
Features
We will begin by talking about the base.
Magnetic Base
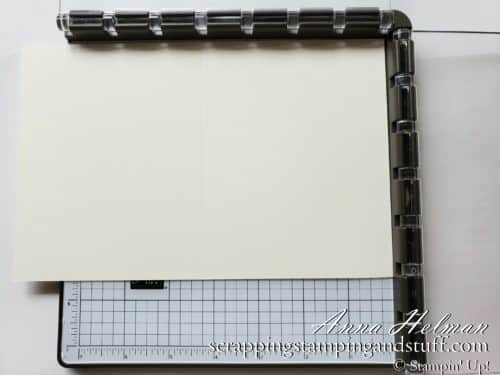
The base of the platform is magnetic, to allow the use of magnets to hold your project secure. The base includes a ruler on the bottom and left sides, as well as gridlines at 1/4″ increments across the surface.
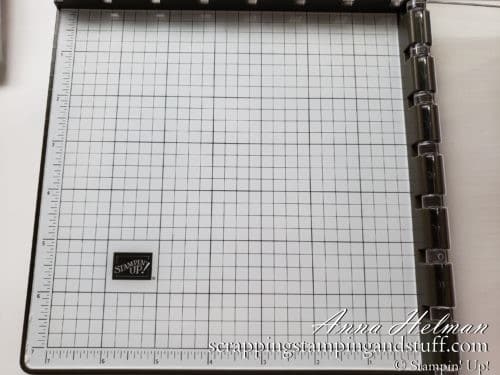
Random tip…if you are left handed, you may prefer to turn the platform 90 degrees counterclockwise. Different users turn the platform different orientations to fit their preference.
The Stamparatus comes with a foam mat, shown on the left in the photo below. This mat is recommended for use when using photopolymer stamps. When stamping with these clear stamps, you’ll want to lay the mat on the base of the platform and place your paper on top. This mat is not required for stamping with rubber stamps, but many stampers find that it works to use the mat with both types of stamps.
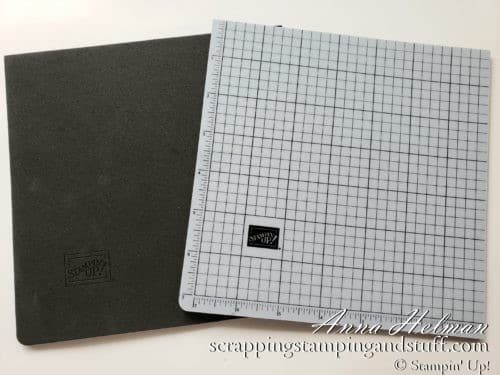
We offer a deluxe foam mat as well as grid paper that can be used on the base of the platform. I’ll discuss these later along with accessories.
The platform base measures 7″ x 7″. One benefit of the design being open on the bottom and left sides is that you can lay a full card base or scrapbook page in it, with the excess hanging over the edge.
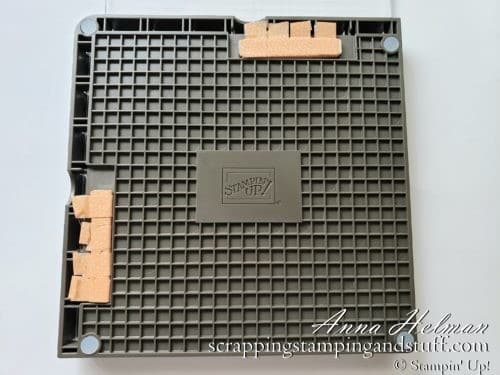
The bottom side of the stamp positioning tool has anti-skid feet to keep it from scooting around on your work surface. The base also holds your two bar magnets and keeps them secure. The orange tape on my magnets will be explained in the next section.
Magnets
The Stamparatus comes with two strong bar magnets (#148213) to hold your project in place during stamping. I strongly recommend that you never use both bar magnets at the same time. They are so strong that if they get anywhere near each other, they will snap together and can break. I prevent this from happening by only using one magnet at a time. Actually, I rarely use magnets to hold my project in place, but if I do, I only use one magnet.
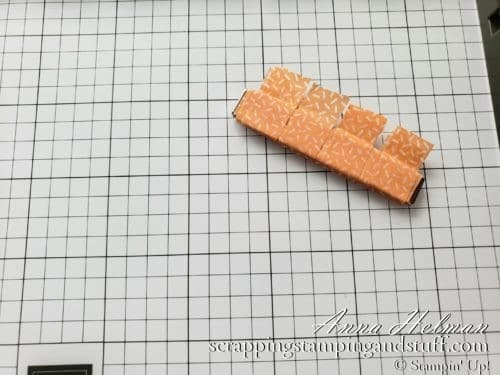
To protect your magnets and make them easier to lift and move, you can wrap several layers of washi tape around them and leave some loose ends hanging off to grab onto.
Now let’s talk about the plates!
Clear Plates
The tool comes with two clear plates with hinges that allow them to rotate inside of the base. The plates are the surfaces to which you’ll mount your stamps. The rotating hinges allow you to open them outward to mount the stamps and ink them, then flip them inward to stamp onto your project. When raised at 90 degrees, you can lift the plates directly up and remove them from the platform.
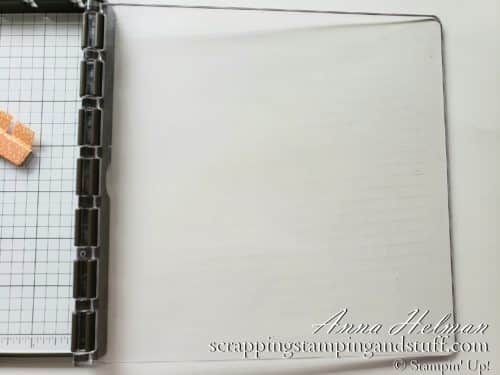
The plates include a gridline etched into the surface, which helps to align your stamps straight (anyone tired of having crooked greeting stamps?). The plates are double-sided, and you can mount stamps to both sides of each. That means you can have four separate projects or steps mounted to your plates at each time, one on each side of the two plates. I’ll show this in more detail when I discuss techniques.
Now, let’s learn how to use this baby!
How To Use It?
Basic Procedure
Lay your cardstock in the corner of the platform. Push it all the way into the corner. Lay the stamp on top in the desired location.
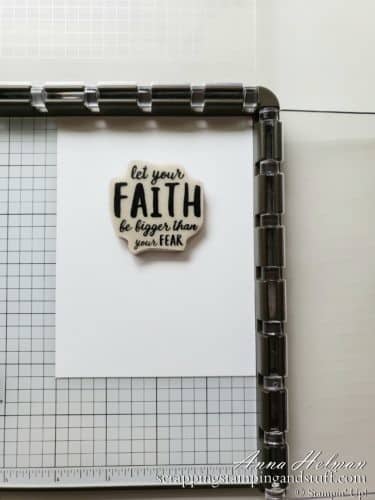
Rotate one of the plates inward until it lays on top of the stamp. Press against the plate, on top of the stamp, to adhere it to the plate.
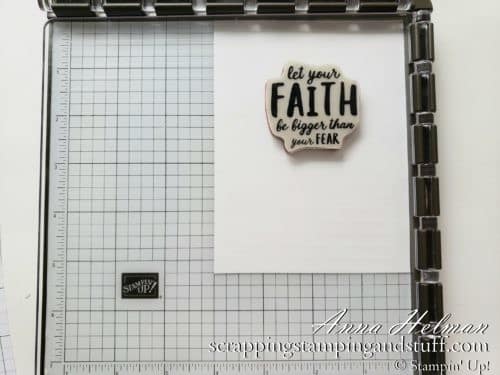
Rotate the plate back to the open position. Your paper may stick to your stamp at this point. Either use your hand to remove it, or get out one of those magnets and use it to hold the paper in place.
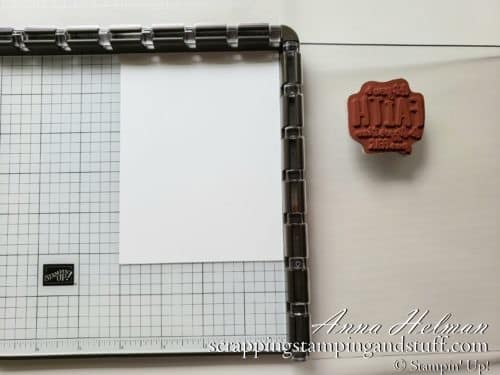
Ink the stamp by gently pressing an ink pad, upside down, against the stamp. You can use our regular stamp pads for this, or many stampers find that Stampin’ Spots (#141822 or #153183) can be handy and easier to manage.
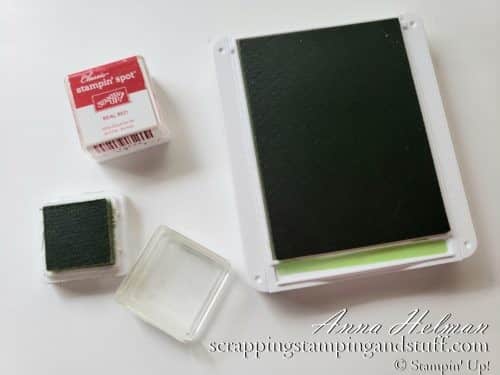
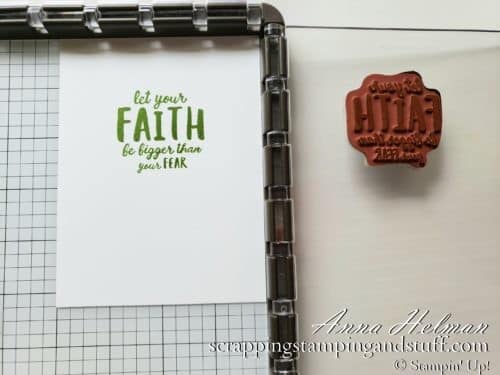
Rotate the plate over the cardstock and press directly on top of the stamp to transfer ink to the cardstock.

Rotate the plate open, and you can see your creation!
What Happens If You Make A Mistake?
Occasionally I don’t get the stamp fully inked, or I don’t press across the entire surface of the stamp. This results in a less-than-perfect image, as shown below.
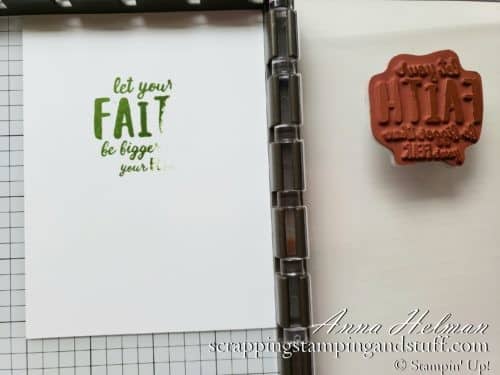
How can you fix this? If you were stamping the old way with an acrylic block, you were out of luck. You either had to flip your paper over and try again, or throw it away.
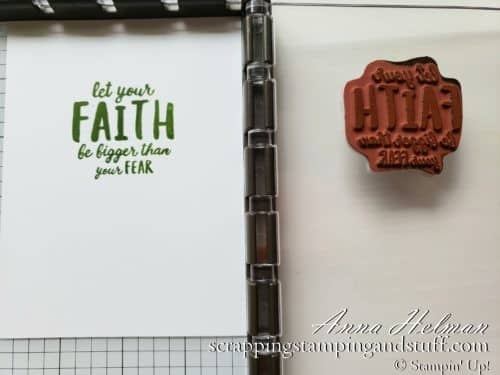
Using your stamp positioning tool…simply reink the stamp and try again. As long as you didn’t move your paper or the stamp on the plate, it will stamp in exactly the same spot! Fixed!
Accessories
Stampin Up offers a few accessories that can be used along with the Stamparatus. Earlier I mentioned a Deluxe Foam Mat (#150866), which is shown on the right below. It is a foam mat with rulers and gridlines, as well as a laminated surface. If you get ink on this mat, it wipes right off. For just $6, it is totally worth the small investment.

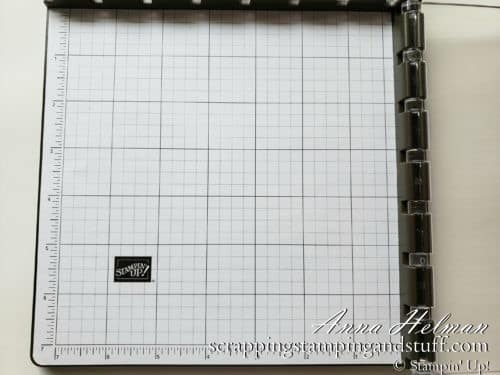
We also offer Small Grid Paper (#149621) that fits on the base of the stamping platform perfectly. It looks just like the base, right? This makes it even quicker and easier to clean up your messes, since you can get rid of one paper and grab another one. You can also use these sheets to make templates for special techniques like the one shown in the video here.
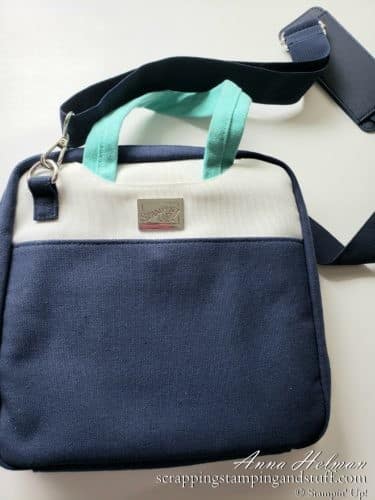
Last but not least, we have the Craft & Carry Stamparatus Bag (#149695). It is the perfect size to store and carry your precious stamp positioning tool with room to spare for your grid paper, extra mats, and other supplies
So you may be wondering if this wonderful tool will cost half of your right arm. Let’s talk about price.
Price & Service
As of writing this post, the cost for the Stamparatus is just $49. I said it before, and I’ll say it again, this is the best $49 you can invest in your stamping collection!
Keep in mind, your cost also includes customer service. A novel idea these days, right? When ordering from me, I’ll be here to 1. Thank you for your purchase! 2. Answer any questions about your order or its status, 3. Help you learn to use your new stamp positioner, 4. Help you handle any problems that you may encounter. I am able to contact Stampin Up regarding any problems and you are able to as well. SU customer service is the best!
Are you interested in knowing about special techniques you can try with this tool? Let’s talk about them!
Techniques
There are a ton of techniques you can try with the Stamparatus. Let’s talk about two basic ones.
Step Stamping Technique
With step stamping, you can use your stamp positioning tool to create the same image repeatedly, and align them perfectly at exactly the same spacing. Begin by lining up and stamping once at the top of your cardstock.
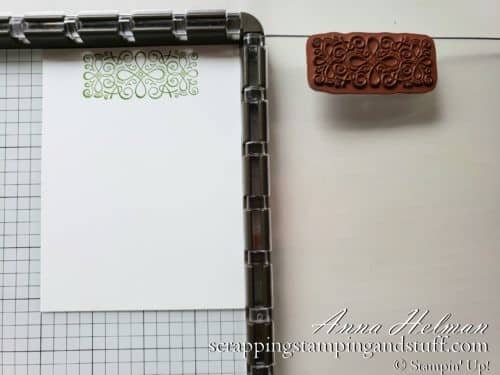
Next, raise your clear plate to 90 degrees, lift it completely out of the platform, and move the hinges down one notch.
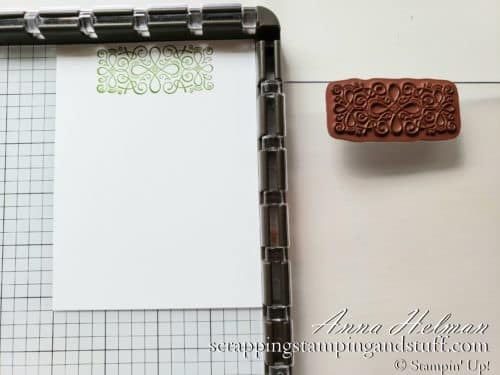
At this point you can reink the stamp if desired, or for this example I’m not going to reink to achieve a faded effect.
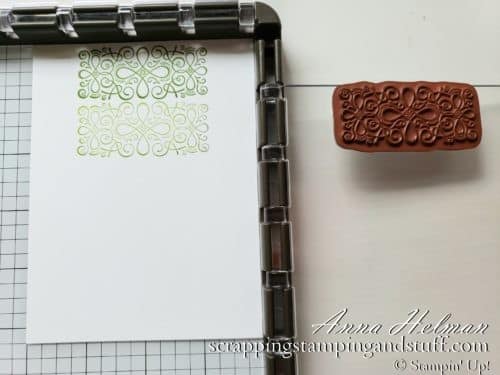
I repeated this step four times. Each time I stamped the image, lifted the plate out, moved it down one notch, and stamped again. It creates a neat ombre effect!
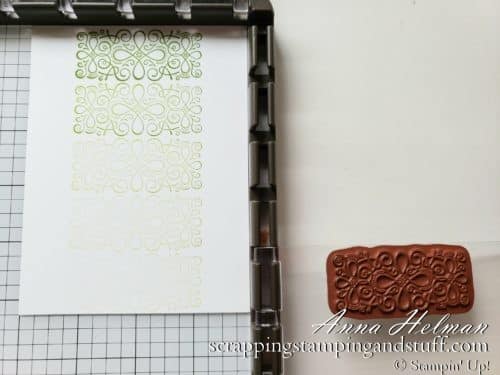
What a fun technique! Let’s look at a second technique.
Two- Three- or Four-Step Stamping
What Is It?
Many stamp sets require multiple stamps to complete your image. For example, you’ll stamp the outline of a flower with one stamp, and then a second stamp will fill it in with color. For this type of stamp, you need to align the stamps perfectly, and doing so by hand often achieves less-than-perfect results. Let’s try four-step stamping with our stamp alignment tool. I’ll show you how to use both sides of the clear plates to line up and prep your stamps to make multiples of this project.
How Do I Do It?
Place your cardstock in the corner of the platform, and lay your stamp on top in the desired location.
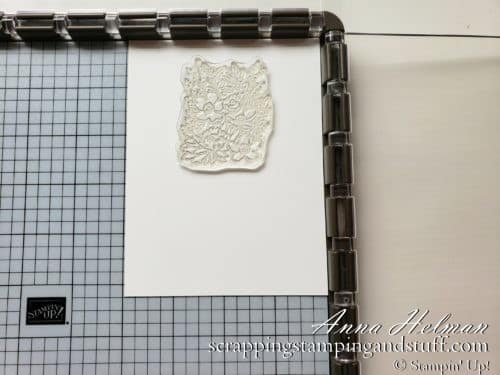
Rotate the plate inward to mount the stamp. Rotate it back outwards, ink it, and stamp. Then, raise the plate to 90 degrees, lift it out of the platform, turn the plate 180 degrees, and place the hinges back in the platform. Now, your first stamp will be on the back side of the plate and the front of the plate will be empty.
Place the second stamp in the desired location on your project. Attach it to the plate and stamp it.
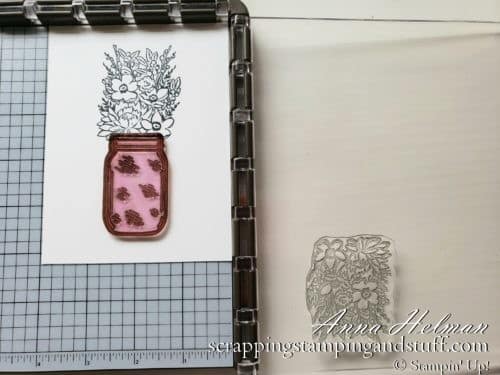
To do a three-step stamp, you’ll continue the same process, but this time you’ll mount the stamps to the top plate. Here you can see my third stamp in place and ready to stamp.
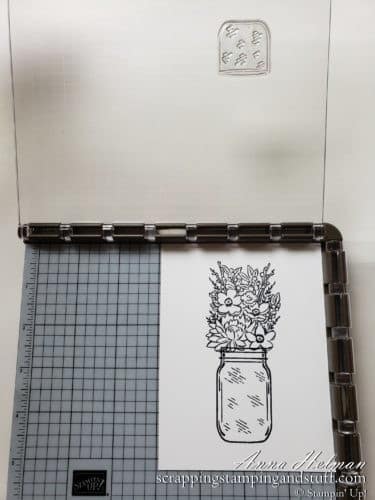
In the photo below, I have already stamped the third step – the water. After stamping it, I lifted the top plate out, rotated it 180 degrees to give me access to the empty side of the plate, and I have my fourth stamp lined up and ready to attach to the plate.
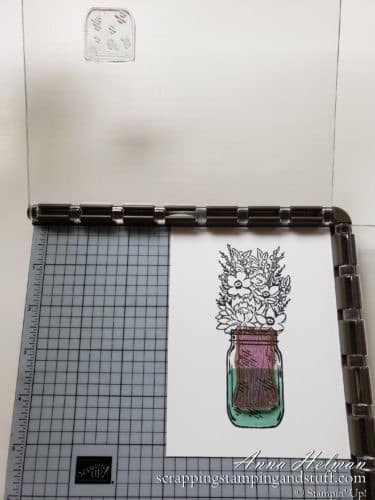
Below I’m stamping step four – the stems. See that patch of green ink on the plate? Oh no, it might get on my project! No worries. It will not get on your project. Just make sure your fingers stay out of it or it will be on your project next! I might know this from experience…
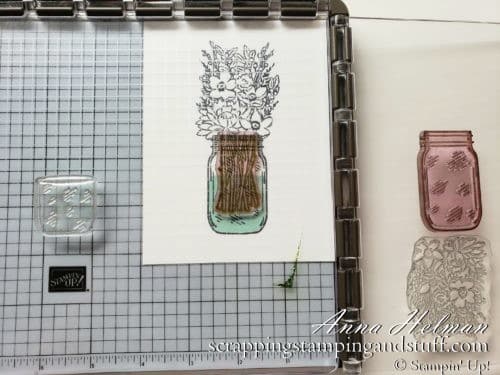
See how perfectly these four images came together? And now we have the stamps all lined up to create a few, or a lot more of this same card. After the stamps have been lined up on the plates, you can stamp more in a jiffy!
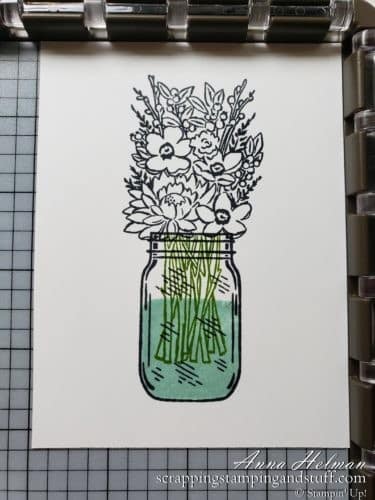
Are you interested in more Stamparatus techniques? You can learn about one of my favorites, circle/wreath stamping here and also how to make stamped die cuts quickly here.
Clean Up
To clean your Stamparatus, you’ll want to avoid any type of harsh cleaning agents. My favorite way to clean it is using my Stampin’ Shammy (#147042) to wipe it off. You can see that my shammy has been well used. I just moisten my shammy with tap water, squeeze it out, and it’s ready to clean my stamps, the Stamparatus, my work surface, hands, and anything else that gets inky (which sometimes is everything!).
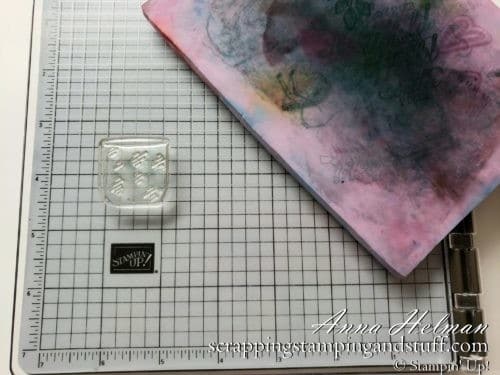
You can also use Stampin’ Mist (#153648), baby wipes, or other mild cleaners to clean your platform. Do not use harsh products like glass cleaner or alcohol.
Storage
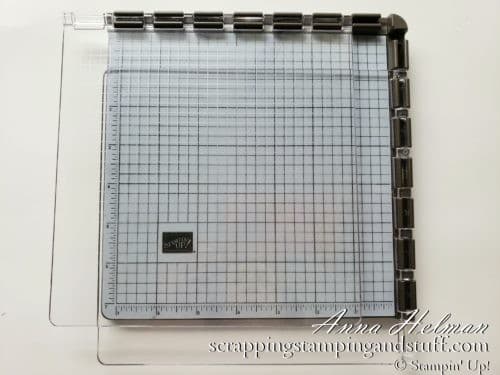
To store your platform, it would be nice if both of the plates would fold closed, right? You can see in the photo below that one folds closed, but the other won’t completely. I have two solutions for this.
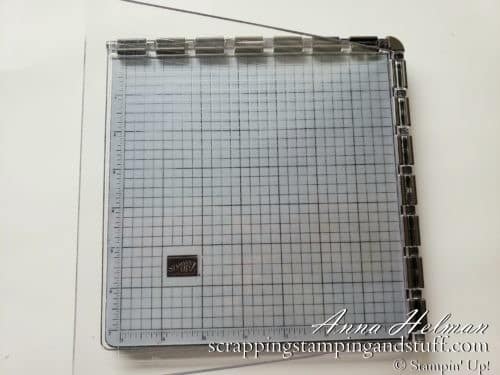
The way I store my Stamparatus is to fold one plate closed, lay the foam mat on top of that plate, then lift the second plate fully out of the platform and lay it flat on top. Using this method, the top plate is laying loosely on top and is perfectly flat. I can put it in my storage bag or lay it in a drawer.
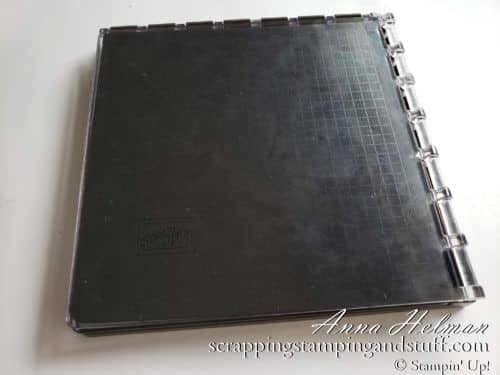
Another solution is to remove both plates from the base and move them outward one hinge. In this position, they stick out slightly from the platform, but they lay flat and are secured.
That’s a Wrap!
Wow, that was a lot of information about about this amazing Stamparatus stamp positioning tool. This stamping platform is the best investment for the money that you can make in your stamping collection. Order one and get to using it…you won’t regret it!
Learn more about this tool and see some projects I have made using it here.
Please make me your Stampin’ Up! demonstrator! Order from me using the product links at the bottom! Earn rewards points towards free stamps PLUS a gift when you order using July host code: 6XFARQP4. PLUS, with your first order, you’ll receive free catalogs in your thank you package!

Holiday Catalog Product Shares Available For A Limited Time Only!

Sign Up For My Upcoming Virtual Card Classes!
Order the products I used and make this project yourself!
You May Also Like:
Make Multiple Die Cuts Fast With This Awesome Cardmaking Hack!


Hello how to order stamparatus?
Hello, i would like to buy stamparatus stamping tool.. i can’t access the stampin up site. How to order and pay?