Organization. It can make or break your craft space. It can determine how much of your ‘craft time’ will be spent crafting, and how much time will be spent finding your work space or the supplies you need for a project. Today we will talk about a tip regarding how to store your Stampin Up ink pads and reinkers that can definitely save you time and headache. One person even called today’s tips “life changing!”
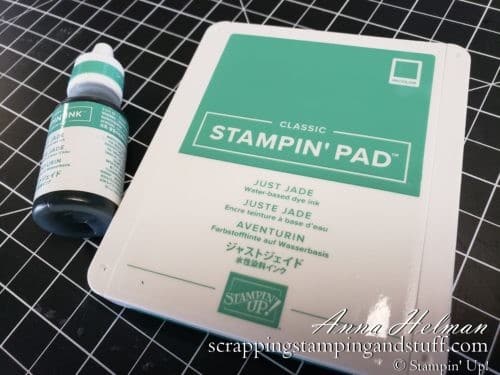
Stampin Up Ink Pads
If you’re new to stamping or new to Stampin Up, I want to share a few of my favorite aspects of Stampin Up ink pads, which are also known as stamp pads. They are amazing, and here’s why:
- They have a very large surface for inking your stamps.
- They are designed so the ink surface stores upside down, so the ink will always be on the surface when you open it (instead of sunk down in the bottom of the pad).
- They lock shut. This keeps small hands from opening them and also prevents them from popping open when you accidentally drop them on the floor.
- When the pad dries up, you don’t have to throw it away. We sell ink refills for all of our colors for a minimal price of $3.75. Keep a reinker on hand (I suggest ordering a reinker when you order your ink pads) and just reink the pad! This will extend the life of your ink pad for years and years!
Now that we’ve discussed why our stamp pads are awesome, let’s talk about how to store them.
Storing Ink Pads
I highly recommend storing your stamp pads and reinkers using Stampin Up’s storage options, which are designed specially for our products. See links at the bottom for more info.
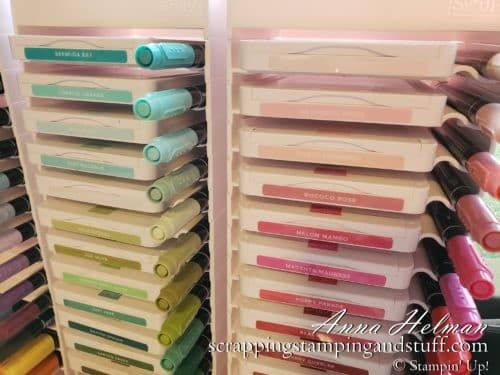
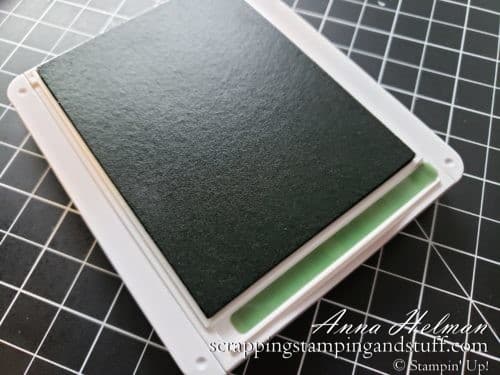
My tip for today is for how to to use the color labels on the bottom of the ink pads. There are several color labels included – one in English, a few in other languages, and one blank one. In the photo below I have used two of the labels, and you can see the three in other languages which are left.
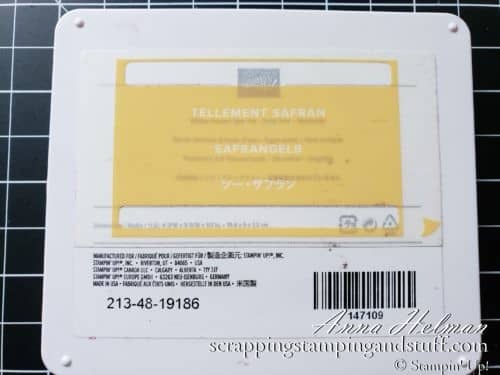
Here is how I used the labels:
I always place the named color label on the front edge of the pad. This makes it easy to grab the appropriate color from my storage trays.
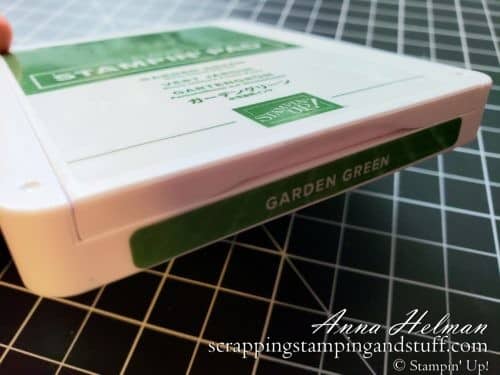
I place the blank color label on the inside edge of the pad to make it easy to identify the color when the pad is open and ready for use. This is very helpful when you have multiple colors open at the same time because it’s not always easy to tell the colors apart!
How To Store Reinkers
Then I use a third label around the lid of my coordinating ink refill to make it easy to distinguish it from the other colors. This is a life-saver! It sure beats sorting through 50+ bottles trying to find the correct one.
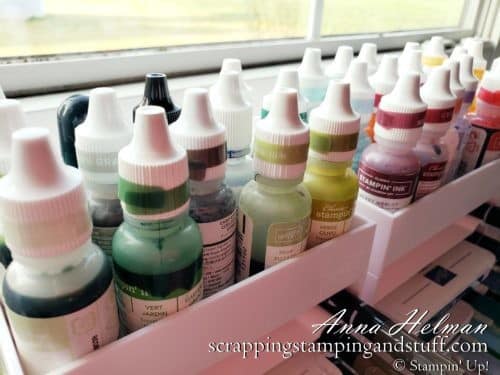
After using three labels as mentioned, there are two more left. I never throw away the extra labels. I used to get rid of them, and then I realized this was silly! I leave them on the bottom of the pads in case I want to use them to label a Stampin Spritzer, sponge dauber, or other item.
Watch along below as I discuss these tips for how to store your Stampin Up ink pads and reinkers!
Thanks for joining in! Please make me your Stampin’ Up! demonstrator! Order from me using the product links at the bottom! Earn rewards points towards free stamps PLUS a gift when you order using July host code: 6XFARQP4. PLUS, with your first order, you’ll receive free catalogs in your thank you package!

Sign Up For My Upcoming Virtual Card Classes!
Store your ink pads and reinkers using Storage by Stampin Up!


Great idea with the labels.I have been labeling my ink refill with the extra label but not the inside of the ink pad but I will start doing that.Thanks for the tips as greatly appreciated
You’re very welcome! Thanks for visiting and commenting!
Also, thank you for the tips on saving the labels! I just got all 40 new pads and reinkers, and I have the SU markers coming soon.
Wonderful, I’m glad this is helpful!