• Nav Social Menu

    • Facebook
    • Facebook Group
    • Instagram
    • Pinterest
    • RSS
    • Twitter
    • YouTube

Handmake with Love

Anna Helman | formerly Scrapping, Stamping and Stuff

  • Blog
  • Start Here
    • About Me
    • Learn to Make Cards
    • Why Shop With Me?
    • Testimonials
    • Connect On Social
    • Get Email Updates
    • Stampin’ Up! Giveaway Winners
  • Products
    • Shop Now
    • Catalogs
    • Clearance
    • Why Choose Stampin Up?
    • Paper Pumpkin Kits
    • Product Shares
    • Rewards Program
    • Stamparatus
    • Cut And Emboss Machine
    • Mini Cut And Emboss Machine
    • Blends Alcohol Markers
    • Blending Brushes
  • Ideas
    • Video Tutorials
    • Project Gallery
    • Card Ideas
    • 3D Projects
    • Scrapbooking
    • Tips & Techniques
    • Kits
    • Learn to Make Cards
    • Printable Catalog Tabs
    • Social Media
  • Join
    • Join My Team
    • Stampin Up Demonstrator Resources
  • Classes
    • Classes in the Mail
    • In Person Events
  • Contact
    • Contact
    • Connect On Social

How To Place Labels On Rubber Stamps PERFECTLY Every Time!

11 Nov

How exciting is it when you get a new set of stamps?! Yes, doing a happy dance is totally acceptable when you get your stamps in the mail 🙂 To prep and assemble those newly acquired stamps, I’ve found a really handy trick to place the cling labels onto your rubber stamps PERFECTLY every time. Let’s talk about it!

Use this quick card making tip and you will be able to place labels on rubber stamps perfectly every time!

Why Label Your Stamps

Although labeling isn’t absolutely necessary, it does make it much easier for you to see exactly what you’re stamping. Especially if you like your stamping to be exact, I highly recommend using the labels.

The Old Way

Here’s a reminder of how I’ve always done my label placement in the past. Click HERE to see the video.

How To Place Labels On Rubber Stamps

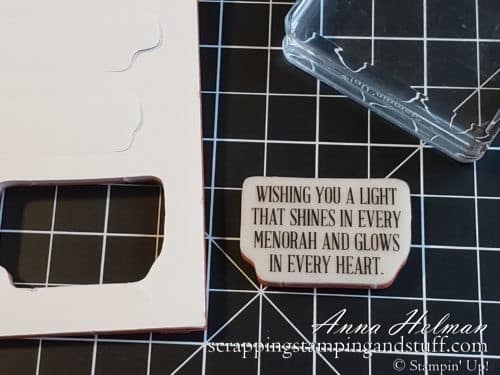
When your set arrives, pop the stamps out of the rubber sheet.

Use this quick card making tip and you will be able to place labels on rubber stamps perfectly every time!

First, remove the white paper backing from the stamp to get it ready for the labels.

Use this quick card making tip and you will be able to place labels on rubber stamps perfectly every time!

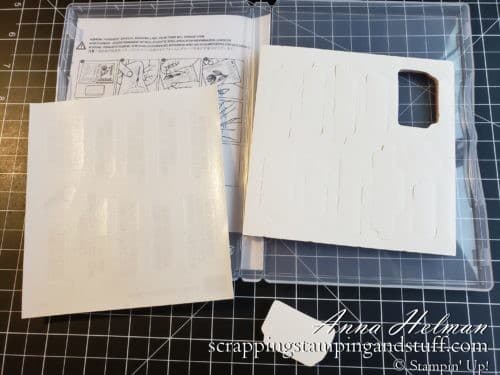
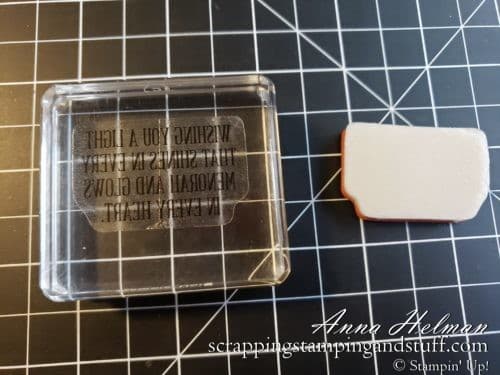
Next, peel the paper backing AND the sticker label from the label sheet. Stick the backing and label onto a clear block – just place it on gently, no need to press down hard!

Use this quick card making tip and you will be able to place labels on rubber stamps perfectly every time!

Remove the white backing from the sticker label.

Use this quick card making tip and you will be able to place labels on rubber stamps perfectly every time!

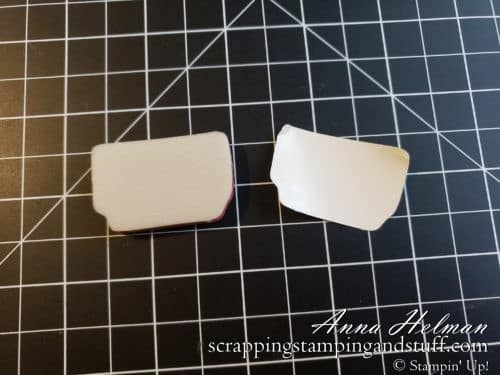
Flip your clear block over so the label side is down. Place the corresponding stamp on your work surface.

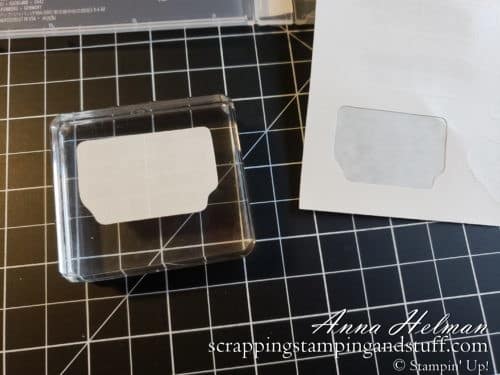
Next, align the block over the stamp so that the label and stamp line up perfectly.

Use this quick card making tip and you will be able to place labels on rubber stamps perfectly every time!

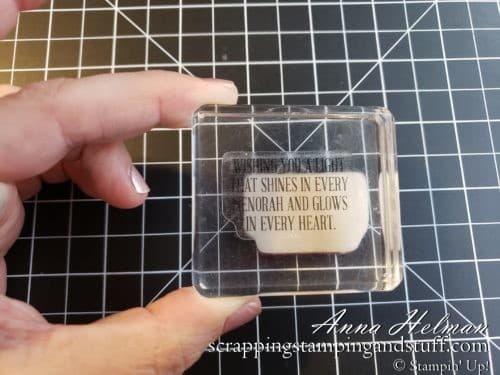
When they are lined up properly, lower the block to make contact with the stamp, give it a good press, and BAM! You have a perfectly placed label on your new rubber stamp!

Use this quick card making tip and you will be able to place labels on rubber stamps perfectly every time!

How To Place Labels On Stamps Video Tutorial

If you’d like to see a video tutorial of how I place labels on rubber stamps perfectly every time, visit my YouTube link!

Thanks for visiting!! Check out my opportunities and rewards program below.

Don’t Miss Out!

Please make me your Stampin’ Up! demonstrator!  Earn rewards points towards free stamps PLUS a gift when you order using October host code: FZR7RJZY. PLUS, with your first order, you’ll receive free catalogs in your thank you package!

Stampin Up Hostess Rewards Customer Loyalty Free Gift With Order

Sign Up For My Upcoming Virtual Card Classes!

You May Also Like:

Warped Cutting Plates? Try This.

How To Tie A Bow For Cards, Crafts or Gifts – 10 Tips For Tying A Perfect Bow Every Time

How To Make Clear Stamps Stick To Block With Stampin Up Cling Adhesive

Sharing is caring!

Filed Under: Gallery, Learn to Stamp Tagged With: cardmaking tips and tricks, learn to stamp, technique

Previous Post: « Mystery Stamping #1 And Join Me Today For Another Fun Project!
Next Post: An Interchangeable Seasonal Wreath & OSAT Blog Hop Glad Tidings »

Reader Interactions

Trackbacks

  1. Don't Throw Away That Trash! says:
    May 29, 2021 at 5:01 AM

    […] This labeling trick is so helpful when it comes to preparing new stamps. For more details and a quick video, check out this post for how to label your stamps perfectly every time. […]

    Reply

Leave a Reply Cancel reply

Your email address will not be published. Required fields are marked *

Recipe Rating


Primary Sidebar

Anna Helman

Independent Stampin' Up!® Demonstrator

  • Email
  • Facebook
  • Facebook Group
  • Instagram
  • Pinterest
  • RSS
  • Twitter
  • YouTube
Shop Stampin' Up!
Stampin' Up! catalogs
get updates
join Stampin' Up!
Stampin' Up! Rewards
Stampin' Up! special offers
Stampin' Up! clearance
Stampin' Up! 2025-2026 Annual Catalog
May 6, 2025 - May 4, 2026
View Online | Shop Online

Blog Archive

Categories

Footer

Important Links

  • Home
  • Shop Now
  • Get Updates
  • Join My Team
  • Rewards
  • Specials
  • Catalogs
  • Clearance

Anna Helman, Independent Stampin' Up!® Demonstrator

  • Email
  • Facebook
  • Facebook Group
  • Instagram
  • Pinterest
  • RSS
  • Twitter
  • YouTube

Get Ideas, Inspiration, and Special Offers!

Sign up to receive updates in your inbox

Thank you!

Please check your email for a special offer! 

.
All content on this blog is the property of Anna Helman, Stampin' Up!® Independent Demonstrator. Classes, services and projects offered here are not endorsed by Stampin' Up!® Projects, videos, photos, ideas and articles are shared for personal use only and may not be removed, duplicated or copied without permission. All artwork © Stampin' Up!®

Copyright © 2025 Anna Helman, handmake with love · Site Design by Catherine Carroll