• Nav Social Menu

    • Facebook
    • Facebook Group
    • Instagram
    • Pinterest
    • RSS
    • Twitter
    • YouTube

Handmake with Love

Anna Helman | formerly Scrapping, Stamping and Stuff

  • Blog
  • Start Here
    • About Me
    • Learn to Make Cards
    • Why Shop With Me?
    • Testimonials
    • Connect On Social
    • Get Email Updates
    • Stampin’ Up! Giveaway Winners
  • Products
    • Shop Now
    • Catalogs
    • Clearance
    • Why Choose Stampin Up?
    • Paper Pumpkin Kits
    • Product Shares
    • Rewards Program
    • Stamparatus
    • Cut And Emboss Machine
    • Mini Cut And Emboss Machine
    • Blends Alcohol Markers
    • Blending Brushes
  • Ideas
    • Video Tutorials
    • Project Gallery
    • Card Ideas
    • 3D Projects
    • Scrapbooking
    • Tips & Techniques
    • Kits
    • Learn to Make Cards
    • Printable Catalog Tabs
    • Social Media
  • Join
    • Join My Team
    • Stampin Up Demonstrator Resources
  • Classes
    • Classes in the Mail
    • In Person Events
  • Contact
    • Contact
    • Connect On Social

Don’t Like The New Stamp Packaging? Do This!

3 Jul

Welcome! Are you having a hard time adjusting to the new style stamp packaging Stampin Up just rolled out? For myself, I enjoy parts of the packaging, but other parts aren’t my favorite. Let me share what I did to improve on the new change so that I now LOVE it!

If you don't like Stampin Up's new stamp packaging, do this - it makes a huge difference! You'll be glad you did!

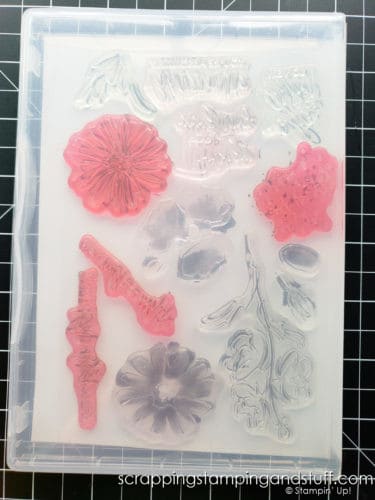
New Photopolymer Stamp Packaging

If you haven’t read my post on Stampin Up’s new stamp packaging, I highly suggest taking a look. In it I talk about the changes Stampin Up made recently to the photopolymer stamp set packaging.

Pros & Cons

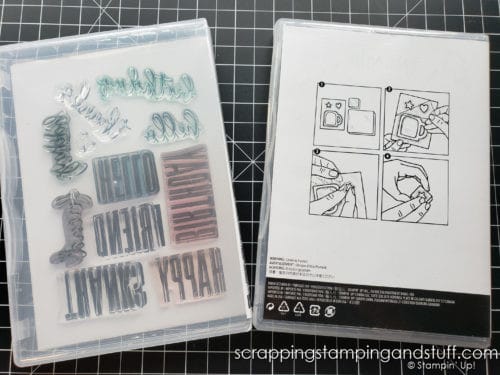
There are several things I really enjoy about Stampin Up’s new stamp packaging. One of those things is the printed image of each stamp inside the back panel, instead of on the clear plastic sheets that the stamps are attached to. This printed image allows me to place each stamp directly onto the case itself instead of using the plastic sheets. I like that I can quickly open the stamp case and remove a stamp without fumbling with the clear liner first. The printed images also allow me to take a quick inventory of my stamps to make sure I have them all in place before I put the set away after using it.

With that being said, there are some attributes about this new packaging that I’m not necessarily a fan of. One of the things I loved about the old style of packaging was that I was able to see through the back of my stamp cases. I look through the back of the cases regularly for a couple of reasons. First, if the case is already closed, I look through the back to make sure the stamps are in place before I put the set away. Second, I often look through the back to see the actual size of the stamps, since they aren’t always printed full size on the front of the case. If I want to know how a stamp will fit onto a punch or die cut, its nice to look through to see it’s full size.

Since the new packaging doesn’t allow for looking through the back of the cases, I decided to create my own way to make it work.

How to Get the Best of Both Worlds

So, what change am I making? It’s actually very simple.

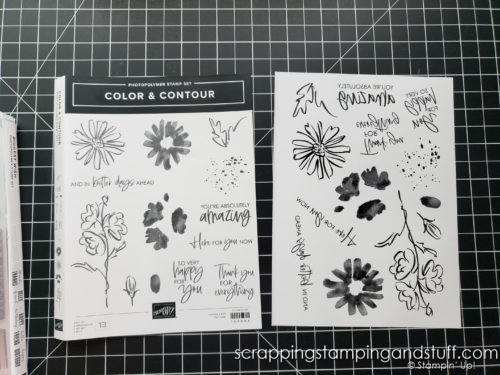
First, I remove the printed paper insert from the stamp case. After removing it, I cut the insert on the fold line between the side/binding and the back panel. See the image below if you’re not sure where to trim.

If you don't like Stampin Up's new stamp packaging, do this - it makes a huge difference! You'll be glad you did!

Once trimmed, I put the front insert back into the stamp cartridge as usual. Next, I take the insert with the images of the stamps and place it behind the front panel so I can see it when the case is open.

If you don't like Stampin Up's new stamp packaging, do this - it makes a huge difference! You'll be glad you did!

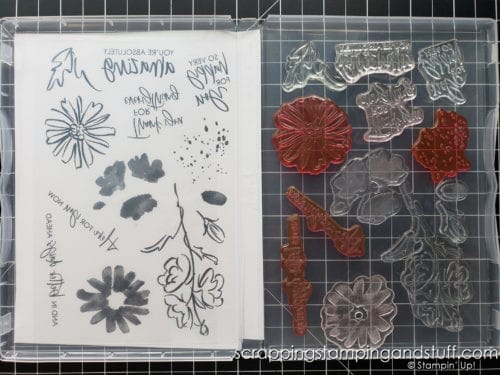
Last, I attach the stamps to the case to fit on top of the printed images.

If you don't like Stampin Up's new stamp packaging, do this - it makes a huge difference! You'll be glad you did!

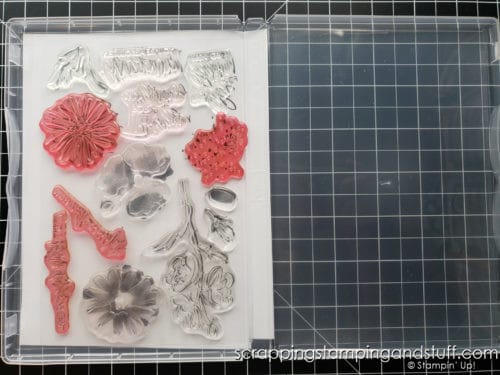
Now I can see through the back of the stamp case again. This makes me happy 🙂

If you don't like Stampin Up's new stamp packaging, do this - it makes a huge difference! You'll be glad you did!

Video

Click on the video below for more details and explanation.


Don’t Miss Out!

Please make me your Stampin’ Up! demonstrator!  Earn rewards points towards free stamps PLUS a gift when you order using host code: JSUKR6CE. PLUS, with your first order, you’ll receive free catalogs in your thank you package!

Stampin Up Customer Rewards Host Code Free Gift With Order


You Might Also Like:

How To Tie A Bow For Cards, Crafts or Gifts – 10 Tips For Tying A Perfect Bow Every Time

I hope you’ve enjoyed todays tip. Join me next time when I’ll be back helping you to handmake with love.

Sharing is caring!

Filed Under: Gallery, Tutorials Tagged With: 2021-2022 Annual Catalog, cardmaking tips and tricks, tips and tricks

Previous Post: « This Candy Bar Slider Is The Neatest Thing I’ve Made For Months!
Next Post: Meme Monday »

Reader Interactions

Comments

  1. Cindy Pegg says

    July 3, 2021 at 7:24 AM

    Great idea. I’m going to do this to my stamp sets today! Love your videos.

    Reply
  2. Beth S says

    July 3, 2021 at 7:57 AM

    Great idea! I’m not a fan of the new packaging and this will help immensely. Thanks for sharing!

    Reply
    • Anna Helman says

      July 21, 2021 at 3:40 PM

      Wonderful! I’m glad it is helpful 🙂

      Reply
  3. Betty Moore says

    July 3, 2021 at 10:45 AM

    Thank you for the inspiration

    Reply
    • Anna Helman says

      July 21, 2021 at 3:40 PM

      Thanks so much Betty!

      Reply
  4. Terrys says

    July 8, 2021 at 8:26 AM

    What an easy solve! Thanks for sharing 🙂

    Reply
  5. cassy hedges says

    August 11, 2021 at 2:26 AM

    WOW ! I liked the new packaging… but, NOW I like it more 🙂 Thank you for sharing this tip ! Sometimes , its just the simple things…

    Reply
    • Anna Helman says

      August 23, 2021 at 12:44 PM

      I agree. Little things can make such a big difference. I’m glad this is helpful for you!

      Reply
  6. Ginger Adkins says

    December 1, 2021 at 5:29 PM

    Oh my goodness ! So grateful for this idea. I will go modify my cases! Thank you!

    Reply

Leave a Reply Cancel reply

Your email address will not be published. Required fields are marked *

Recipe Rating


Primary Sidebar

Anna Helman

Independent Stampin' Up!® Demonstrator

  • Email
  • Facebook
  • Facebook Group
  • Instagram
  • Pinterest
  • RSS
  • Twitter
  • YouTube
Shop Stampin' Up!
Stampin' Up! catalogs
get updates
join Stampin' Up!
Stampin' Up! Rewards
Stampin' Up! special offers
Stampin' Up! clearance
Stampin' Up! 2025-2026 Annual Catalog
May 6, 2025 - May 4, 2026
View Online | Shop Online

Blog Archive

Categories

Footer

Important Links

  • Home
  • Shop Now
  • Get Updates
  • Join My Team
  • Rewards
  • Specials
  • Catalogs
  • Clearance

Anna Helman, Independent Stampin' Up!® Demonstrator

  • Email
  • Facebook
  • Facebook Group
  • Instagram
  • Pinterest
  • RSS
  • Twitter
  • YouTube

Get Ideas, Inspiration, and Special Offers!

Sign up to receive updates in your inbox

Thank you!

Please check your email for a special offer! 

.
All content on this blog is the property of Anna Helman, Stampin' Up!® Independent Demonstrator. Classes, services and projects offered here are not endorsed by Stampin' Up!® Projects, videos, photos, ideas and articles are shared for personal use only and may not be removed, duplicated or copied without permission. All artwork © Stampin' Up!®

Copyright © 2025 Anna Helman, handmake with love · Site Design by Catherine Carroll