• Nav Social Menu

    • Facebook
    • Facebook Group
    • Instagram
    • Pinterest
    • RSS
    • Twitter
    • YouTube

Handmake with Love

Anna Helman | formerly Scrapping, Stamping and Stuff

  • Blog
  • Start Here
    • About Me
    • Learn to Make Cards
    • Why Shop With Me?
    • Testimonials
    • Connect On Social
    • Get Email Updates
    • Stampin’ Up! Giveaway Winners
  • Products
    • Shop Now
    • Catalogs
    • Clearance
    • Why Choose Stampin Up?
    • Paper Pumpkin Kits
    • Product Shares
    • Rewards Program
    • Stamparatus
    • Cut And Emboss Machine
    • Mini Cut And Emboss Machine
    • Blends Alcohol Markers
    • Blending Brushes
  • Ideas
    • Video Tutorials
    • Project Gallery
    • Card Ideas
    • 3D Projects
    • Scrapbooking
    • Tips & Techniques
    • Kits
    • Learn to Make Cards
    • Printable Catalog Tabs
    • Social Media
  • Join
    • Join My Team
    • Stampin Up Demonstrator Resources
  • Classes
    • Classes in the Mail
    • In Person Events
  • Contact
    • Contact
    • Connect On Social

Bow Tying Hack To Try Today – Save That Precious Ribbon!

30 Sep

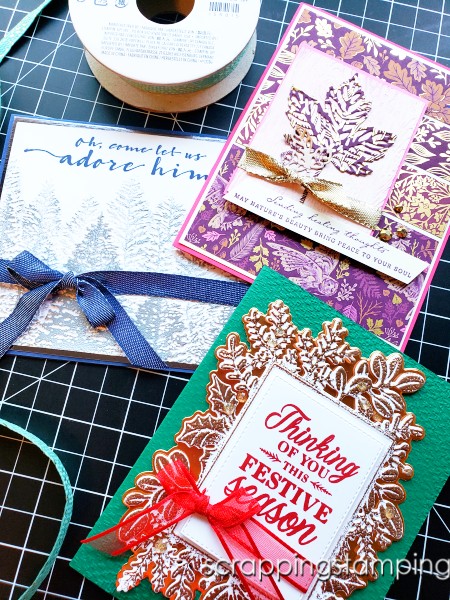
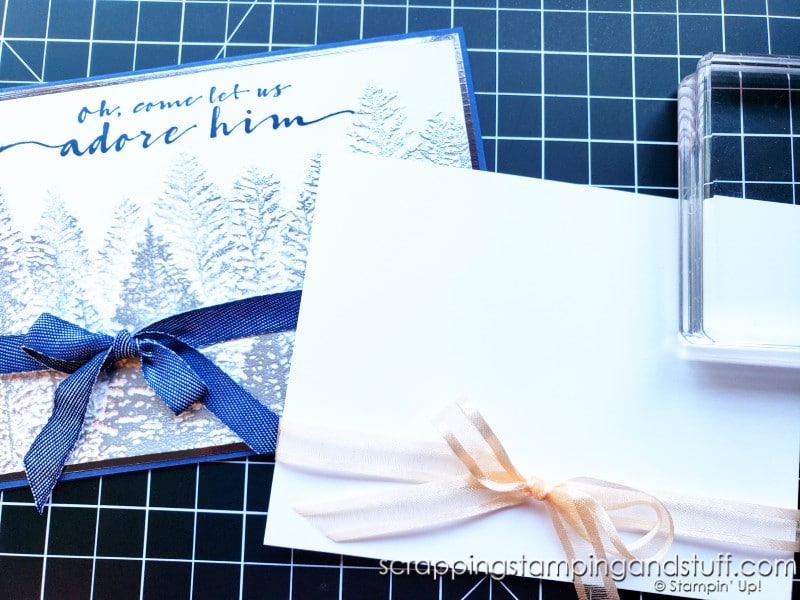
Do you struggle with tying bows? Would you like a tip for tying bows and saving ribbon at the same time? Today I have a simple bow tying hack to share with you that can save lots of ribbon and help stretch your crafting dollars farther. This trick works anytime you are attaching a bow to a project in the way shown below, where it wraps around to the back side of one of your card layers.

Try this bow tying hack today and save that precious ribbon! Use an acrylic block and this easy trick to stretch your paper crafting budget farther.

Let me share it with you!

Bow Tying Hack Video

Watching along is the easiest way to learn this trick. Take a look at this video I created.. 

…or you can keep reading for a photo explanation.

Try this bow tying hack today and save that precious ribbon! Use an acrylic block and this easy trick to stretch your paper crafting budget farther.

Bow Tying Hack Step-By-Step

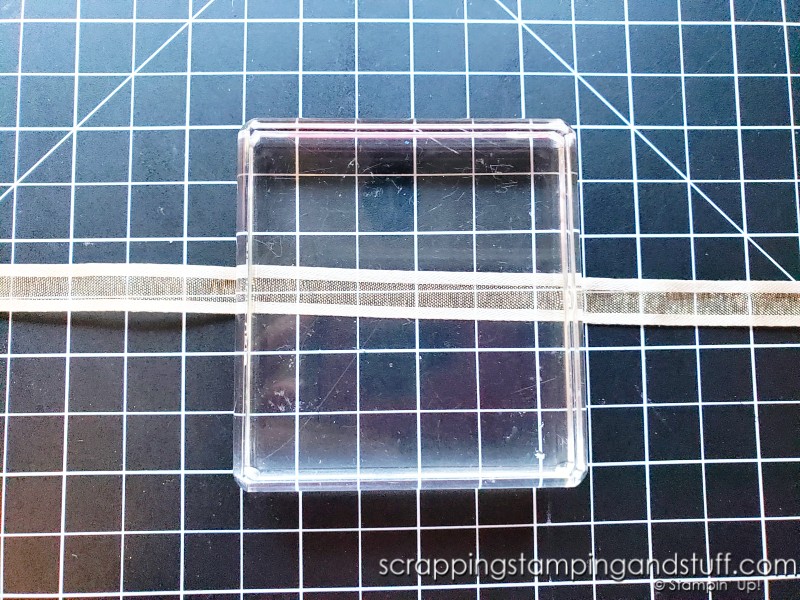
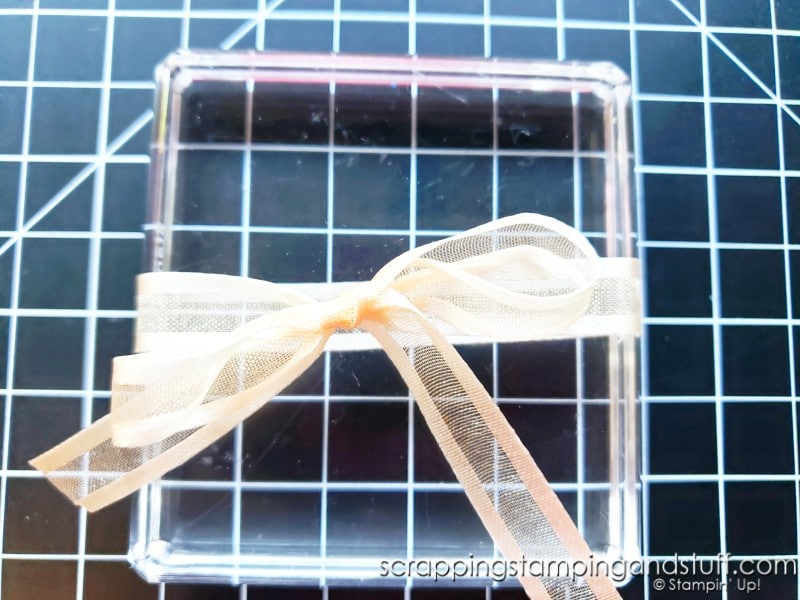
I’m sharing this trick using a piece of 19″ ribbon and a D size acrylic block. You could use a larger or smaller block and more or less ribbon if you desire.

Lay the ribbon on your work surface and lay the block on top in the center.

Try this bow tying hack today and save that precious ribbon! Use an acrylic block and this easy trick to stretch your paper crafting budget farther.

Bring the ends of the ribbon to the front, criss cross them, and pull tight.

Try this bow tying hack today and save that precious ribbon! Use an acrylic block and this easy trick to stretch your paper crafting budget farther.

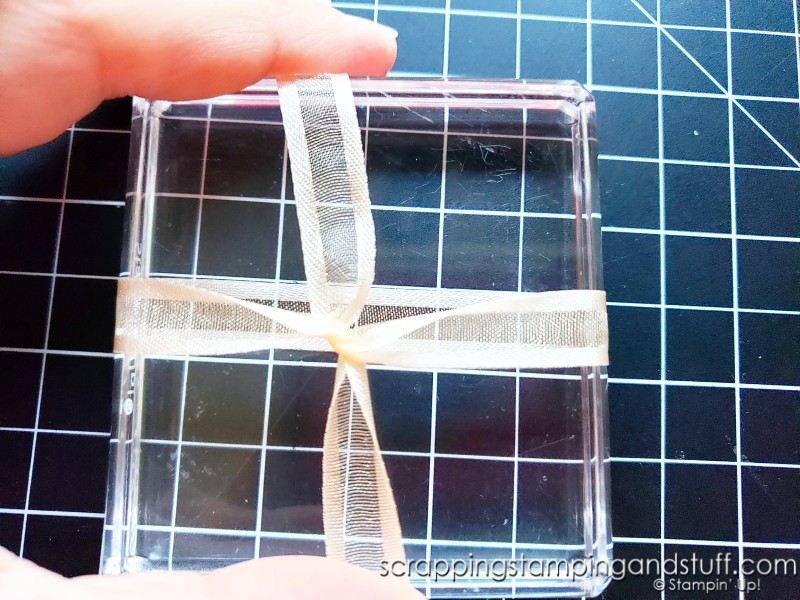
Tie your bow. Adjust as needed.

Try this bow tying hack today and save that precious ribbon! Use an acrylic block and this easy trick to stretch your paper crafting budget farther.

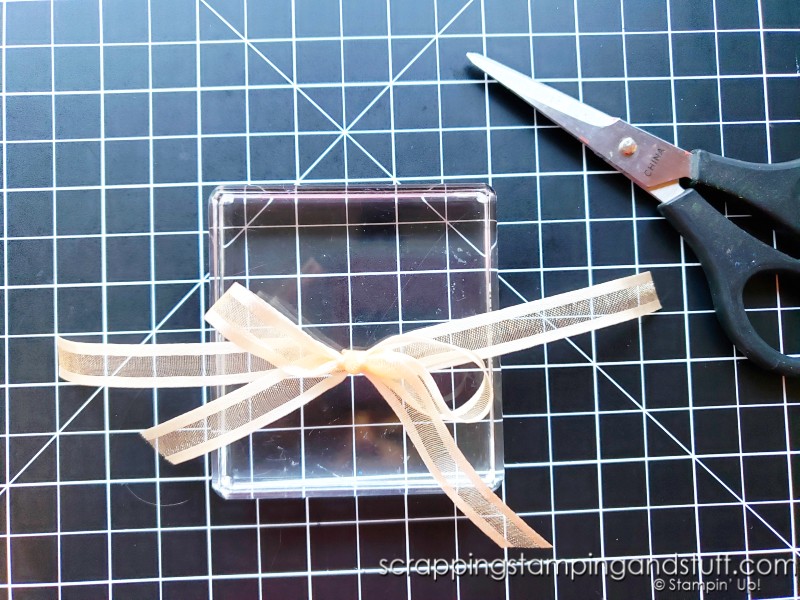
Snip the ribbon on the back side of the block, which will give you a bow attached to two ribbon ends. 

Try this bow tying hack today and save that precious ribbon! Use an acrylic block and this easy trick to stretch your paper crafting budget farther.

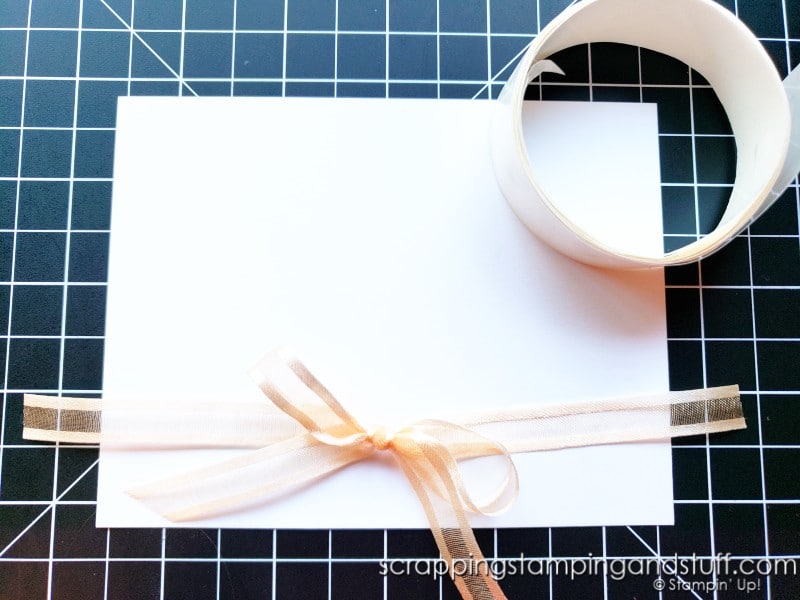
Lay on top of your project. Place a glue dot on each end, wrap around your card and attach. 

Try this bow tying hack today and save that precious ribbon! Use an acrylic block and this easy trick to stretch your paper crafting budget farther.

Have you ever tried this before? Will you try it next time you’re crafting?

Other Card Making Tips & Tricks

Would you love more bow tying tips and tricks? Click here for 10 tips for tying a perfect bow. 

Learn To Make Cards
Shop Supplies
Rewards Program
Join My Amazing Team

Try this bow tying hack today and save that precious ribbon! Use an acrylic block and this easy trick to stretch your paper crafting budget farther.

Thanks for visiting. Hopefully today’s bow tying hack is helpful for you! 

Sharing is caring!

Filed Under: Gallery, Learn to Stamp Tagged With: cardmaking hacks, cardmaking tips and tricks, learn to stamp, tips and tricks

Previous Post: « September 2021 Paper Pumpkin – Haunts & Harvest With Alternative Ideas!
Next Post: Stampin Up Tombstone Boxes – 5 Ways To Use For Halloween! »

Reader Interactions

Comments

  1. Deb says

    October 21, 2021 at 12:25 PM

    WOW that is a great bow tying trick!! looking forward to trying it!

    Reply
    • Anna Helman says

      October 21, 2021 at 12:39 PM

      Wonderful!

      Reply

Leave a Reply Cancel reply

Your email address will not be published. Required fields are marked *

Recipe Rating


Primary Sidebar

Anna Helman

Independent Stampin' Up!® Demonstrator

  • Email
  • Facebook
  • Facebook Group
  • Instagram
  • Pinterest
  • RSS
  • Twitter
  • YouTube
Shop Stampin' Up!
Stampin' Up! catalogs
get updates
join Stampin' Up!
Stampin' Up! Rewards
Stampin' Up! special offers
Stampin' Up! clearance
Stampin' Up! 2025-2026 Annual Catalog
May 6, 2025 - May 4, 2026
View Online | Shop Online

Blog Archive

Categories

Footer

Important Links

  • Home
  • Shop Now
  • Get Updates
  • Join My Team
  • Rewards
  • Specials
  • Catalogs
  • Clearance

Anna Helman, Independent Stampin' Up!® Demonstrator

  • Email
  • Facebook
  • Facebook Group
  • Instagram
  • Pinterest
  • RSS
  • Twitter
  • YouTube

Get Ideas, Inspiration, and Special Offers!

Sign up to receive updates in your inbox

Thank you!

Please check your email for a special offer! 

.
All content on this blog is the property of Anna Helman, Stampin' Up!® Independent Demonstrator. Classes, services and projects offered here are not endorsed by Stampin' Up!® Projects, videos, photos, ideas and articles are shared for personal use only and may not be removed, duplicated or copied without permission. All artwork © Stampin' Up!®

Copyright © 2025 Anna Helman, handmake with love · Site Design by Catherine Carroll