• Nav Social Menu

    • Facebook
    • Facebook Group
    • Instagram
    • Pinterest
    • RSS
    • Twitter
    • YouTube

Handmake with Love

Anna Helman | formerly Scrapping, Stamping and Stuff

  • Blog
  • Start Here
    • About Me
    • Learn to Make Cards
    • Why Shop With Me?
    • Testimonials
    • Connect On Social
    • Get Email Updates
    • Stampin’ Up! Giveaway Winners
  • Products
    • Shop Now
    • Catalogs
    • Clearance
    • Why Choose Stampin Up?
    • Paper Pumpkin Kits
    • Product Shares
    • Rewards Program
    • Stamparatus
    • Cut And Emboss Machine
    • Mini Cut And Emboss Machine
    • Blends Alcohol Markers
    • Blending Brushes
  • Ideas
    • Video Tutorials
    • Project Gallery
    • Card Ideas
    • 3D Projects
    • Scrapbooking
    • Tips & Techniques
    • Kits
    • Learn to Make Cards
    • Printable Catalog Tabs
    • Social Media
  • Join
    • Join My Team
    • Stampin Up Demonstrator Resources
  • Classes
    • Classes in the Mail
    • In Person Events
  • Contact
    • Contact
    • Connect On Social

How To Paper Piece With Die Cuts & Glad Press ‘N Seal

4 Sep

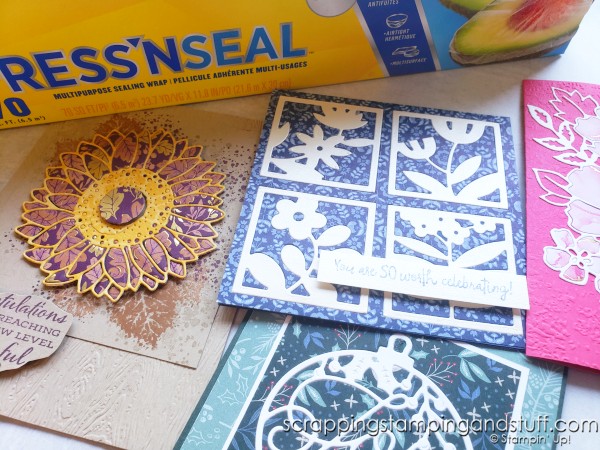
Today I have another fun technique to share for your cardmaking and craft projects. I’m calling it paper piecing and it uses a kitchen supply you may not have used in crafting before – Glad Press ‘N Seal. This creates such a neat effect, and if I didn’t know how I had created these cards, I would look at them and say ‘How’d she DO that?!?’ Let me share with you how to paper piece and create gorgeous cards such as these!

Click to learn how to paper piece with die cuts! Create gorgeous 'How'd she DO that?' cards today!

What Is Paper Piecing

Paper piecing is attaching different pieces of paper together in a particular way to create a desired end result. For today’s technique, we are using the same die cut from two separate pieces of paper, then piecing them together to look almost like a quilt or puzzle. All of the pieces are on the same layer, but they fit together perfectly.

Paper Piecing Video Tutorial

You’re definitely going to want to watch the full explanation and demonstration for how to create these cards. Watch along here!

Featured Products

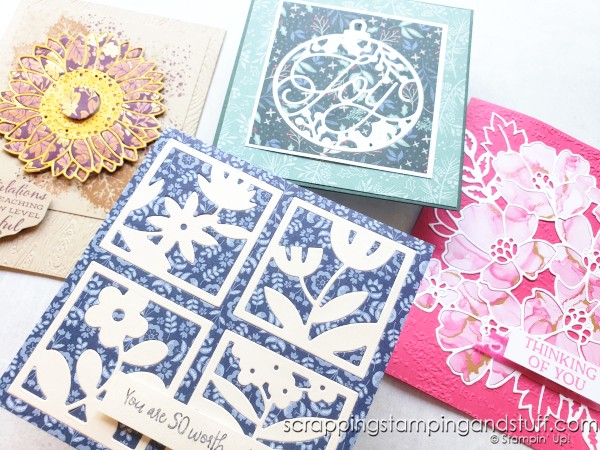
Let’s take a closer look at the card samples and the products I used to create them.

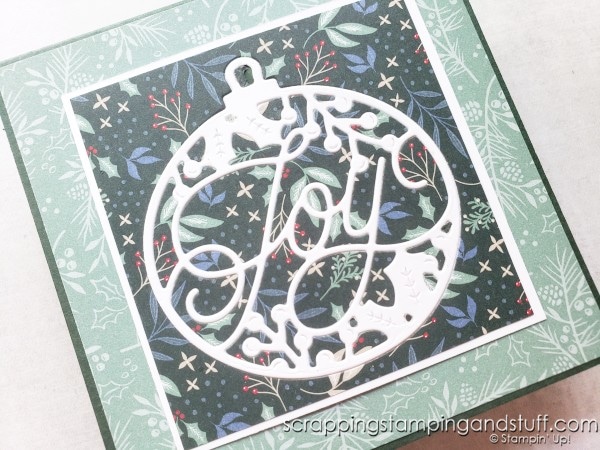
Here is a beautiful example using the Bright Baubles die set. This one may be my favorite!

Click to learn how to paper piece with die cuts! Create gorgeous 'How'd she DO that?' cards today!

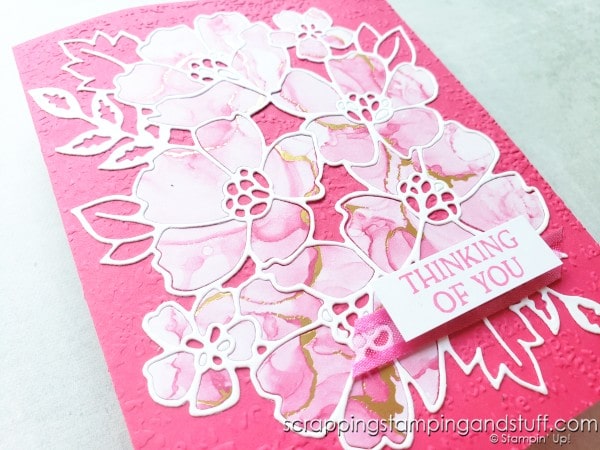
I created this gorgeous one using the Blossoms In Bloom bundle.

Click to learn how to paper piece with die cuts! Create gorgeous 'How'd she DO that?' cards today!

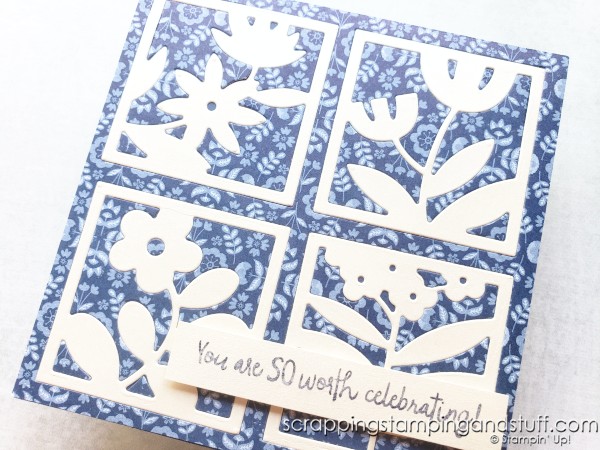
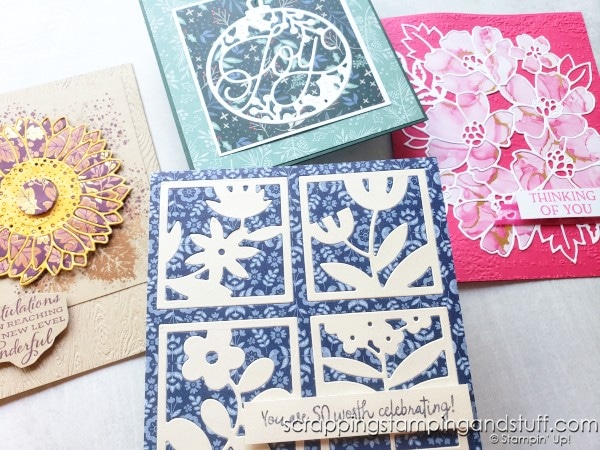
This beauty was created with the All Squared Away bundle. Wait, now I think this one may be my favorite! This is the sample I created in the video tutorial shown above.

Click to learn how to paper piece with die cuts! Create gorgeous 'How'd she DO that?' cards today!

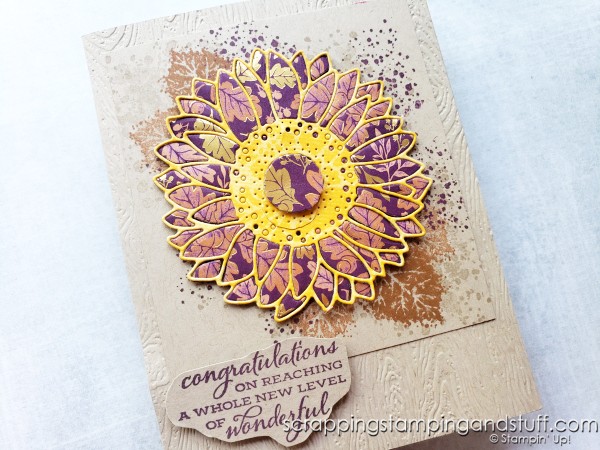
Last, but not least, is a sample with the Celebrate Sunflowers set.

Click to learn how to paper piece with die cuts! Create gorgeous 'How'd she DO that?' cards today!

Aren’t these amazing? Next I’ll share the basic steps for creating these cards.

Paper Piecing Step-By-Step

Begin by cutting your main die cut. Make sure to attach adhesive sheets to the back side before die cutting. Second, die cut the paper you’ll use as the ‘surrounding’ print. Before lifting this off of the cutting plates, carefully flip it over. Lift the back cutting plate off (the one that is now laying on top), but leave the dies and paper in place. If any paper pieces have moved out of place, put them back in place. Then lay a piece of Press ‘N Seal over top, and press firmly to get all pieces to stick to it. Flip this entire piece over. Lift off the dies. Add a second piece of Press ‘N Seal over the top and press firmly. Next, flip back over to the back and carefully remove the Press ‘N Seal. Add glue to the pieces that you want attached to your project (all the pieces except the main die cut). Then flip over, attach to your project, and let it sit for a few minutes while the glue dries. Once the glue is dry, carefully remove the Press ‘N Seal and the extra die cut pieces. Then remove the paper backing from your other die cut, and attach it into the opening where it fits.

Click to learn how to paper piece with die cuts! Create gorgeous 'How'd she DO that?' cards today!

Pretty neat, huh? Are you ready to try it yourself?

Supply List & Ordering Links

Here are the supplies I used for these neat cards.

Product List
Celebrate Sunflowers Cling Stamp Set (English)
[152517]
Sunflowers Dies
Sunflowers Dies
[152704]
Blossoms In Bloom Photopolymer Stamp Set (English)
[152684]
Many Layered Blossoms Dies
[153582]
Bright Baubles Bundle
[156384]
All Squared Away Bundle (English)
[158382]
Stampin' Cut & Emboss Machine
[149653]
Sweet Symmetry 12" X 12" (30.5 X 30.5 Cm) Designer Series Paper
[155605]
Expressions In Ink 12" X 12" (30.5 X 30.5 Cm) Specialty Designer Series Paper
[155464]
Blackberry Beauty 12" X 12" (30.5 X 30.5 Cm) Specialty Designer Series Paper
[156458]
Tidings Of Christmas 6" X 6" (15.2 X 15.2 Cm) Designer Series Paper
[155718]
Pearlescent Specialty Paper
[154291]
Multipurpose Liquid Glue
[110755]
Adhesive Sheets
Adhesive Sheets
[152334]

If you try this, I would love to see your results!

Click to learn how to paper piece with die cuts! Create gorgeous 'How'd she DO that?' cards today!

Learn To Make Cards
Shop Supplies
Rewards Program
Join My Amazing Team

Thanks for visiting today as I shared how to paper piece using Press ‘N Seal!

Sharing is caring!

Filed Under: Gallery, Tutorials Tagged With: 2021 July-December Holiday Mini Catalog, 2021-2022 Annual Catalog, all squared away stamp set, blossoms in bloom stamp set, celebrate sunflowers stamp set, Christmas, fall, stampin up bright baubles

Previous Post: « Stampin Up Ink Pads & 7 Reasons I Love These Stampin Pads
Next Post: Clean All Those Pieces Off Your Cutting Plates – Quick Tip! »

Reader Interactions

Trackbacks

  1. Ornament & Lantern - 12 Days of DIY Gift Ideas says:
    November 23, 2021 at 5:01 AM

    […] If you like the die set I used to create these lanterns, you may enjoy the card below as well. I created this a while back using a really fun technique that uses Glass Press ‘N Seal. You can learn about it here. […]

    Reply

Leave a Reply Cancel reply

Your email address will not be published. Required fields are marked *

Recipe Rating


Primary Sidebar

Anna Helman

Independent Stampin' Up!® Demonstrator

  • Email
  • Facebook
  • Facebook Group
  • Instagram
  • Pinterest
  • RSS
  • Twitter
  • YouTube
Shop Stampin' Up!
Stampin' Up! catalogs
get updates
join Stampin' Up!
Stampin' Up! Rewards
Stampin' Up! special offers
Stampin' Up! clearance
Stampin' Up! 2025-2026 Annual Catalog
May 6, 2025 - May 4, 2026
View Online | Shop Online

Blog Archive

Categories

Footer

Important Links

  • Home
  • Shop Now
  • Get Updates
  • Join My Team
  • Rewards
  • Specials
  • Catalogs
  • Clearance

Anna Helman, Independent Stampin' Up!® Demonstrator

  • Email
  • Facebook
  • Facebook Group
  • Instagram
  • Pinterest
  • RSS
  • Twitter
  • YouTube

Get Ideas, Inspiration, and Special Offers!

Sign up to receive updates in your inbox

Thank you!

Please check your email for a special offer! 

.
All content on this blog is the property of Anna Helman, Stampin' Up!® Independent Demonstrator. Classes, services and projects offered here are not endorsed by Stampin' Up!® Projects, videos, photos, ideas and articles are shared for personal use only and may not be removed, duplicated or copied without permission. All artwork © Stampin' Up!®

Copyright © 2025 Anna Helman, handmake with love · Site Design by Catherine Carroll