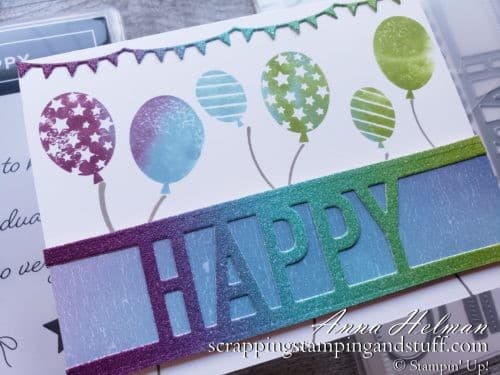
I love being able to give someone special a handmade birthday card. On today’s birthday card project, I used a baby wipe technique to create a rainbow full of color and cheer. The baby wipe technique is a great way to stamp an image in multiple colors instead of just one. I hope you’ll join in and we’ll talk about it!
What Is The Baby Wipe Technique?
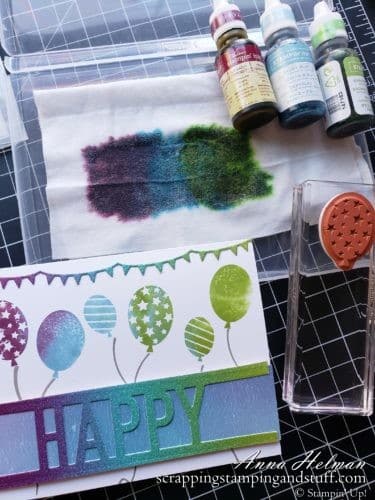
The baby wipe technique involves using a folded baby wipe and adding ink to it using ink refill bottles. Then, instead of inking your stamp on a traditional stamp pad, you will use the baby wipe to ink it. When you stamp, you’ll have a stamped image in multiple colors! The balloons on this card were stamped using the baby wipe technique.
By using different colors and patterns of ink on the baby wipe, you can achieve limitless color combinations and effects. Amazing!
Sample Cards Using The Baby Wipe Technique
Here are some other projects I have made using this baby wipe technique.
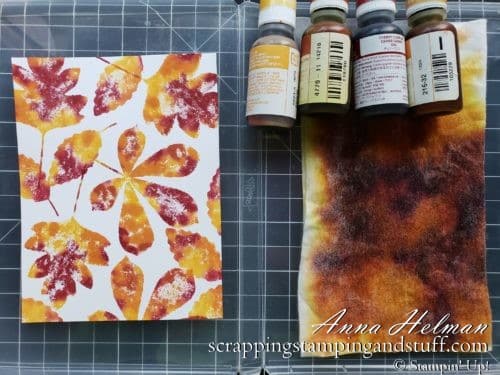
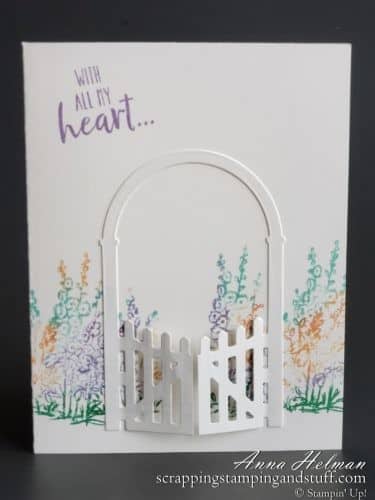
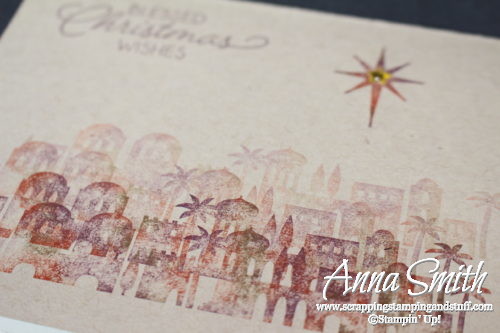
I just can’t stop thinking about the possibilities with this technique. So much fun!
Now that we’ve talked about the possibilities using this technique, let’s show you how to do it!
How to Achieve the Baby Wipe Technique
First, take a folded baby wipe and place it in an empty stamp container. Next, grab several different ink refill colors of your choosing. I used Rich Razzleberry, Balmy Blue and Granny Apple Green.
Using one color at a time, add ink to the baby wipe. Ink colors will need to overlap some if you desire to get the blending effect between colors. Make sure your inked area is large enough to completely ink your stamps, and also avoid having any white space left in between the colors. If desired, you can set this aside for a minute or two to allow colors to blend more.
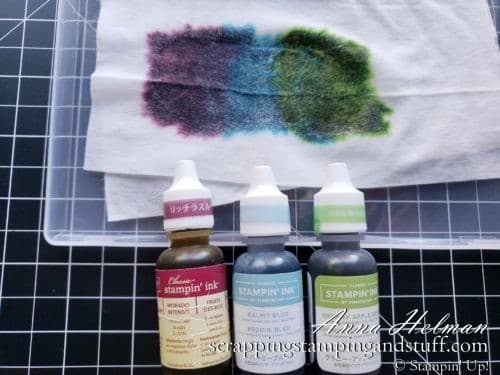
Your baby wipe ink pad is ready for use!
How To Make Today’s Card Project
Materials
Here are the materials needed for this project:
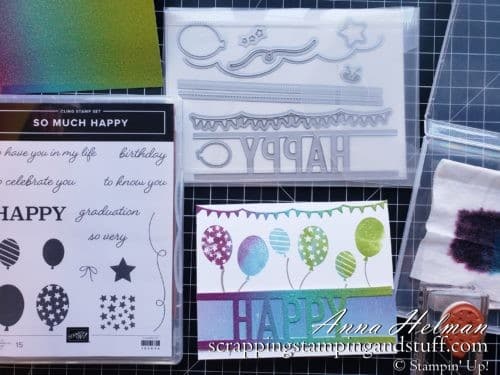
- So Much Happy stamp set
- Happy die set
- Rainbow Glimmer Paper
- Card Base (I used white!) 5 1/2″ x 8 1/2″
- Artistry Blooms designer paper 1 1/2″ x 5/1/2″
- Baby Wipe
- Re-inkers (I used Rich Razzleberry, Balmy Blue, and Granny Apple Green)
- Adhesive
- Gray Granite Stamp Pad
What to Prep
Cut a 1 1/2″ x 5 1/2″ strip from Artistry Blooms designer paper.
From the Happy die set, you’ll want to use the banner and word ‘Happy’ dies to cut your images from Rainbow Glimmer paper. You’ll also need a 1/4″ x 5 1/2″ strip of Rainbow Glimmer paper.
*Note: I recommend using adhesive sheets on the back of the Rainbow Glimmer paper before you cut it. This makes for easier application of the die cut pieces.
Assembling the Outside of the Card
Now, grab your card base and the banner cut from the Rainbow Glimmer paper. This is a horizontal card so your fold will need to be at the top.
Apply the banner the top of the card using adhesive sheets or multipurpose glue.
Next, place the word Happy towards the bottom of the card. Don’t apply just yet, we want it there for placement of the balloon stamps.
Next, prepare the balloon stamps from the So Much Happy stamp set. Ink one stamp starting on the purple side of the baby wipe. This will allow your color blends to mimic the color pattern of the Rainbow Glimmer paper.
Apply your first balloon stamp, then repeat this process by moving across the colors on the baby wipe. Make sure to clean your stamp after each use.
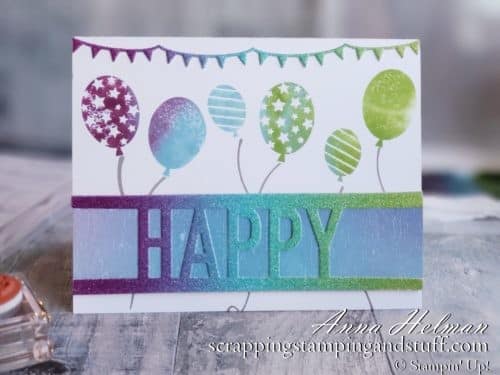
One the balloons are stamped, use the string stamp and Gray Granite ink to add strings to each one.
Next, adhere the Happy die cut to the 1 1/2″ x 5 1/2″ Artistry Blooms designer paper strip.
Attach the Artistry Blooms strip with dimensionals at the bottom of the card.
Assembling the Inside of the Card
Adhere the 1/4″ x 5 1/2″ strip of glimmer paper near the bottom of the card.
Stamp the balloon and greeting using the baby wipe as your ink pad.

Video Tutorial
Don’t Miss Out!
Please make me your Stampin’ Up! demonstrator! Earn rewards points towards free stamps PLUS a gift when you order using October host code: FZR7RJZY. PLUS, with your first order, you’ll receive free catalogs in your thank you package!
Sign Up For My Upcoming Virtual Card Classes!
Order the products I used and make this project yourself!
")


Check out these other fun techniques you may enjoy!
[…] Baby Wipe Technique And A Fun Birthday Card […]