Oh Happy Day! It’s a happy day because I love the Oh Happy Day card kit! Coming up in a few weeks, I’m going to do a kit class where attendees can choose from the Oh Happy Day kit, or the other all-inclusive kit we currently offer called Watercolor Wishes. Since I have this class coming up, it put me on a deadline to get my own kits completed! The results? I have 40 beautiful completed cards (20 from each kit) just waiting to be added to my collection and/or sent out right away. Let’s start looking at the Oh Happy Day card kit!
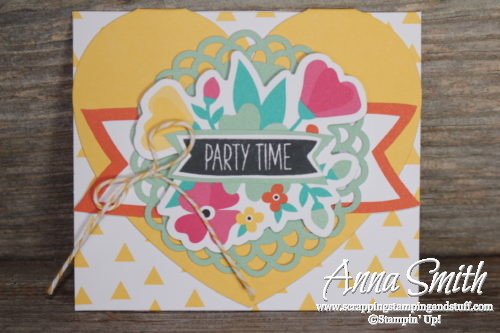
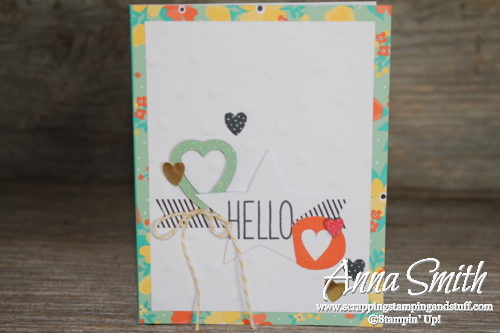
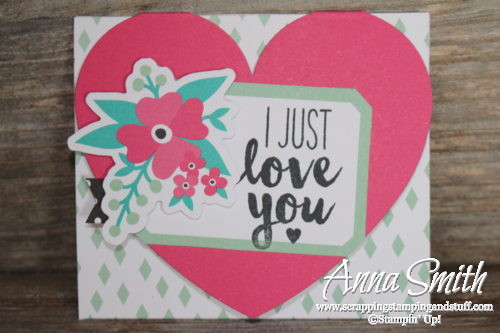
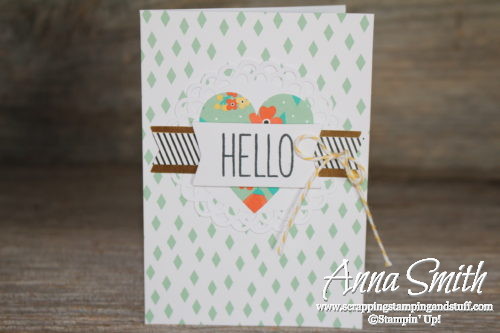
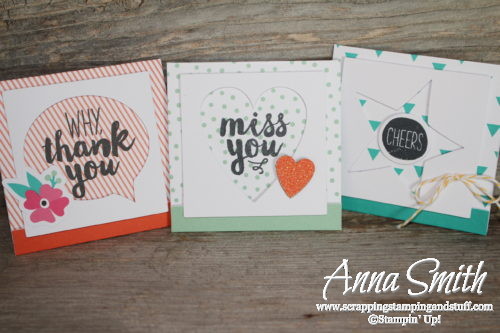
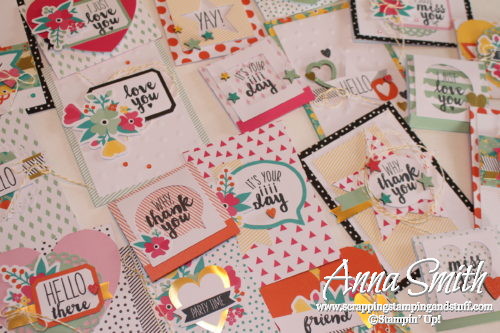 Aren’t these absolutely adorable? They’re so bright and cheery, they’re bound to brighten the day of everyone who receives one of them.
 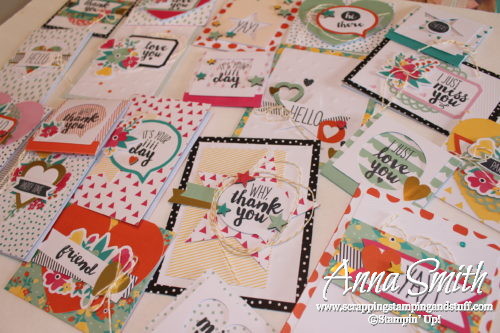 One of the reasons our all-inclusive kits are so fantastic is because a person with any amount of stamping experience can complete them. The actual stamping is extremely simple, and the rest is just assembly! More advanced stampers can spice up the cards as desired, but those who want it simple can keep it simple!
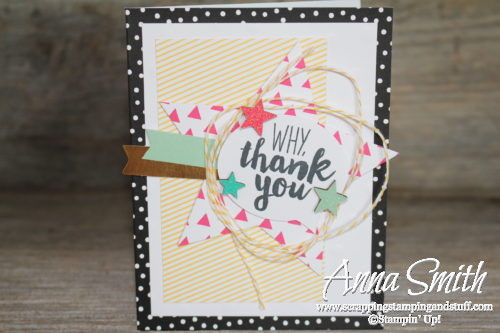
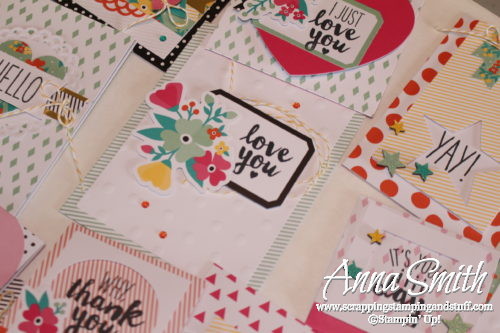 Many of you creative types out there don’t always like the idea of being ‘locked in’ to a pre-designed project. Keep in mind, you can assemble the pieces and parts in any way you like. You can rearrange the designs to make your own unique cards, or even use the pieces on totally separate projects. For the purpose of keeping things simple, I created the cards just as designed.
I want to give you a few tips for those of you who plan to order this kit. I make no claims that this is the ‘right’ way to assemble it. In fact, my way goes against the method described in the instructions (which involves laying out each piece according to the card number associated with it). I thought the way I did it would be far easier than the method described, but I don’t promise that you would feel the same way!
- Lay out kit pieces in organized piles. Punch out die cuts and organize them by type.
- Stamp greetings onto the appropriate die cuts. To do this efficiently, I laid out each stamp in the set, then placed the die cuts I needed to stamp beside the corresponding stamp (how many times can I say stamp in one sentence?). Then I just went through each set of stamp/die cuts and did the following – mount the stamp, grab the appropriate die cuts, stamp the die cuts, clean the stamp, put it back in the stamp set.
- Set aside the baker’s twine, thick chipboard hearts and stars, and enamel dots.
- Lay out card bases in the order shown on the directions, from 1 through 20.
- Lay out all pieces (except those set aside in step 3) for each card on top of the appropriate card base. You will end up with a little stack for each card.
- Cut baker’s twine in an approximate length for each card that needs it and lay with the materials for that card. The length you need is specified in the instructions for most of the cards.
- Assemble the cards, adding in the remaining supplies (chipboard embellishments and enamel dots) when needed. When you finish each card, admire the beauty you just created!
I did the sorting, stamping, and assembly for a few of the cards one evening. Then I stacked up the materials (neatly organized in a little pile for each card) and put them back in the box until a few nights later when I was able to finish them. This was a pretty handy way to not have my entire craft table covered in a mess for days. You could do this and assemble one or two cards each day if you don’t have a chunk of time to spend on any single day.
Here are a few tips that might be helpful:
- Number 1 Rule of using all-inclusive kits – Go into your crafting with a somewhat ‘carefree’ attitude, rather than that of a perfectionist. By that, I mean don’t feel like your cards have to be exactly like those in the instructions. You can use different stamps on the die cuts, different die cuts on each card, etc. If you can’t find a certain piece (they get lost sometimes like socks in the washer) or use a piece on the wrong card, who cares?! You’ll have plenty of pieces to ‘make do’ as you continue to complete cards, and they will all turn out beautiful! Don’t get hung up on the small details. Remember – this is fun 🙂
- The pieces that look light yellow in the instructions are gold in real life. I kept looking for the light yellow ones, and looking, and looking. Then I had the light bulb moment…they’re gold.
- The instructions show how long the baker’s twine should be cut for most cards. Some do not specify a length. In that case, I wrapped the twine around my hand 3 or 4 times before cutting it. Remember – too long is better than too short.
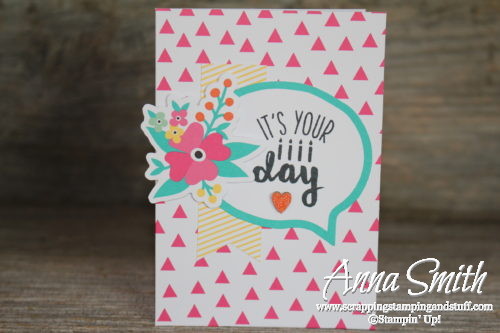
- Two notes about the small square cards with a white frame on the front. 1. When doing your stamping, make sure to lay out the card base with the narrow strip at the very top. This will allow it to be folded and become the bottom flap when assembled. When doing your assembly, use dimensionals to attach the white frames onto the card. Make sure to keep these high enough that the flap will have space to slide under them at the bottom.
- I used a variety of adhesives – Snail for most pieces, dimensionals for anything I wanted to pop up, and glue for embellishments and small die cuts. An assortment of adhesives is always your friend for any craft project.
- If you aren’t sure how to create the ‘messy thread’ look for baker’s twine, this YouTube video should help. These days I usually use a dimensional in place of a glue dot for the technique.
 I’ve been talking too much, I’m out of breath! Let’s just look at some of these fun cards now…
I hope you will try this kit because I think you will love it! If you’re a local, please let me know by February 8 if you want to attend my kit class on February 17. If you’re not local, use the link below to see and order this kit. Make sure to check back and see the Watercolor Wishes kit as well!
Please shop with me and combine these offers to get great deals!
- Use hostess code H3N6K46A and I will send you a free gift!
- Earn a free Sale-a-bration item with every $50 you order!
- Sign up with Stampin’ Up! during Sale-a-bration and get a bonus of any two stamp sets for FREE!
- Keep track of your Stampin’ Rewards and earn free stamps from me!
- Any purchase of $150 or more will earn you hostess credit through Stampin’ Up!
- Join online stamp club and get free products and projects.
Order the products I used and make this card yourself!


[…] to make the Watercolor Wishes card kit, the one I’m sharing today, or another one called Oh Happy Day. I needed to get my kits done to have as samples! I had six people attend the class, and after just […]