• Nav Social Menu

    • Facebook
    • Facebook Group
    • Instagram
    • Pinterest
    • RSS
    • Twitter
    • YouTube

Handmake with Love

Anna Helman | formerly Scrapping, Stamping and Stuff

  • Blog
  • Start Here
    • About Me
    • Learn to Make Cards
    • Why Shop With Me?
    • Testimonials
    • Connect On Social
    • Get Email Updates
    • Stampin’ Up! Giveaway Winners
  • Products
    • Shop Now
    • Catalogs
    • Clearance
    • Why Choose Stampin Up?
    • Paper Pumpkin Kits
    • Product Shares
    • Rewards Program
    • Stamparatus
    • Cut And Emboss Machine
    • Mini Cut And Emboss Machine
    • Blends Alcohol Markers
    • Blending Brushes
  • Ideas
    • Video Tutorials
    • Project Gallery
    • Card Ideas
    • 3D Projects
    • Scrapbooking
    • Tips & Techniques
    • Kits
    • Learn to Make Cards
    • Printable Catalog Tabs
    • Social Media
  • Join
    • Join My Team
    • Stampin Up Demonstrator Resources
  • Classes
    • Classes in the Mail
    • In Person Events
  • Contact
    • Contact
    • Connect On Social

Mini Ink Pads – Stampin Up Spots For The Win

4 Nov

Welcome! Do you have any Stampin Up Spots in your stamping collection? If not, today I’m going to share why these mini ink pads are perfect for any stamping collection. Whether you’re just starting out in the paper craft world and growing your collection, or if you’re currently on a budget but still want a variety of colors, mini ink pads are the way to go. Oh, let’s not forget about you professional crafters out there, you know who you are with all those amazing supplies. I’ll also share why these Stampin Up Spots are even helpful if you have all the colors in large ink pads. Let’s get started! 

Mini ink pads are the perfect way to add colors to your collection on a budget. Click here to see Stampin Up Spots baby ink pads!

First, I’ll share the video overview I created. 

Mini Ink Pad Video

If you’d like to check out my video introducing these adorable mini ink pads, click on the link below.

Next we’ll do a quick introduction and talk about what Stampin Up Spots are! 

What Are Stampin Up Spots?

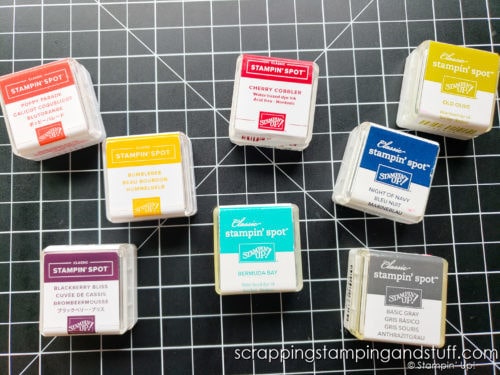
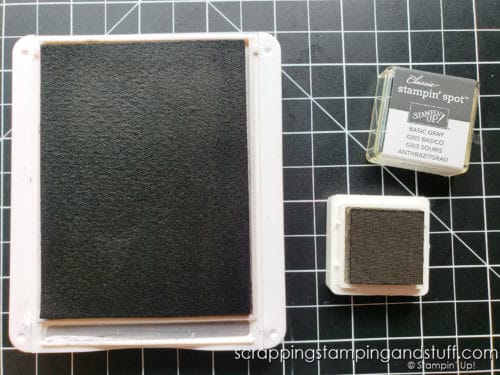
These Stampin Spots come in the same colors as the normal size ink pads, they’re just… mini! How mini? The Spots inking area measures 1″ x 1″. They are refillable and can be refilled with Stampin Up’s ink refill bottles just like the large pads.

Mini ink pads are the perfect way to add colors to your collection on a budget. Click here to see Stampin Up Spots baby ink pads!

Mini ink pads are the perfect way to add colors to your collection on a budget. Click here to see Stampin Up Spots baby ink pads!

Some avid Stampin Up customers don’t even realize we sell these cute ink pads, so let’s talk about how to get them. 

How Do I Get Mini Ink Pads?

So, you might be wondering how you can get ahold of these little ink pads, because they can be hard to find online and in our catalogs. There are a couple different ways you can collect Stampin Up Spots. Here’s how…

Paper Pumpkin Kits

Paper Pumpkin kits are a monthly subscription that comes in the mail – bringing you a fun surprise each month with ALL the supplies including stamps, ink, and paper to make a fun project. Each kit comes with at least 1, sometimes 2 ink spots. The colors of inks are not repeated in a 12 month period, so if you sign up and try it, you’re bound to end up with a selection of pretty colors in this fun mini size. 

Purchase a Color Collection

Another way to collect Spots is to order the classic collection of colors. These basic colors are perfect to get your collection of mini ink pads started. 

Order Un-Inked Spots

The third option is to order Stampin Up Spots un-inked. Add ink to them with our ink refill bottles (which can also be used to ink large pads, re-ink markers, and do lots of stamping techniques). This is a great way to customize the colors you’ll have in your collection. This also allows you to add lots of color to your collection for a low cost. 

Next I’ll share more about the features and benefits of these small ink pads. 

Closer Look at the Mini Ink Pads

Let’s take a closer look at these mini ink pads. In this section, I’ll share how to open them, how to use them, and best practices for storing these pads.
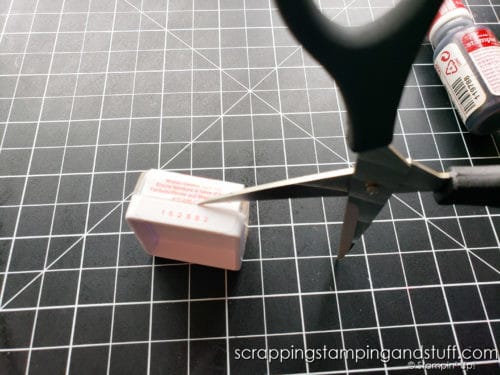
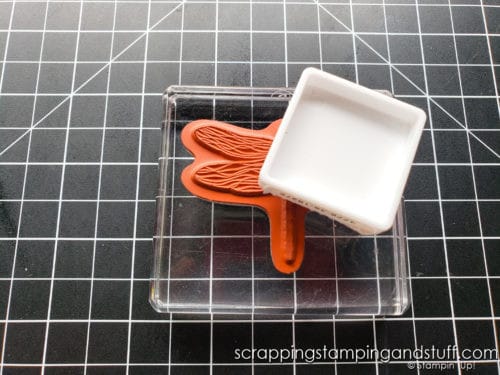
How to Open

Upon receiving your mini pads, I’ve found the best way to open them is with the Stampin Up Snips. Simply run one of the blades along the ink pad, scoring the side where the base meets the lid. This cuts through the paper label and will allow the top to pop right off.

Mini ink pads are the perfect way to add colors to your collection on a budget. Click here to see Stampin Up Spots baby ink pads!

How to Use

There are two different ways these ink pads can be used, and it depends on the size of stamp I’m using which method I prefer. For smaller stamps, use the ink pad like normal as shown below.

Mini ink pads are the perfect way to add colors to your collection on a budget. Click here to see Stampin Up Spots baby ink pads!

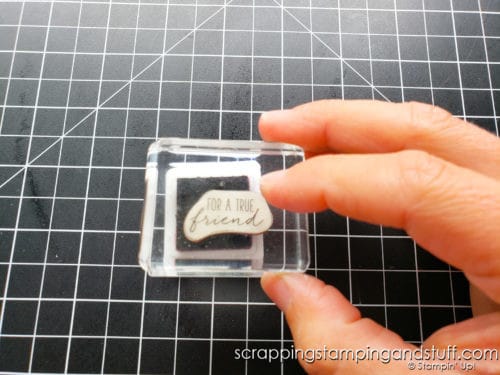
If you’re using larger stamps, lay the stamp face up on your work surface, turn the pad upside down and dab ink onto the stamp from above. This is far easier when using large stamps than the method described above. 

Mini ink pads are the perfect way to add colors to your collection on a budget. Click here to see Stampin Up Spots baby ink pads!

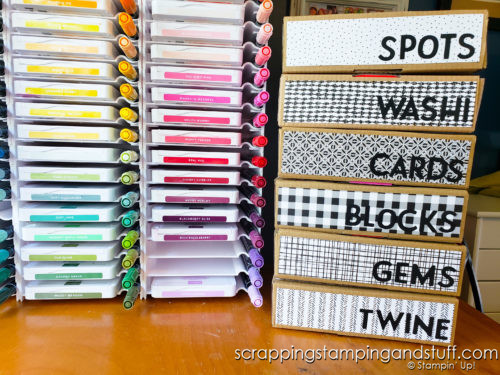
Ways to Store Mini Ink Spots

Always store mini ink pads upside down if possible. This allows the ink to be right at the surface of the pad and ready for use when you flip it over and open it.

Mini ink pads are the perfect way to add colors to your collection on a budget. Click here to see Stampin Up Spots baby ink pads!

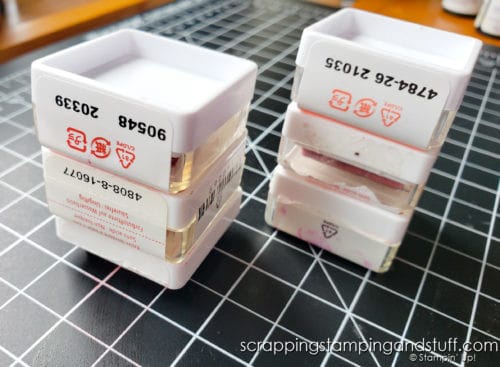
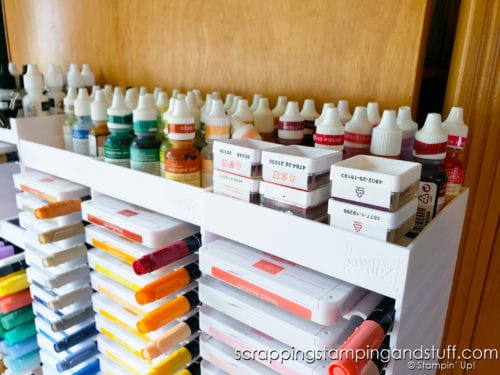
One way to store these mini ink pads is on top of your regular Stampin Up Storage.

Mini ink pads are the perfect way to add colors to your collection on a budget. Click here to see Stampin Up Spots baby ink pads!

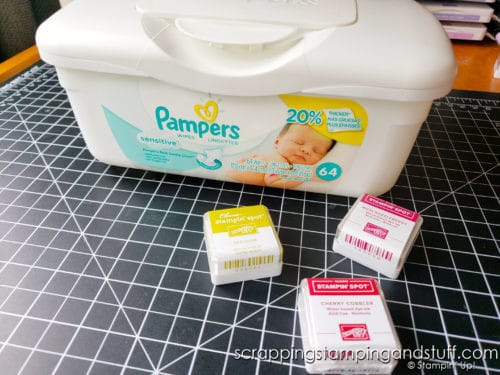
In the past I stored mine in an old baby wipes container, which worked really well.

Mini ink pads are the perfect way to add colors to your collection on a budget. Click here to see Stampin Up Spots baby ink pads!

Recently, I converted several Paper Pumpkin kit boxes into storage containers. These work really great for storing the small ink pads. Here’s a link to that blog post if you’d like to see how to create these boxes.

Mini ink pads are the perfect way to add colors to your collection on a budget. Click here to see Stampin Up Spots baby ink pads!

Do you love an organized craft area? Check out this idea for using Stampin Up kit and Paper Pumpkin boxes for inexpensive storage options!

If you have our large size ink pads in all of the colors, you’re probably thinking you wouldn’t use these mini pads, but many stampers love having both in their collections. Next I’ll share why! 

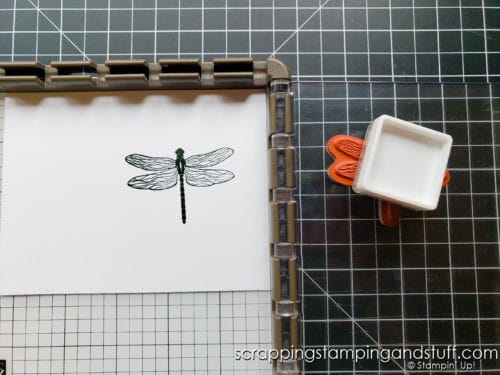
Why Experienced Stampers Love These Minis

Even experienced crafters love having these mini ink pads in their collection. One of the big reasons is they are perfect for using with the Stamparatus, as shown below. The smaller ink surface helps prevent ink from getting on the plate. 
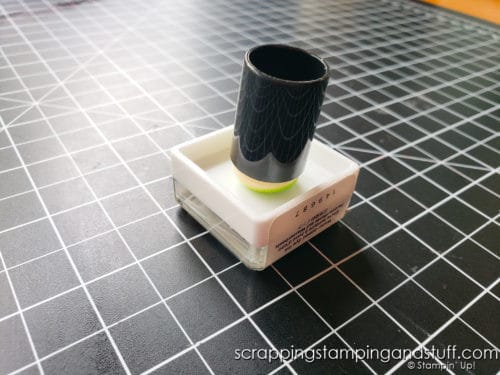
Mini ink pads are the perfect way to add colors to your collection on a budget. Click here to see Stampin Up Spots baby ink pads!

Tip

Here’s a quick tip I’ve see others do, and I can’t wait to try myself. Attach a sponge dauber to the back of the Spots with hot glue. First remove the sponge portion, then attach it together. This makes a nice holder that fits right on your fingertip, to make it easy to handle the mini pads. 

Mini ink pads are the perfect way to add colors to your collection on a budget. Click here to see Stampin Up Spots baby ink pads!

Order Stampin Up’s Mini Ink Pads Today!

Just Jade & Magenta Madness Classic Stampin’ Spots

Just Jade & Magenta Madness Classic Stampin’ Spots
[153182]

Classic Stampin' Spots Assortment

Classic Stampin’ Spots Assortment
[153183]

Uninked Stampin' Spots

Uninked Stampin’ Spots
[141822] 

You Might Also Like:

Cardmaking 101 Lesson 6: Basic Cardmaking Tools


Learn To Make Cards
Shop Supplies
Rewards Program
Join My Amazing Team

Thanks for joining me today. I hope you’ve enjoyed this information about Stampin Up’s mini Spots ink pads!

Sharing is caring!

Filed Under: Featured Products, Gallery, Learn to Stamp Tagged With: 2021-2022 Annual Catalog, beginning, how beginner, mini ink pads, Stampin Up Spots, tools

Previous Post: « Stampin Up Eden’s Garden Special Release Now Available & 6 Card Ideas
Next Post: Stampin Up Thinking Thanks & Peace And A 1 Minute Christmas Card »

Reader Interactions

Comments

  1. Kim says

    November 4, 2021 at 4:24 PM

    Wish the ink spots came in more colors

    Reply
    • Anna Helman says

      November 4, 2021 at 6:55 PM

      Me too!

      Reply
  2. Karen in Florida says

    November 5, 2021 at 12:03 AM

    Good video, Anna! I didn’t know spots should be stored upside down.
    Interesting! I’ll have to flip all mine over. Thanks for the tip.

    Reply
  3. Connie Kahl says

    November 19, 2021 at 7:25 PM

    Nice article Anna. Very informative. Thank you

    Reply
    • Anna Helman says

      November 19, 2021 at 8:35 PM

      You’re welcome!

      Reply

Trackbacks

  1. November 2021 Paper Pumpkin - Gifts Galore With Alternative Ideas says:
    November 27, 2021 at 5:01 AM

    […] to make nine adorable holiday-themed gift bags, along with a cute stamp set, flirty flamingo ink spot, and […]

    Reply

Leave a Reply Cancel reply

Your email address will not be published. Required fields are marked *

Recipe Rating


Primary Sidebar

Anna Helman

Independent Stampin' Up!® Demonstrator

  • Email
  • Facebook
  • Facebook Group
  • Instagram
  • Pinterest
  • RSS
  • Twitter
  • YouTube
Shop Stampin' Up!
Stampin' Up! catalogs
get updates
join Stampin' Up!
Stampin' Up! Rewards
Stampin' Up! special offers
Stampin' Up! clearance
Stampin' Up! 2025-2026 Annual Catalog
May 6, 2025 - May 4, 2026
View Online | Shop Online

Blog Archive

Categories

Footer

Important Links

  • Home
  • Shop Now
  • Get Updates
  • Join My Team
  • Rewards
  • Specials
  • Catalogs
  • Clearance

Anna Helman, Independent Stampin' Up!® Demonstrator

  • Email
  • Facebook
  • Facebook Group
  • Instagram
  • Pinterest
  • RSS
  • Twitter
  • YouTube

Get Ideas, Inspiration, and Special Offers!

Sign up to receive updates in your inbox

Thank you!

Please check your email for a special offer! 

.
All content on this blog is the property of Anna Helman, Stampin' Up!® Independent Demonstrator. Classes, services and projects offered here are not endorsed by Stampin' Up!® Projects, videos, photos, ideas and articles are shared for personal use only and may not be removed, duplicated or copied without permission. All artwork © Stampin' Up!®

Copyright © 2025 Anna Helman, handmake with love · Site Design by Catherine Carroll