It’s an exciting day today! I’m sharing my very first video created in my new craft room!!! Many of you have been following along with updates on social media, and I know you’re excited to see it too. Today I want to share a quick tip, which is how to refill Stampin Up markers. Let’s talk about it.
How To Refill Stampin Up Markers Video
See exactly how to refill Stampin Up markers in this video below, or keep reading for more details.
Before I share about refilling markers, I want to talk for a minute about why I love these markers and how they really can save you money.
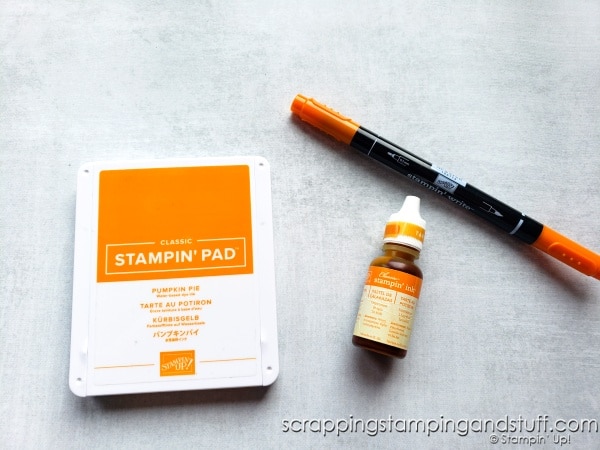
Stampin Write Markers
For detailed information about our markers, you can take a look at a post I shared here. Here’s a quick overview – they come in all 50 of our Stampin Up colors, each marker has two tips – fine and brush, they are refillable, and they last a long time as long as you care for them properly!
Product Coordination
One of my many favorite things about Stampin Up products is the coordination. Our colors coordinate between ink pads, markers, cardstock, designer papers, ribbons and embellishments. This saves so much time in choosing supplies that coordinate. I mention this because it leads into my next benefit.
Getting The Most For Your Money
When spending money on craft supplies, you definitely want to choose items that you can use often, use in various ways, or which will help your products last longer. Because our markers can be refilled, they can truly last 10 years or much longer if you care for them properly (and don’t allow small children to use them!!). And here’s the best part – the same ink refill bottles that can be used to refill our ink pads can also be used to refill our markers. So you can purchase an ink refill bottle for just a few dollars that will allow you to keep using your ink pads and markers for years and years. Love this!
How To Store Markers, Ink Pads & More
If you’re looking for ideas on storage of ink pads, markers, and more, take a look at this post where I talk about how I store my ink pads, markers, and refills.
How To Refill Stampin Up Markers
1. Remove the cap from the brush/bold tip of the marker.
2. Use tweezers or your fingers to remove the tip from the marker.
3. Hold the marker at an angle.
4. Drop 5-20 drops of ink into the opening. Try to drop the ink against the side of the marker, and not into the center. This helps prevent air bubbles.
5. If you see the ink begin to build up inside the marker, stop adding more. Let it soak in for a moment before continuing.
6. Replace the marker tip and cap.
7. Allow the marker to lay horizontally for a bit, then test it to see if it needs more ink.
Troubleshooting
Here are a few problems I’ve encountered when refilling markers, and how I’ve dealt with them.
Air Bubbles
Hold the marker vertically and tap it on your work surface a few times, or pop the air bubble with the piercing tip of your Take Your Pick tool.
Overfilling The Marker
If you completely filled the marker to where there’s no space to replace the tip, try tapping it on your work surface to see if the ink will settle into it. If it’s still full, you’ll just have to replace the marker tip, and it will push ink out which will run down the sides. Then it’s time to clean up the mess 🙂
Underfilling The Marker
If you go through the process, let the marker sit horizontally for a bit, and it’s still dry, just repeat the process!
Order Markers Here
See more about our markers and ink refills here.
Product List


Learn To Make Cards
Shop Supplies
Rewards Program
Join My Amazing Team
Now you’re an expert on how to refill Stampin Up markers!
You know Anna, I have been a demonstrator for many years and never knew that before. Thank you for sharing the idea! Can you do that with the blending pens as well.That would save quite a bit of money.
I’m so glad when I find out that someone didn’t know about this. I’m not glad you didn’t know – just glad I could share it with you. I saw someone who shared how to refill the blends one time but I’ve never tried it. I may try it out at some point and if it works, I’ll definitely share it here.
I have refilled my Stampin Up Markers a different way. You can take pliers and remove the colored part on the brush end. It pops out and is easy to reinsert. Then I put the ink directly into the foam inside a straw like tube. There is also an online company where you can purchase new brush tips for Stampin Up markers. They fit perfectly.
Good to know, thank you for sharing!
Have you ever pushed the nib in too far? How would you get it back out?
I dont believe it will go in that far. It always stops when it has gone in all the way.