If you love fun fold or interactive cards, you definitely want to see today’s project. This is a flip fold card design, and I got my inspiration from a special die set I purchased several years ago. It included a die to create flip fold cards, but I knew there was a way to make them without a special die. I figured it out and today I want to share this along with the Stampin Up Nested Friends stamp set. Let’s get started!
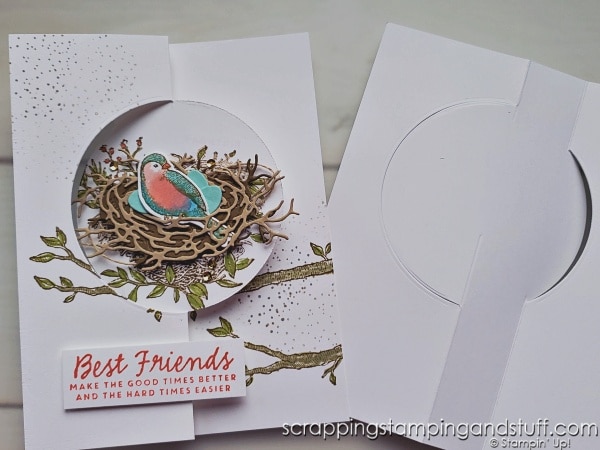
Flip Fold Card Design
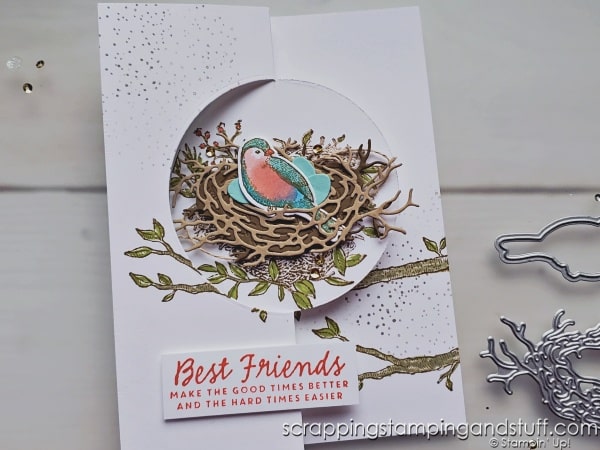
Here’s what this card looks like when it’s closed…
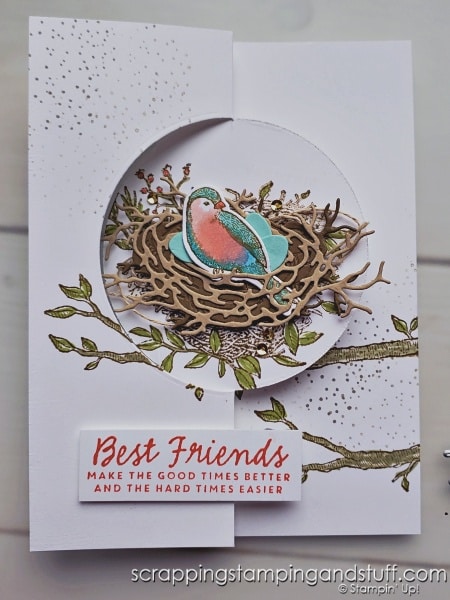
…and here’s what it looks like open.
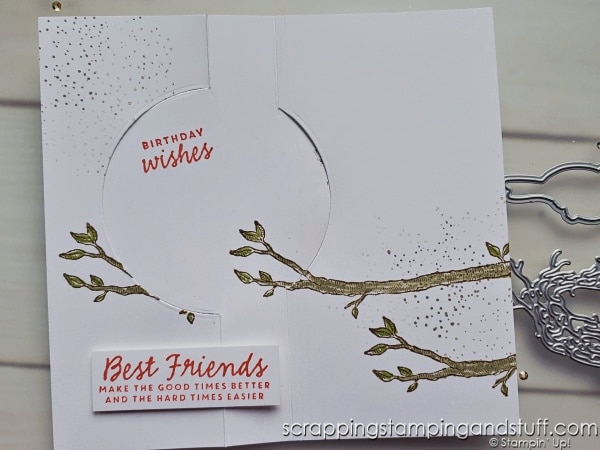
As you pull on the edges of the card, the circle in the front flips around so that you see what’s above. Neat, right?!
Next I’ll talk a little about the type of dies to use to create a flip card.
Which Dies To Use?
You can create one of these flip fold cards using most symmetrical dies, meaning the left side is a mirror image of the right side. The circle die I used is from my Layering Circles die set, and I found the circle to be the easiest shape to work with, but you can see I also used a label shape from the Something Fancy die set.
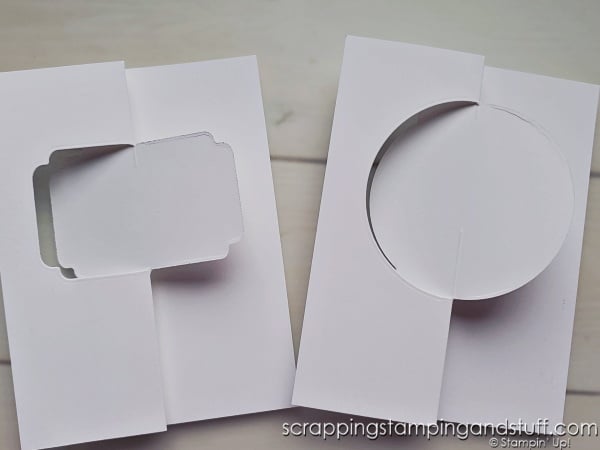
When choosing dies, I suggest not using dies that have stitching or special accents around the edges. Like I said, any symmetrical die should work, but a circle might be the easiest option to start with.
Prepare The Die
Before creating this card, you’ll need to mark the center line of the die you plan to use. Lay it on a trimmer grid or piece of grid paper, determine the total width, then use a Blends marker or Sharpie to make a dot in the center of the top and the center of the bottom.
Materials Needed
Here’s what you need to create this flip card design:
- 5 1/2″ x 5 7/8″ cardstock
- Scoring board or trimmer with scoring ability
- Symmetrical shape die, such as a circle
- Die cutting machine
- Bone folder
- Stamps and embellishments to decorate
How To Create A Flip Card Design
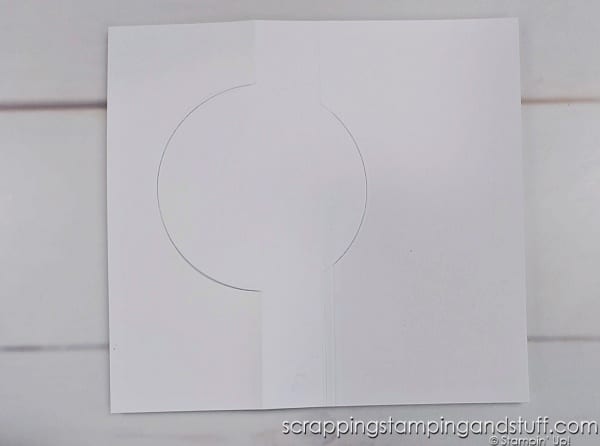
1. Lay cardstock on your trimmer/scoring board with the long edge at the top. Create a small score line at 2 1/8″ at the top and also at the bottom. Move to 3″ and create a small score line at the top and at the bottom.
2. Line up the die with the left score line, so that the center markings on the die are in line with the score line. Use a post-it or tape to hold in place.
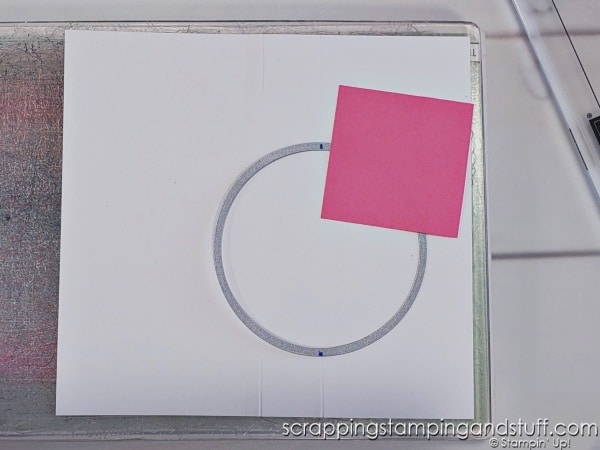
3. Place cardstock on top of your base plate and cutting plate for your die cutting machine.
4. Lay the top plate so it will only cut on the left (narrow) side of the score line. Crank through the machine.
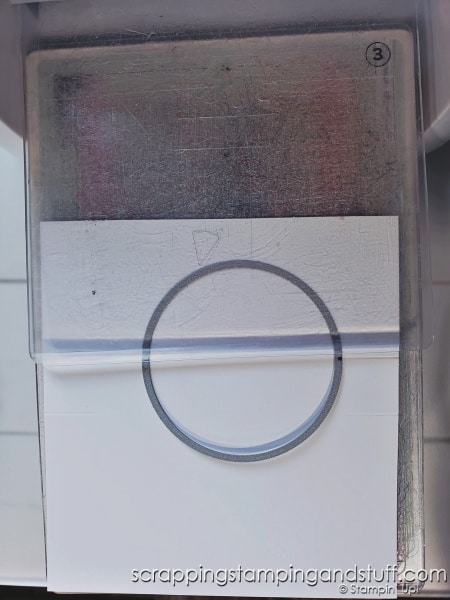
5. Turn the paper around (not moving the die) and repeat the same procedure, so the top plate only lays on top of the outside edge of the die. Crank through to cut.
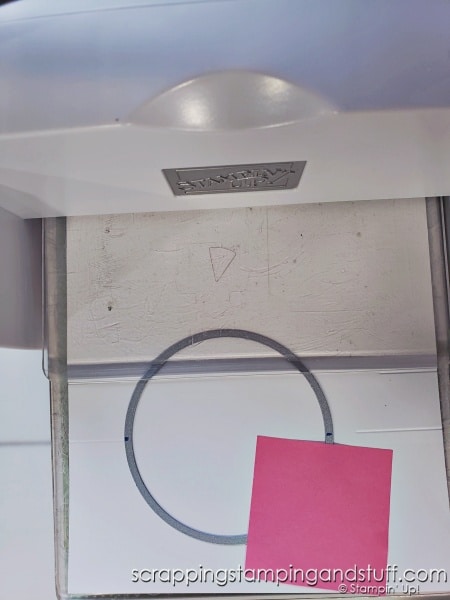
This process is difficult to explain in words, but watch along with the video for a better explanation!
Flip Card Video Tutorial
Watch along here as I share exactly how to make one of these cards!
Stampin Up Nested Friends
What do you think about the Stampin Up Nested Friends bundle? It seemed like the perfect way to finish off this card. Watch along with the video for details on how I finished it.
Supply List
Take a look at the supplies I used here!
Product List Learn To Make Cards
Shop Supplies
Rewards Program
Join My Amazing Team
I hope you’ll try this flip fold card design yourself…with the Stampin Up Nested Friends stamp set if you choose!


Excellent design! I just watched your video and your presentation was very easy to understand …. with all these wonderful photos and clear instructions, I feel sure I can make a similar card. I just love this Nested Friendship bundle and am so glad that I bought it. Thank you for all your work creating and sharing!
Thank you so much Rita! Enjoy using this bundle and making a flip card yourself!
The bundle is gorgeous and so is your card. Thanks for the video and clear instructions!
Thanks so much Gail!
Thank you for sharing your idea and making a video. I will be trying this idea today!
Great, have fun with it!