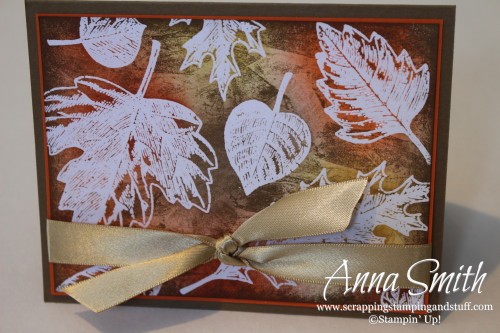
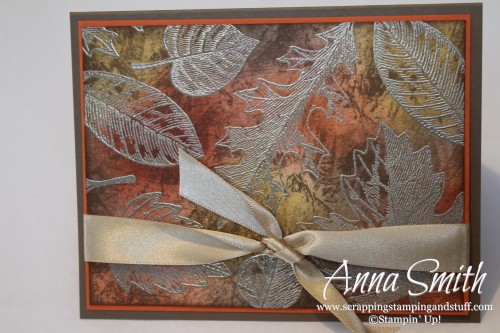
It’s time for a Blast From the Past post! I don’t know about you, but I’m super excited that fall is just around the corner. I picked out a fantastic project I made two years ago with our beautiful Vintage Leaves stamp set, which is still available for ordering. Enjoy!…
Fall is my favorite season. Favorite favorite FAVORITE!!! It’s that much my favorite season. When this time of year rolls around, I have to resist the temptation to make fall projects at ALL of my classes. Of course we make some fall projects, but I don’t want to shove it in everyone’s faces that I love fall!
At my last card class, I did give in to the temptation to make a fall card. I used two techniques – emboss resist and tissue stamping directly onto the card. Watch this short video to see how I made this vintage leaves emboss resist card.
This was the first card I made using clear embossing powder on whisper white cardstock. The leaves are from the Vintage Leaves stamp set.

My second version was with gold embossing powder.

After the leaves were stamped and embossed, I sponged patches of color around and over the leaves. Then I wrinkled up a tissue, inked it using Soft Suede ink, and applied the tissue to the card. This created the wrinkled look. Then I used a clean tissue to wipe excess ink off of the embossed areas.
These are two great techniques that can allow you to create gorgeous cards. Try them out and let me know how it goes!
To see the original post, click here.
Please shop with me and combine these offers to get great deals!
- Please use hostess code KNMVSRKE when you order.
- Keep track of your Stampin’ Rewards and earn free stamps from me!
- When you order $150 or more, you’ll earn hostess credit through Stampin’ Up!
- Join online stamp club and get free products and projects.
Order the products I used and make this card yourself!


Leave a Reply