• Nav Social Menu

    • Facebook
    • Facebook Group
    • Instagram
    • Pinterest
    • RSS
    • Twitter
    • YouTube

Handmake with Love

Anna Helman | formerly Scrapping, Stamping and Stuff

  • Blog
  • Start Here
    • About Me
    • Learn to Make Cards
    • Why Shop With Me?
    • Testimonials
    • Connect On Social
    • Get Email Updates
    • Stampin’ Up! Giveaway Winners
  • Products
    • Shop Now
    • Catalogs
    • Clearance
    • Why Choose Stampin Up?
    • Paper Pumpkin Kits
    • Product Shares
    • Rewards Program
    • Stamparatus
    • Cut And Emboss Machine
    • Mini Cut And Emboss Machine
    • Blends Alcohol Markers
    • Blending Brushes
  • Ideas
    • Video Tutorials
    • Project Gallery
    • Card Ideas
    • 3D Projects
    • Scrapbooking
    • Tips & Techniques
    • Kits
    • Learn to Make Cards
    • Printable Catalog Tabs
    • Social Media
  • Join
    • Join My Team
    • Stampin Up Demonstrator Resources
  • Classes
    • Classes in the Mail
    • In Person Events
  • Contact
    • Contact
    • Connect On Social

Best Tips For Card Making Adhesives

22 Feb

Having the right adhesives and knowing how to use them can make or break your paper crafting experience. I decided it was time to share some of my best tips for adhesives, all in one place. I started with the intention of sharing my five best tips, and the list kept growing…and growing. Keep reading for all of my best tips for card making adhesives!

Tape

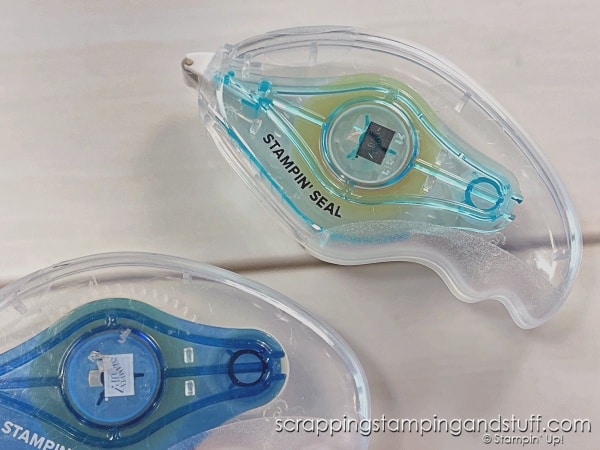
The first rule of papercrafting – thou shalt find a tape runner you love. They are SO much quicker and easier than using double sided tape or glue sticks. I use my Seal+ most of the time, and I love it because it’s very strong and I only have to use a tiny bit in each corner. I also use Seal quite a bit. See my tips for using these two tape runners here.

Click for my 10 best tips for card making adhesives! Adhesives can make or break your paper crafting experience!

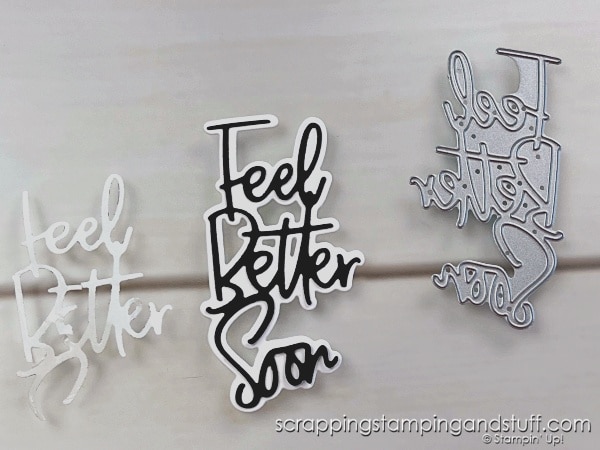
Attaching Detailed Die Cuts

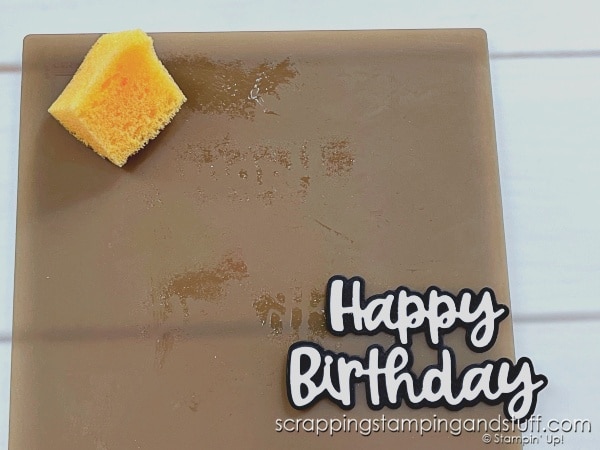
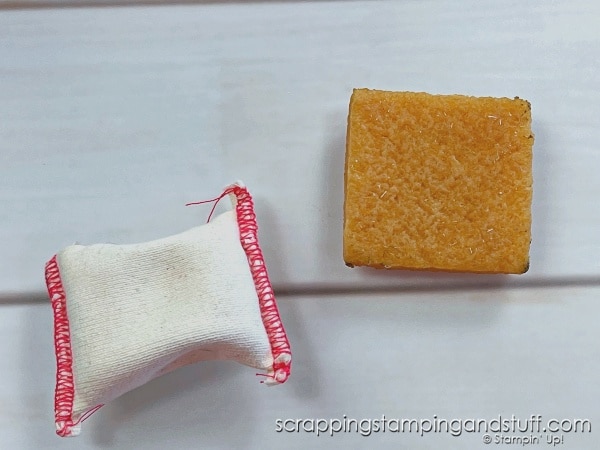
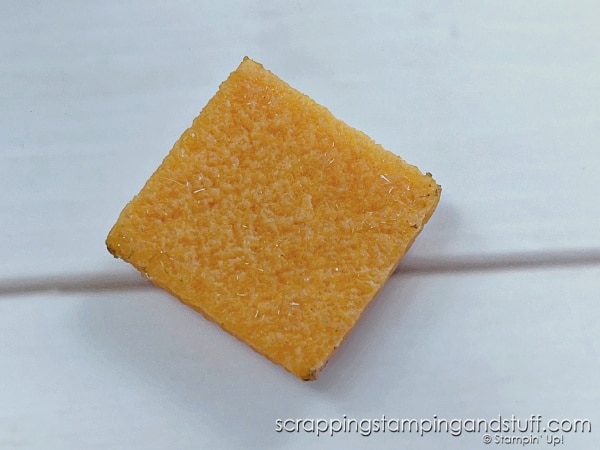
An awesome way to adhere your delicate die cuts is to use a Silicone Craft Mat, along with a sponge and Multipurpose Glue, and sponge a thin layer of glue on the back of the die cut.

Click for my 10 best tips for card making adhesives! Adhesives can make or break your paper crafting experience!

You can also use the Silicone Craft Mat with tape for delicate die cuts! Watch along with today’s video to see how.

Click for my 10 best tips for card making adhesives! Adhesives can make or break your paper crafting experience!

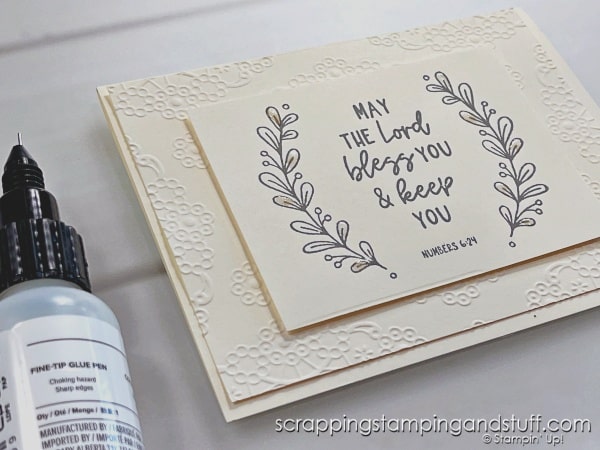
The Fine Tip Glue Pen is great for detailed pieces as well, because it dispenses glue in a teeny tiny stream. When using this glue (shown below) just make sure you get the wire inserted back into the tip when you are done using it, as otherwise it will glue itself shut. If it does get glued shut, take a look at my tip here for removing the clog.

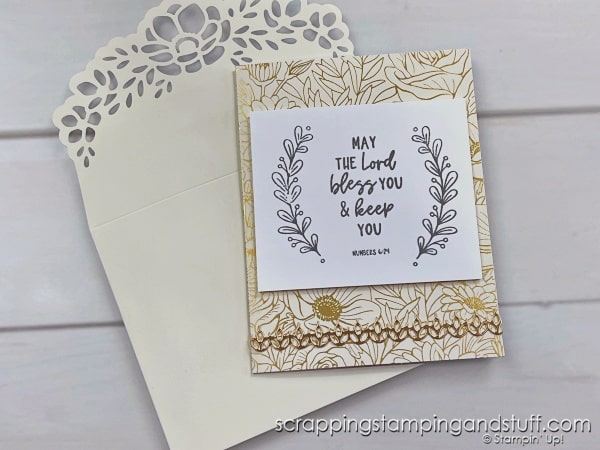
A bonus use for this glue is you can use it to create glossy accents on your project because it dries clear and glossy, not sticky! If you love the card shown here, get more details on it.

Click for my 10 best tips for card making adhesives! Adhesives can make or break your paper crafting experience!

Adhesive Sheets are awesome tool! Just stick some of this to the back of your paper before you create the die cut, and it’s as easy to attach to your project as removing the release paper from the back of a sticker!

Click for my 10 best tips for card making adhesives! Adhesives can make or break your paper crafting experience!

Do you ever apply adhesive before you’re done stamping on a piece of paper? Let’s talk about that next!

Did You Apply Adhesive Too Soon?

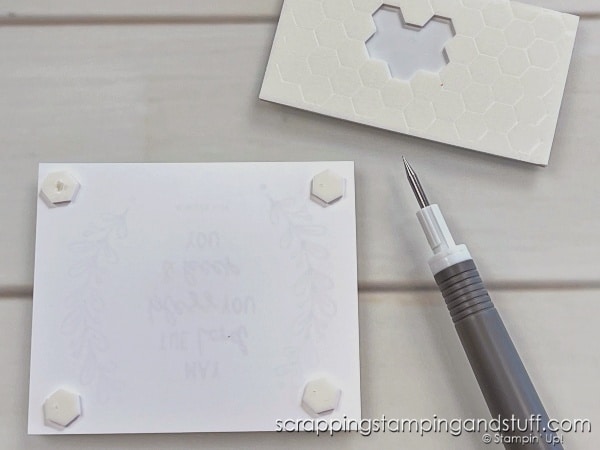
It never fails. I need to do more stamping and I realize I already put tape or dimensionals on the back of my paper. If you have tape on the back, you can just lay the piece on the Silicone Craft Mat, do your stamping, and then easily remove it to place on your project.

Click for my 10 best tips for card making adhesives! Adhesives can make or break your paper crafting experience!

If you have foam dimensionals on the back and need to do more stamping, you have to be a little more creative to solve the problem. Here’s a way to fix it. Place a sheet or partial sheet of dimensionals underneath, so the entire piece is level and supported by dimensionals. Then do your stamping.
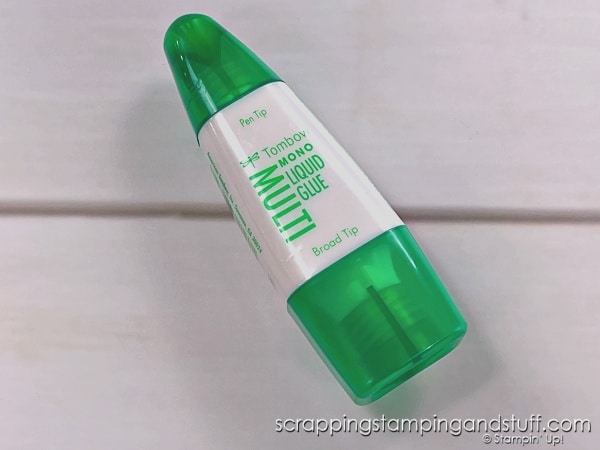
Click for my 10 best tips for card making adhesives! Adhesives can make or break your paper crafting experience!

Best Glue!

As a paper crafter, you definitely need a glue that you love. This Multipurpose Glue is my favorite! I love that it begins to set up in just seconds, so I don’t have to hold pieces in place for a long time before letting go. It’s also the best glue for the sponging trick I shared at the top.

Click for my 10 best tips for card making adhesives! Adhesives can make or break your paper crafting experience!

Glue Dots Are A Must Have

Glue Dots are…ESSENTIAL…for bows and other bulky items like buttons! They’re pre-dried sticky dots. Just place your bow against one of the glue dots while it is still on the roll, give it a press, and lift it away. Now it’s ready to stick on your project, and you won’t have to hold it in place and wait for glue to dry! I made a handy little dispenser for my Glue Dots, which helps a ton. See more about this here. See all of my best tips for Glue Dots here!

Click for my 10 best tips for card making adhesives! Adhesives can make or break your paper crafting experience!

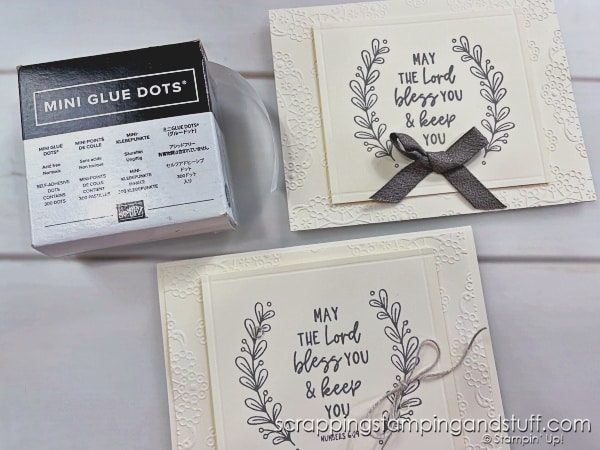
Is the Glue Dot too large for a twine bow? Just roll it up, kind of like a hot dog bun, and it will be the right size!

Get Glue Or Tape On Your Project?

If you have a bit of sticky on your project, just run over it with your Embossing Buddy. The powder will cling to it, and the stick will disappear. Learn how to make your own Embossing Buddy here.

Click for my 10 best tips for card making adhesives! Adhesives can make or break your paper crafting experience!

Do you have a bit of glue or tape you need to remove from your project? An Adhesive Square will do the trick perfectly. Just rub back and forth with the corner of the square, and it will ball up the adhesive so you can pull it off. I found my Adhesive Square at the dollar store.

Click for my 10 best tips for card making adhesives! Adhesives can make or break your paper crafting experience!

I have a couple more quick tips before we wrap this up!

Tape Isn’t Holding Your Project?

If you need something super-strong for a 3D card or treat box, Tear & Tape is what you need! I love it.

Click for my 10 best tips for card making adhesives! Adhesives can make or break your paper crafting experience!

The All-Purpose Tool For Adhesives

The Take Your Pick tool serves all kind of purposes. I love to use it to pick up and place foam dimensionals on my projects, and it can also be used to remove the paper backing from them. This is so helpful if you have arthritis or problems with your hands.

Click for my 10 best tips for card making adhesives! Adhesives can make or break your paper crafting experience!

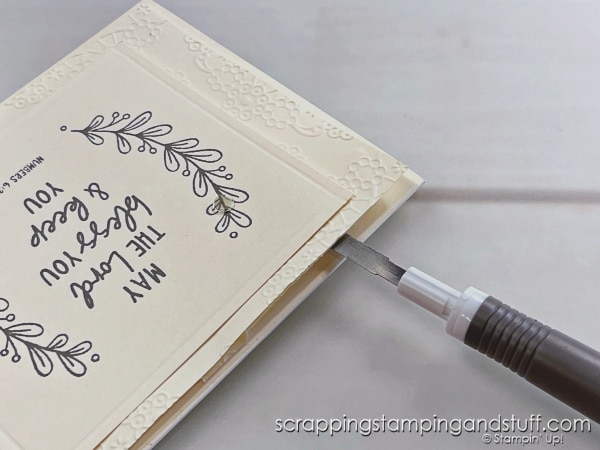
If you need to remove a piece of paper from your project after you have adhered it, you can use the spatula tip to carefully lift it without causing any tears.

Click for my 10 best tips for card making adhesives! Adhesives can make or break your paper crafting experience!

This tool has a million other uses too, and I shared some of them here.

Best Tips For Card Making Adhesives Video

Watch along here to see these tips in action and hear a bit of encouragement from me at the end!

Shop Adhesives & Supplies

Use these links to shop adhesives and supplies!

Product List
Silicone Craft Sheet
[127853]
Stampin' Seal
Stampin' Seal
[152813]
Stampin' Seal+
Stampin' Seal+
[149699]
Tear & Tape Adhesive
[138995]
Stampin' Dimensionals
[104430]
Mini Stampin' Dimensionals
[144108]
Take Your Pick
Take Your Pick
[144107]
Embossing Additions Tool Kit
[159971]
Multipurpose Liquid Glue
[110755]
Fine-Tip Glue Pen
Fine-Tip Glue Pen
[138309]
Mini Glue Dots
Mini Glue Dots
[103683]
Adhesive Sheets
Adhesive Sheets
[152334]
Heartfelt Hexagon Punch
[162888]
Heartfelt Hexagon Photopolymer Stamp Set (English)
[162882]
Wanted To Say Dies
Wanted To Say Dies
[161594]
Stampin' Cut & Emboss Machine
[149653]
Gold Foiled Flowers Cards & Envelopes
[162589]
Add All to Cart

Learn To Make Cards
Shop Supplies
Rewards Program
Join My Amazing Team

Thanks for visiting today! I hope you learned a thing or two from my best tips for card making adhesives!

Sharing is caring!

Filed Under: Featured Products, Gallery Tagged With: adhesives

Previous Post: « Use Your Paper Stash With These 50 Card Ideas!
Next Post: Stampin Up Perennial Lavendar & 9 Cards In 20 Minutes! »

Reader Interactions

Comments

  1. Sue Floyd says

    February 22, 2024 at 9:25 AM

    Great tips Anna! I’m a seasoned stamper, and some were new to me.
    So glad you’re back doing blog posts and videos.
    You are truly as gift, and I so appreciate all you share.
    I totally appreciate that family matters come first, so always take care of you and yours.
    Life is beautiful, and so are you!
    Sue

    Reply

Leave a Reply Cancel reply

Your email address will not be published. Required fields are marked *

Recipe Rating


Primary Sidebar

Anna Helman

Independent Stampin' Up!® Demonstrator

  • Email
  • Facebook
  • Facebook Group
  • Instagram
  • Pinterest
  • RSS
  • Twitter
  • YouTube
Shop Stampin' Up!
Stampin' Up! catalogs
get updates
join Stampin' Up!
Stampin' Up! Rewards
Stampin' Up! special offers
Stampin' Up! clearance
Stampin' Up! 2025-2026 Annual Catalog
May 6, 2025 - May 4, 2026
View Online | Shop Online

Blog Archive

Categories

Footer

Important Links

  • Home
  • Shop Now
  • Get Updates
  • Join My Team
  • Rewards
  • Specials
  • Catalogs
  • Clearance

Anna Helman, Independent Stampin' Up!® Demonstrator

  • Email
  • Facebook
  • Facebook Group
  • Instagram
  • Pinterest
  • RSS
  • Twitter
  • YouTube

Get Ideas, Inspiration, and Special Offers!

Sign up to receive updates in your inbox

Thank you!

Please check your email for a special offer! 

.
All content on this blog is the property of Anna Helman, Stampin' Up!® Independent Demonstrator. Classes, services and projects offered here are not endorsed by Stampin' Up!® Projects, videos, photos, ideas and articles are shared for personal use only and may not be removed, duplicated or copied without permission. All artwork © Stampin' Up!®

Copyright © 2025 Anna Helman, handmake with love · Site Design by Catherine Carroll