• Nav Social Menu

    • Facebook
    • Facebook Group
    • Instagram
    • Pinterest
    • RSS
    • Twitter
    • YouTube

Handmake with Love

Anna Helman | formerly Scrapping, Stamping and Stuff

  • Blog
  • Start Here
    • About Me
    • Learn to Make Cards
    • Why Shop With Me?
    • Testimonials
    • Connect On Social
    • Get Email Updates
    • Stampin’ Up! Giveaway Winners
  • Products
    • Shop Now
    • Catalogs
    • Clearance
    • Why Choose Stampin Up?
    • Paper Pumpkin Kits
    • Product Shares
    • Rewards Program
    • Stamparatus
    • Cut And Emboss Machine
    • Mini Cut And Emboss Machine
    • Blends Alcohol Markers
    • Blending Brushes
  • Ideas
    • Video Tutorials
    • Project Gallery
    • Card Ideas
    • 3D Projects
    • Scrapbooking
    • Tips & Techniques
    • Kits
    • Learn to Make Cards
    • Printable Catalog Tabs
    • Social Media
  • Join
    • Join My Team
    • Stampin Up Demonstrator Resources
  • Classes
    • Classes in the Mail
    • In Person Events
  • Contact
    • Contact
    • Connect On Social

How To Reverse Stamp With The Mirror Stamping Technique

30 Jul

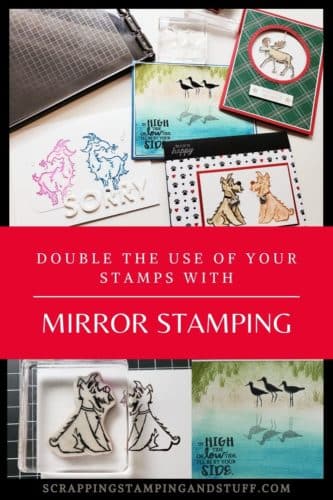
Welcome! I hope you are having a wonderful day. I have a really neat trick to share with you today to basically double the use of the stamps in your collection. It is called mirror stamping or reverse stamping, and it involves taking a stamp that faces one direction and making it stamp the other. It’s almost like magic! You’ll need a Stamparatus and silicone craft mat to make it work, plus your stamps and ink. That’s it! Let’s get started and I’ll share much more!

Double The Use of Stamps In Your Collection With The Mirror Stamping Technique. How To Reverse Stamp An Image With The Stamparatus

What Is It?

Mirror stamping, also known as reverse stamping, is taking a rubber or photopolymer stamp and achieving a stamped image that is actually the reverse, mirror image, or reflection of the original.

Double The Use of Stamps In Your Collection With The Mirror Stamping Technique. How To Reverse Stamp An Image With The Stamparatus

Why Use Reverse Images?

First, because this is a really fun technique to try! It’s always exciting to try new and different ways of stamping, and when using this technique, you can do so much more with the stamps in your collection. Here are a few specific reasons you may want to stamp a reverse image:

  • For proper positioning of an image on your project. Sometimes it just looks better (or fits better) to have that one thing facing left instead of right.
  • To create a scene with two of your images facing each other or facing apart. This is often done with stamps of animals and people.
  • To create double sided punches or die cuts, with the stamped image on both sides. This is simple to do without mirror stamping if your image is symmetrical, but when it is not, mirror stamping will allow it to be possible.
  • To stamp an image and then show its reflection in water, a window, or a mirror.

Card Ideas

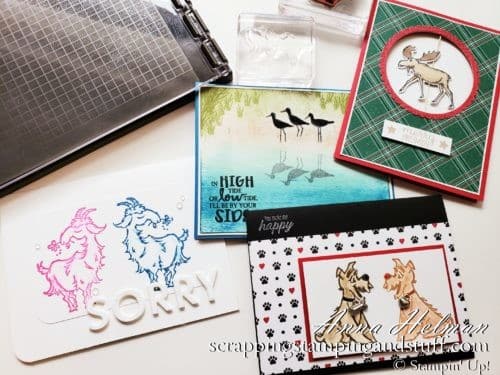
You can create amazing cards with this technique. Let’s look at a few.

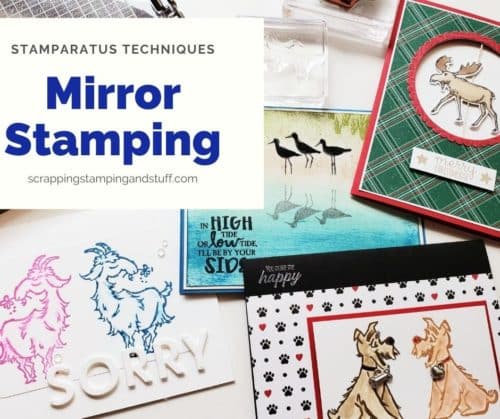
This is a spinner card that I created using our Merry Moose stamp set and coordinating punch.

Double The Use of Stamps In Your Collection With The Mirror Stamping Technique. How To Reverse Stamp An Image With The Stamparatus

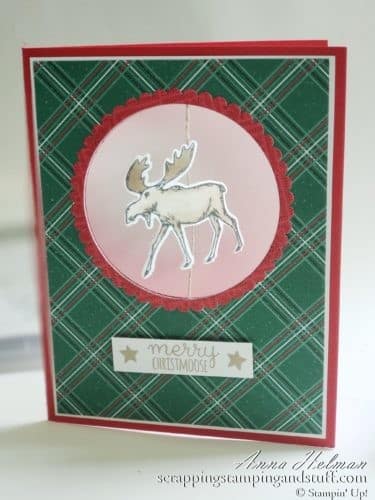
The punched moose faces left on the front side, and for the piece on the back he faces right. Neat, huh?

Double The Use of Stamps In Your Collection With The Mirror Stamping Technique. How To Reverse Stamp An Image With The Stamparatus

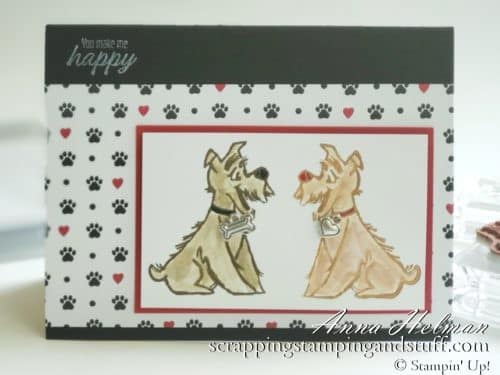
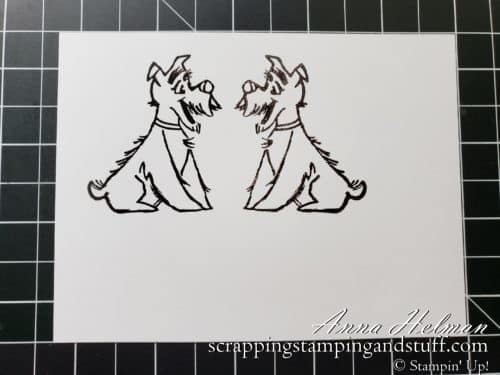
On the card below, I wanted these cute pups to be facing each other and looking madly ‘in like.’ I’ll demonstrate how to get this look below.

Double The Use of Stamps In Your Collection With The Mirror Stamping Technique. How To Reverse Stamp An Image With The Stamparatus

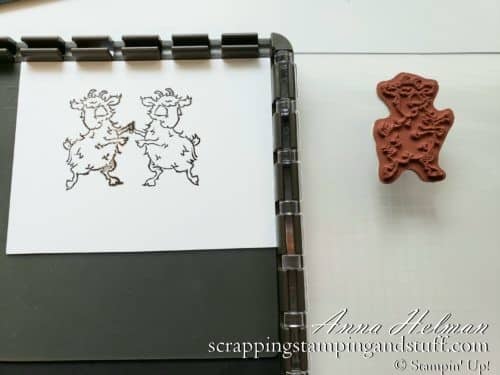
These goats were mad at each other, but one of them is ready to say ‘sorry.’

Double The Use of Stamps In Your Collection With The Mirror Stamping Technique. How To Reverse Stamp An Image With The Stamparatus

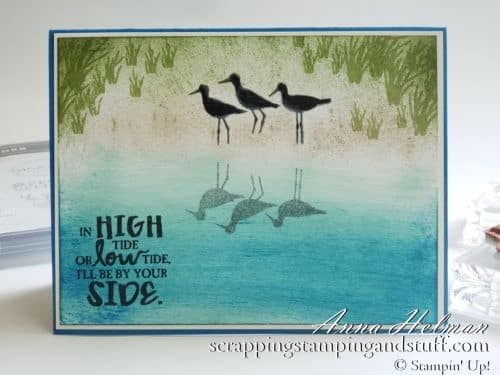
Here is a card showing how you can use this technique for reflected images. Reflections in water are such a gorgeous technique.

Double The Use of Stamps In Your Collection With The Mirror Stamping Technique. How To Reverse Stamp An Image With The Stamparatus

Ok, let’s talk about how to do this fun mirror stamping technique!

Materials Needed

All you need is a Stamparatus, a silicone craft sheet, stamps, and ink.

Video Tutorial

Watch along below to see exactly how to reverse stamp, or keep reading for more information!

How Do I Reverse Stamp An Image?

If you will be using rubber stamps, make sure to remove the foam mat from your Stamparatus. If you are using photopolymer stamps, leave the foam mat in place.

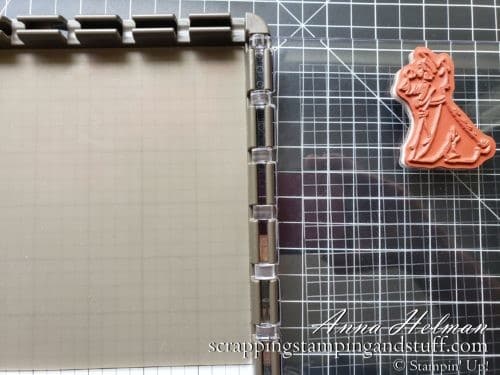
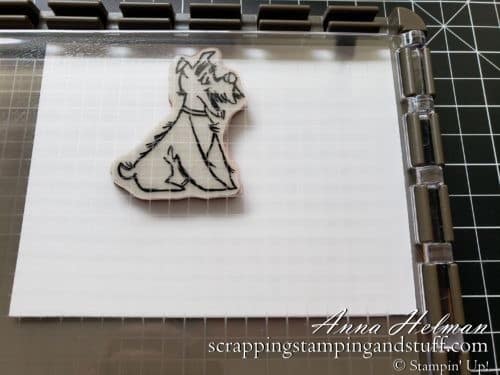
Lay the silicone craft sheet in the corner of the platform, and place your stamp on top.

Double The Use of Stamps In Your Collection With The Mirror Stamping Technique. How To Reverse Stamp An Image With The Stamparatus

Rotate the plate over to pick up the stamp. Rotate it back outward.

Double The Use of Stamps In Your Collection With The Mirror Stamping Technique. How To Reverse Stamp An Image With The Stamparatus

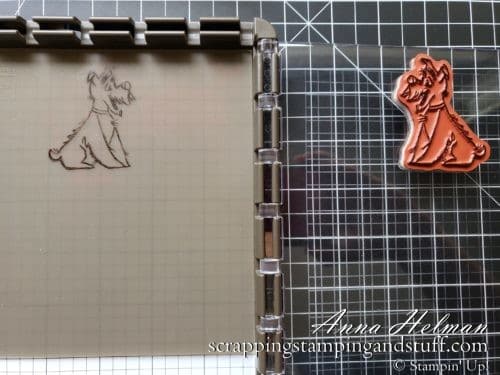
Ink the stamp, then stamp directly onto the silicone mat. Repeat if desired to get better coverage.

Double The Use of Stamps In Your Collection With The Mirror Stamping Technique. How To Reverse Stamp An Image With The Stamparatus

Carefully, lay your cardstock over top of the silicone sheet. Be very careful to lay the paper straight down and not to smudge the ink.

Stamp one more time.

Double The Use of Stamps In Your Collection With The Mirror Stamping Technique. How To Reverse Stamp An Image With The Stamparatus

You now have the original image on the top of your cardstock, and the reverse image on the back.

Double The Use of Stamps In Your Collection With The Mirror Stamping Technique. How To Reverse Stamp An Image With The Stamparatus

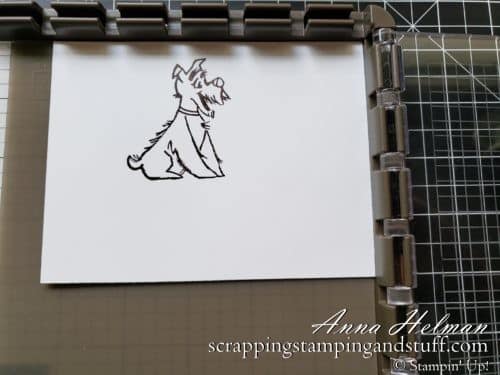
Carefully remove the cardstock, to avoid smudging on the back side. See the dog facing left? That’s my mirror image. For this project, I’ll add another dog looking right and now they’re happily facing each other 🙂

Double The Use of Stamps In Your Collection With The Mirror Stamping Technique. How To Reverse Stamp An Image With The Stamparatus

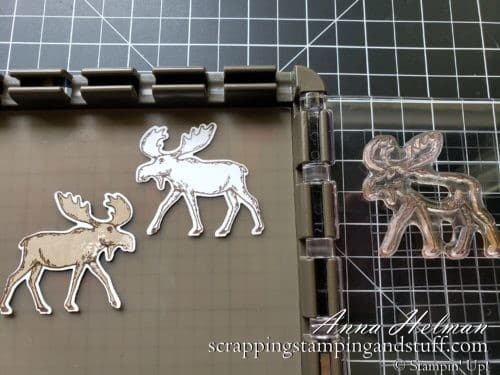
Because you have the exactly same image on both sides of the cardstock, you can punch of die cut these image as well. It wouldn’t work to punch or die cut the reverse image, but when you do it on the side with the original, it work’s perfectly!

Double The Use of Stamps In Your Collection With The Mirror Stamping Technique. How To Reverse Stamp An Image With The Stamparatus

Tips For Mirror Stamping

Here are a few tips that may help as you are trying this technique:

  • This technique works well with thin, detailed, or outline stamps. It does not work as well with solid stamps.
  • If you stamp a solid stamp and it doesn’t stamp evenly, use a Stampin’ Write marker to fill in the image. (I did this with the bird card)
  • If you are planning to ‘create a scene’ with your reverse image, I suggest starting with cardstock that is much larger than your image. Stamp the image in the center, then you have space all around to create the scene. When done, trim off the extra cardstock. The reason I suggest this is that planning your scene in the reverse direction on the back side of your cardstock is tricky to think through if you’re not using extra cardstock.

Double The Use of Stamps In Your Collection With The Mirror Stamping Technique. How To Reverse Stamp An Image With The Stamparatus

I would LOVE to see what you create with this technique. Send over some pics when you try it out!

Double The Use of Stamps In Your Collection With The Mirror Stamping Technique. How To Reverse Stamp An Image With The Stamparatus

Please make me your Stampin’ Up! demonstrator! Order from me using the product links at the bottom! Earn rewards points towards free stamps PLUS a gift when you order using July host code: 6XFARQP4. PLUS, with your first order, you’ll receive free catalogs in your thank you package!

Holiday Catalog Product Shares Available For A Limited Time Only!

Stampin Up 2020 Holiday Catalog Product Shares

Sign Up For My Upcoming Virtual Card Classes!

Order the products I used and make this project yourself!

Stamparatus

Stamparatus
[146276]

Silicone Craft Sheet

Silicone Craft Sheet
[127853]

Simply Shammy

Simply Shammy
[147042]

Pampered Pets Bundle

Pampered Pets Bundle
[154069]

Merry Moose Bundle

Merry Moose Bundle
[153015]

Way To Goat Cling Stamp Set (English)

Way To Goat Cling Stamp Set (English)
[152657]
Sharing is caring!

Filed Under: Cards, Gallery Tagged With: 2020-2021 Annual Catalog, high tide, merry moose stamp set, moose punch, pampered pets stamp set, playful aphabet dies, stamparatus, way to goat stamp set

Previous Post: « The Stamparatus Stamp Positioning Tool
Next Post: Stitched Nested Label Die Desk Organizer And Mini Calendar Tutorial »

Reader Interactions

Comments

  1. Sandra Neff says

    December 6, 2021 at 4:38 PM

    I am just checking on an order I got the pad to do a reverse stamp that I saw you displayed on a video Sandra.neff69@yahoo.com. Thank you

    Reply
  2. Beth says

    January 10, 2023 at 12:00 PM

    Exactly tutorial, thank you

    Reply
    • Anna Helman says

      January 10, 2023 at 12:11 PM

      You’re welcome!

      Reply

Trackbacks

  1. Stampin Up Quite Curvy Special Release Now Available For Ordering! says:
    November 3, 2020 at 12:19 PM

    […] I used the mirror stamping technique to make this card. Learn about mirror stamping here. […]

    Reply
  2. Stampin Up Sweet Little Stockings For Festive Fur Baby Projects! says:
    July 31, 2021 at 5:01 AM

    […] created this one using the Pampered Pets stamp set and the mirror stamping technique with our amazing Stamparatus stamp positioning […]

    Reply
  3. Papercraft from A to Z: R - TPC Magazine says:
    October 29, 2022 at 10:29 AM

    […] Reverse stamping is to stamp an image so it faces in one direction and then stamp it again facing in the opposite direction. Also called Mirror Stamping. See example here: How to Reverse Stamp with the Mirror Stamping Technique […]

    Reply

Leave a Reply Cancel reply

Your email address will not be published. Required fields are marked *

Recipe Rating


Primary Sidebar

Anna Helman

Independent Stampin' Up!® Demonstrator

  • Email
  • Facebook
  • Facebook Group
  • Instagram
  • Pinterest
  • RSS
  • Twitter
  • YouTube
Shop Stampin' Up!
Stampin' Up! catalogs
get updates
join Stampin' Up!
Stampin' Up! Rewards
Stampin' Up! special offers
Stampin' Up! clearance
Stampin' Up! 2025-2026 Annual Catalog
May 6, 2025 - May 4, 2026
View Online | Shop Online

Blog Archive

Categories

Footer

Important Links

  • Home
  • Shop Now
  • Get Updates
  • Join My Team
  • Rewards
  • Specials
  • Catalogs
  • Clearance

Anna Helman, Independent Stampin' Up!® Demonstrator

  • Email
  • Facebook
  • Facebook Group
  • Instagram
  • Pinterest
  • RSS
  • Twitter
  • YouTube

Get Ideas, Inspiration, and Special Offers!

Sign up to receive updates in your inbox

Thank you!

Please check your email for a special offer! 

.
All content on this blog is the property of Anna Helman, Stampin' Up!® Independent Demonstrator. Classes, services and projects offered here are not endorsed by Stampin' Up!® Projects, videos, photos, ideas and articles are shared for personal use only and may not be removed, duplicated or copied without permission. All artwork © Stampin' Up!®

Copyright © 2025 Anna Helman, handmake with love · Site Design by Catherine Carroll