• Nav Social Menu

    • Facebook
    • Facebook Group
    • Instagram
    • Pinterest
    • RSS
    • Twitter
    • YouTube

Handmake with Love

Anna Helman | formerly Scrapping, Stamping and Stuff

  • Blog
  • Start Here
    • About Me
    • Learn to Make Cards
    • Why Shop With Me?
    • Testimonials
    • Connect On Social
    • Get Email Updates
    • Stampin’ Up! Giveaway Winners
  • Products
    • Shop Now
    • Catalogs
    • Clearance
    • Why Choose Stampin Up?
    • Paper Pumpkin Kits
    • Product Shares
    • Rewards Program
    • Stamparatus
    • Cut And Emboss Machine
    • Mini Cut And Emboss Machine
    • Blends Alcohol Markers
    • Blending Brushes
  • Ideas
    • Video Tutorials
    • Project Gallery
    • Card Ideas
    • 3D Projects
    • Scrapbooking
    • Tips & Techniques
    • Kits
    • Learn to Make Cards
    • Printable Catalog Tabs
    • Social Media
  • Join
    • Join My Team
    • Stampin Up Demonstrator Resources
  • Classes
    • Classes in the Mail
    • In Person Events
  • Contact
    • Contact
    • Connect On Social

Two Ways to Add Glitter to Your Papercrafting Projects

25 Oct

Yesterday I shared a beautiful Christmas card that I made for a card swap that will be held during my Rising Star trip to the Stampin’ Up! Home Office this week. When I was creating those cards, I tried out two different ways of adding glitter to cover the entire front of my card. I had a customer asking about this technique earlier this week, so I thought I would share the process for each method and the difference in how they will look!

First off, isn’t this beautiful?

Two Ways to Add Glitter to Your Papercrafting Projects using Iridescent Ice Embossing Powder and Heat & Stick Powder

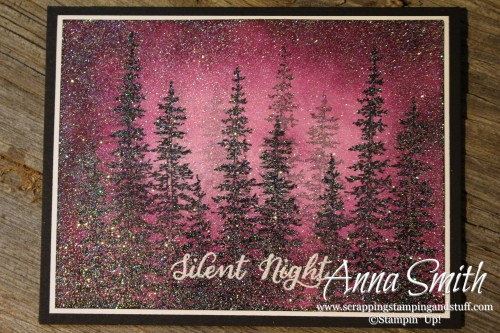
Doesn’t that make you want to add glitter to some of your projects? Here are the two methods that I used:

Iridescent Ice Embossing Powder

  • Stamp your card as desired.
  • Place a Versamark ink pad directly on top of your stamped cardstock. Do this a few times until your cardstock is entirely covered with Versamark.
  • Sprinkle Iridescent Ice embossing powder over the entire surface and shake off the excess.
  • Heat with a heat tool until the powder is melted and set. This takes a little time. Make sure to keep heating it until it is fully set.

Heat & Stick Powder with Glitter

  • Stamp your card as desired.
  • Place a Versamark ink pad directly on top of your stamped cardstock. Do this a few times until your cardstock is entirely covered with Versamark.
  • Sprinkle Heat & Stick powder over the entire surface and shake off the excess.
  • Heat with a heat tool until the powder is melted and sticky. Don’t overheat it. Once it’s sticky, move on to the next step!
  • Sprinkle Dazzling Diamonds glitter over the surface of the card and shake off the excess.
  • Heat it one more time to get the glitter fully ‘stuck.’

If you haven’t heard of Heat & Stick Powder, it is located in the Stampin’ Up! catalog beside the embossing powders, or you can check it out here.

These two techniques will give slightly different results. Basically the Iridescent Ice Embossing Powder will give a darker color than your stamped image, while the Heat & Stick Powder with glitter will give a slightly lighter color than your stamped image. Here is a side by side comparison to show you the difference.

Two Ways to Add Glitter to Your Papercrafting Projects using Iridescent Ice Embossing Powder and Heat & Stick Powder

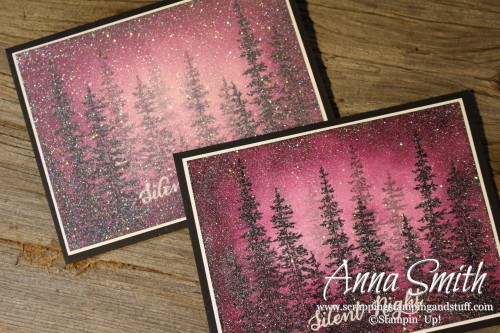
I used Heat & Stick Powder with glitter for the top left card, and Iridescent Ice embossing powder for the bottom right card. As you can see, the glitter gives a lighter frostier appearance, while the embossing powder gives a darker sparkly look.

For details on how I stamped the trees and the purple background, click here.

Use the links below to check out the supplies I used and do some shopping! Use hostess code HTHNWWZ3 and I will send you a free gift! Even better, sign up for stamp club and you will get free projects and free stamps!

Built for Free Using: My Stampin Blog

Sharing is caring!

Filed Under: Cards

Previous Post: « Blackberry Bliss Silent Night Card
Next Post: Rising Star Trip Day 1 »

Reader Interactions

Trackbacks

  1. Peaceful Pines Christmas Card - Scrapping Stamping and Stuff says:
    November 1, 2015 at 6:20 PM

    […] and cut them out on the Big Shot, I added the glitter on top using the second method described in this […]

    Reply

Leave a Reply Cancel reply

Your email address will not be published. Required fields are marked *

Recipe Rating


Primary Sidebar

Anna Helman

Independent Stampin' Up!® Demonstrator

  • Email
  • Facebook
  • Facebook Group
  • Instagram
  • Pinterest
  • RSS
  • Twitter
  • YouTube
Shop Stampin' Up!
Stampin' Up! catalogs
get updates
join Stampin' Up!
Stampin' Up! Rewards
Stampin' Up! special offers
Stampin' Up! clearance
Stampin' Up! 2025-2026 Annual Catalog
May 6, 2025 - May 4, 2026
View Online | Shop Online

Blog Archive

Categories

Footer

Important Links

  • Home
  • Shop Now
  • Get Updates
  • Join My Team
  • Rewards
  • Specials
  • Catalogs
  • Clearance

Anna Helman, Independent Stampin' Up!® Demonstrator

  • Email
  • Facebook
  • Facebook Group
  • Instagram
  • Pinterest
  • RSS
  • Twitter
  • YouTube

Get Ideas, Inspiration, and Special Offers!

Sign up to receive updates in your inbox

Thank you!

Please check your email for a special offer! 

.
All content on this blog is the property of Anna Helman, Stampin' Up!® Independent Demonstrator. Classes, services and projects offered here are not endorsed by Stampin' Up!® Projects, videos, photos, ideas and articles are shared for personal use only and may not be removed, duplicated or copied without permission. All artwork © Stampin' Up!®

Copyright © 2025 Anna Helman, handmake with love · Site Design by Catherine Carroll