• Nav Social Menu

    • Facebook
    • Facebook Group
    • Instagram
    • Pinterest
    • RSS
    • Twitter
    • YouTube

Handmake with Love

Anna Helman | formerly Scrapping, Stamping and Stuff

  • Blog
  • Start Here
    • About Me
    • Learn to Make Cards
    • Why Shop With Me?
    • Testimonials
    • Connect On Social
    • Get Email Updates
    • Stampin’ Up! Giveaway Winners
  • Products
    • Shop Now
    • Catalogs
    • Clearance
    • Why Choose Stampin Up?
    • Paper Pumpkin Kits
    • Product Shares
    • Rewards Program
    • Stamparatus
    • Cut And Emboss Machine
    • Mini Cut And Emboss Machine
    • Blends Alcohol Markers
    • Blending Brushes
  • Ideas
    • Video Tutorials
    • Project Gallery
    • Card Ideas
    • 3D Projects
    • Scrapbooking
    • Tips & Techniques
    • Kits
    • Learn to Make Cards
    • Printable Catalog Tabs
    • Social Media
  • Join
    • Join My Team
    • Stampin Up Demonstrator Resources
  • Classes
    • Classes in the Mail
    • In Person Events
  • Contact
    • Contact
    • Connect On Social

Tuesday Tip: How to Line Up Stamps for Builder Punches

13 Dec

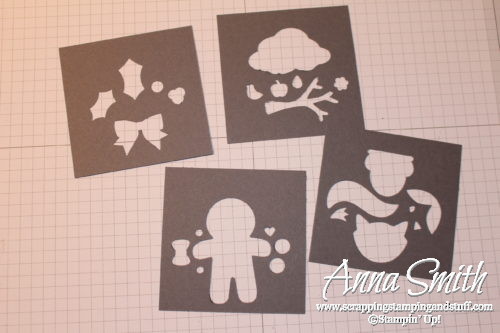
It’s time for a Tuesday tip! This one can be really time-saving if you use any of the Stampin’ Up! builder punches, like the fox builder, holly berry builder, tree builder, or cookie cutter builder. For those of you who have stamped images and then punched them out with these punches, you probably know it can be fairly time consuming to get all the pieces and parts stamped, lined up, and punched. Today’s tip will hopefully save you a lot of time, effort, and paper from being wasted! I’ll share two helpful ways to line up stamps for builder punches.

The first thing you need to do is create what I’ll call a punch flash card (this sounded more fun than calling it a plain old punch card). Cut some cardstock to 3×3 or 4×4 and punch in the center of it.

Really helpful tip! How to line up stamps for Stampin' Up! builder punches like the fox builder, cookie cutter builder, and tree builder punches.

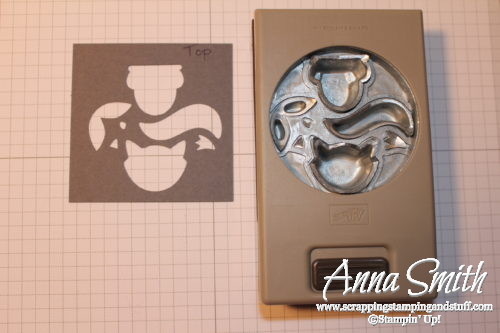
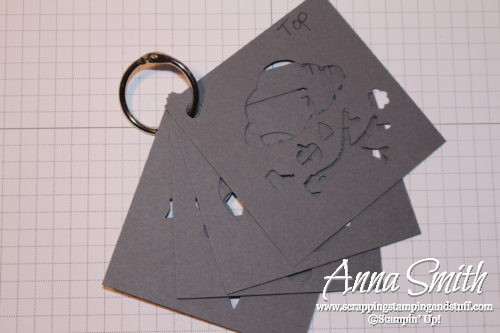
Next, label the top and bottom of the flash card. A better choice of words might be ‘front’ and ‘back.’ Basically, you need to know which side of your flash card to have face for the following steps. You want the ‘top’ or ‘front’ to be in the same orientation as when you look at the back of your punch, as shown below. When lined up the same as the punch, label it ‘top’ or ‘front.’

Really helpful tip! How to line up stamps for Stampin' Up! builder punches like the fox builder, cookie cutter builder, and tree builder punches.

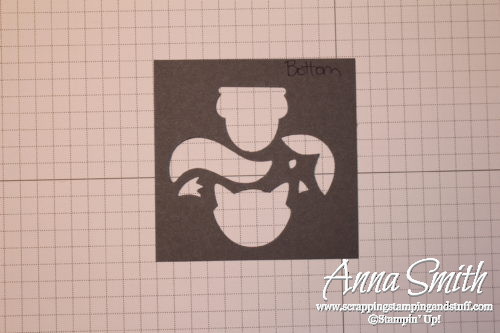
Next, flip the flash card over and label it ‘bottom’ or ‘back.’

Really helpful tip! How to line up stamps for Stampin' Up! builder punches like the fox builder, cookie cutter builder, and tree builder punches.

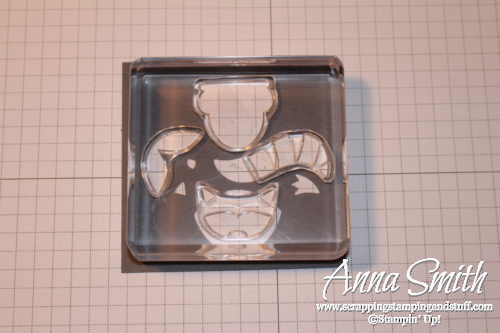
Here is the first way to use your flash card. Lay the stamps over it in the correct locations…

Really helpful tip! How to line up stamps for Stampin' Up! builder punches like the fox builder, cookie cutter builder, and tree builder punches.

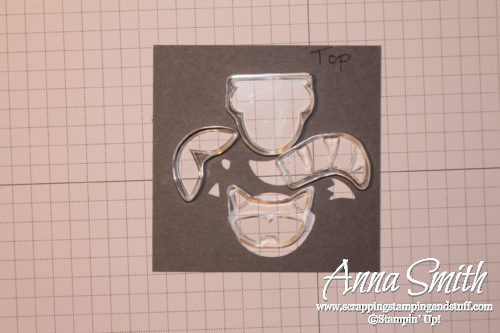
Then place your block on top. They’re all lined up to make it a snap to punch out after you have stamped!

Really helpful tip! How to line up stamps for Stampin' Up! builder punches like the fox builder, cookie cutter builder, and tree builder punches.

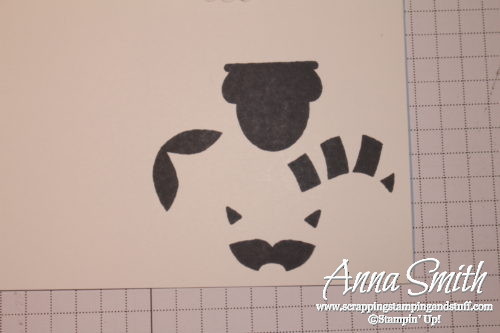
Below I stamped these images with Basic Gray.

Really helpful tip! How to line up stamps for Stampin' Up! builder punches like the fox builder, cookie cutter builder, and tree builder punches.

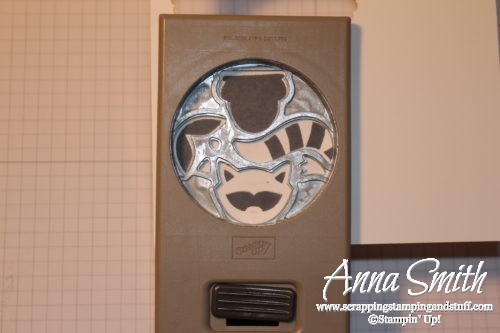
Then I lined up the punch and punched them out.

Really helpful tip! How to line up stamps for Stampin' Up! builder punches like the fox builder, cookie cutter builder, and tree builder punches.

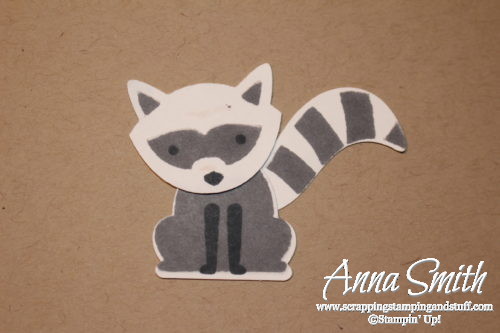
Now they’re ready to be assembled into the cute little raccoon! I stamped the eyes and legs afterwards in case you’re wondering.

Really helpful tip! How to line up stamps for Stampin' Up! builder punches like the fox builder, cookie cutter builder, and tree builder punches.

The method I just described works best if you’re stamping all in one color. Oftentimes you will want to stamp in different colors, so the next technique will work better for those situations.

Lay your flash card on top of the cardstock you plan to stamp onto (which will typically be white).

Really helpful tip! How to line up stamps for Stampin' Up! builder punches like the fox builder, cookie cutter builder, and tree builder punches.

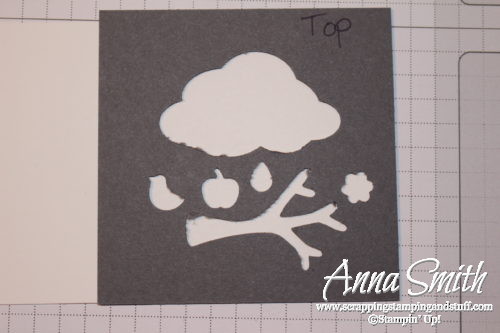
Use the flash card as a template to stamp your images, one at a time, in the correct locations. I chose to stamp the tree trunk, leaves, and flower.

Really helpful tip! How to line up stamps for Stampin' Up! builder punches like the fox builder, cookie cutter builder, and tree builder punches.

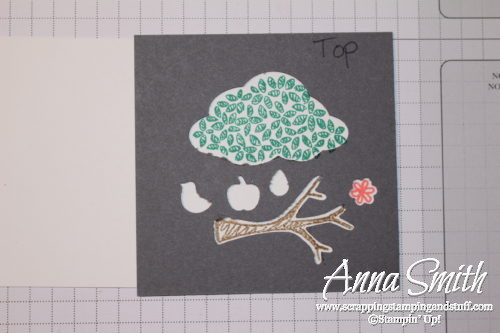
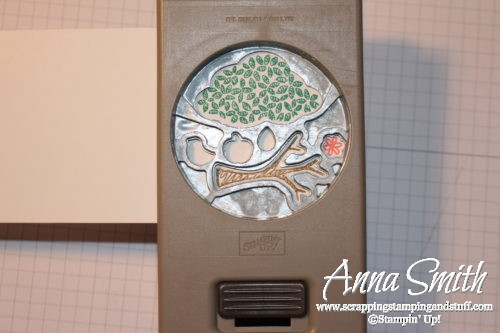
Next, line your stamped images up with the punch and punch them out.
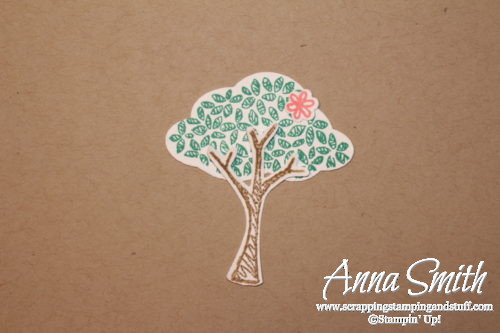
Really helpful tip! How to line up stamps for Stampin' Up! builder punches like the fox builder, cookie cutter builder, and tree builder punches.

And here’s a tree!

Really helpful tip! How to line up stamps for Stampin' Up! builder punches like the fox builder, cookie cutter builder, and tree builder punches.

These two methods could literally save you hours (or days) of time if you use these punches very often. Hopefully this will simplify the process enough so that you will choose to use these punches much more often!

I have two more tips. First, if you punch a hole in a top corner of all of your flash cards, you can use a ring clip to hold them together. I store mine like this with my punches so they’re always close by when I want to use a certain punch.

Really helpful tip! How to line up stamps for Stampin' Up! builder punches like the fox builder, cookie cutter builder, and tree builder punches.

Second, you could consider making a top layer for your flash cards out of clear plastic window sheets. This way they could be wiped off if you happen to stamp on them. Using only window sheets probably wouldn’t work, because they would be hard to see the punched holes, but layering window sheets on top of cardstock would work.

I hope this was helpful! If you ever have questions or ideas for future Tuesday Tips, please comment below or contact me!

Thanks for stopping in! Please shop with me and combine these offers to get great deals!

  • Shop year end closeouts with discounts up to 60% off here!
  • Use hostess code G9MQR3AV and I will send you a free gift!
  • Keep track of your Stampin’ Rewards and earn free stamps from me!
  • Any purchase of $150 or more will earn you hostess credit through Stampin’ Up!
  • Join online stamp club and get free products and projects.

 Order the products I used using the links below!

Holly Berry Builder Punch

Holly Berry Builder Punch
[141843]

Holly Berry Happiness Photopolymer Stamp Set

Holly Berry Happiness Photopolymer Stamp Set
[142061]

Holly Berry Happiness Photopolymer Bundle

Holly Berry Happiness Photopolymer Bundle
[143505]

Tree Builder Punch

Tree Builder Punch
[138295]

Sprinkles Of Life Photopolymer Stamp Set

Sprinkles Of Life Photopolymer Stamp Set
[139971]

Fox Builder Punch

Fox Builder Punch
[141470]

Foxy Friends Photopolymer Bundle

Foxy Friends Photopolymer Bundle
[142326]

Foxy Friends Photopolymer Stamp Set

Foxy Friends Photopolymer Stamp Set
[141549]

Cookie Cutter Builder Punch

Cookie Cutter Builder Punch
[140396]

Cookie Cutter Christmas Photopolymer Bundle

Cookie Cutter Christmas Photopolymer Bundle
[143493]

Neutrals 8-1/2" X 11" Card Stock

Neutrals 8-1/2″ X 11″ Card Stock
[131191]

Window Sheets

Window Sheets
[142314]

Sharing is caring!

Filed Under: Cards Tagged With: annual catalog 2016-2017, cookie cutter builder punch, fox builder punch, foxy friends, holly berry builder punch, sprinkles of life, tree builder punch, tuesday tip

Previous Post: « Beautiful Bokeh Card and Post It Note Cover
Next Post: Old Fashioned Greetings From Santa Card »

Reader Interactions

Comments

  1. Huey Tsao says

    October 31, 2017 at 10:17 PM

    Awesome tip! This makes so much sense that it ought to be included in the instructions of these punches. Thank you, Anna.

    Reply

Trackbacks

  1. Cardmaking Tip - Create A Punch Ring says:
    April 2, 2022 at 5:00 AM

    […] When you want to stamp and punch using builder punches, use the template to line up your stamps before attaching them to the block. You can get more details on this in today’s video or in my builder punch blog post here. […]

    Reply

Leave a Reply Cancel reply

Your email address will not be published. Required fields are marked *

Recipe Rating


Primary Sidebar

Anna Helman

Independent Stampin' Up!® Demonstrator

  • Email
  • Facebook
  • Facebook Group
  • Instagram
  • Pinterest
  • RSS
  • Twitter
  • YouTube
Shop Stampin' Up!
Stampin' Up! catalogs
get updates
join Stampin' Up!
Stampin' Up! Rewards
Stampin' Up! special offers
Stampin' Up! clearance
Stampin' Up! 2025-2026 Annual Catalog
May 6, 2025 - May 4, 2026
View Online | Shop Online

Blog Archive

Categories

Footer

Important Links

  • Home
  • Shop Now
  • Get Updates
  • Join My Team
  • Rewards
  • Specials
  • Catalogs
  • Clearance

Anna Helman, Independent Stampin' Up!® Demonstrator

  • Email
  • Facebook
  • Facebook Group
  • Instagram
  • Pinterest
  • RSS
  • Twitter
  • YouTube

Get Ideas, Inspiration, and Special Offers!

Sign up to receive updates in your inbox

Thank you!

Please check your email for a special offer! 

.
All content on this blog is the property of Anna Helman, Stampin' Up!® Independent Demonstrator. Classes, services and projects offered here are not endorsed by Stampin' Up!® Projects, videos, photos, ideas and articles are shared for personal use only and may not be removed, duplicated or copied without permission. All artwork © Stampin' Up!®

Copyright © 2025 Anna Helman, handmake with love · Site Design by Catherine Carroll