• Nav Social Menu

    • Facebook
    • Facebook Group
    • Instagram
    • Pinterest
    • RSS
    • Twitter
    • YouTube

Handmake with Love

Anna Helman | formerly Scrapping, Stamping and Stuff

  • Blog
  • Start Here
    • About Me
    • Learn to Make Cards
    • Why Shop With Me?
    • Testimonials
    • Connect On Social
    • Get Email Updates
    • Stampin’ Up! Giveaway Winners
  • Products
    • Shop Now
    • Catalogs
    • Clearance
    • Why Choose Stampin Up?
    • Paper Pumpkin Kits
    • Product Shares
    • Rewards Program
    • Stamparatus
    • Cut And Emboss Machine
    • Mini Cut And Emboss Machine
    • Blends Alcohol Markers
    • Blending Brushes
  • Ideas
    • Video Tutorials
    • Project Gallery
    • Card Ideas
    • 3D Projects
    • Scrapbooking
    • Tips & Techniques
    • Kits
    • Learn to Make Cards
    • Printable Catalog Tabs
    • Social Media
  • Join
    • Join My Team
    • Stampin Up Demonstrator Resources
  • Classes
    • Classes in the Mail
    • In Person Events
  • Contact
    • Contact
    • Connect On Social

Tuesday Tip: Getting Your Clear Mount Stamps to Stick

4 Oct

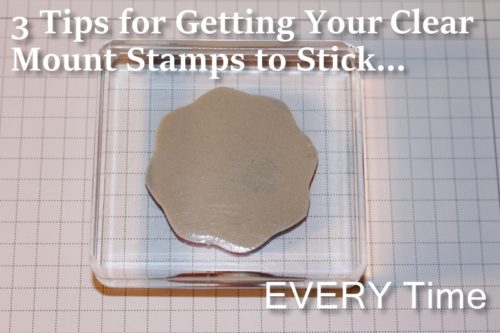
To all of you experienced stampers out there – do you use clear-mount, wood-mount or photopolymer stamps? Each has its advantages and disadvantages and I like each for different situations. Well, if you use clear-mount stamps and you’ve ever been frustrated with getting them to stick to your blocks, this post is for you. I have three suggestions for getting your clear mount stamps to stick using no additional materials besides scissors and a hole punch. Here they are.

These 3 tips will help with getting your clear mount stamps to stick every time!

Tip #1 – Don’t mount the sticker labels that come with your stamps. This is the “guaranteed to stick, really well, every time” suggestion. Some people have a hard time with the fact that you can’t see exactly what you’re stamping, since you’re looking at a blank stamp instead of an image of what’s on the stamp. I’ll admit, I have a hard time with this sometimes. With certain stamps it can be difficult to tell which direction you need to orient the stamp, or which direction is ‘level.’ If it’s a greeting stamp, getting it straight is pretty important! Regardless, leaving the labels off is the best way to get your stamps to stick really, really well.

3 tips for getting your clear mount stamps to stick every time!

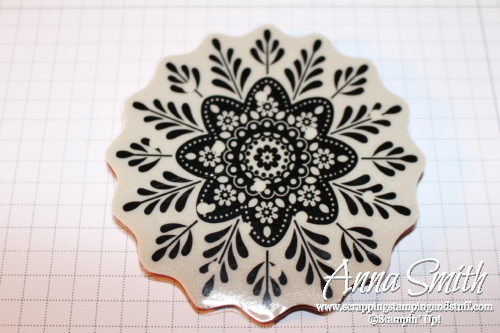
Tip #2 – Before mounting the labels to your stamps, use scissors to trim 1/8″ or more off of the edges.

3 tips for getting your clear mount stamps to stick every time!

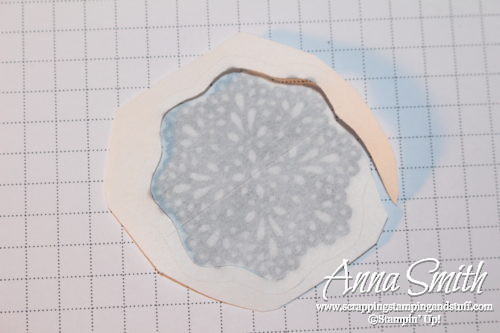
This allows the super-clingy foam on the stamp to come in contact with your block just around the edges, which is usually enough to keep it attached. If you look carefully in the photo below, you can see that the label does not go all the way to the edge of the stamp. The outer portion will cling really well to the block, helping keep the rest of it ‘stuck.’

3 tips for getting your clear mount stamps to stick every time!

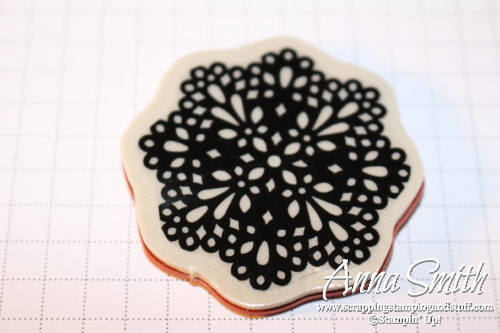
Tip #3 – Before mounting the label to your stamp, use a hole punch to punch out some holes from the label.

3 tips for getting your clear mount stamps to stick every time!
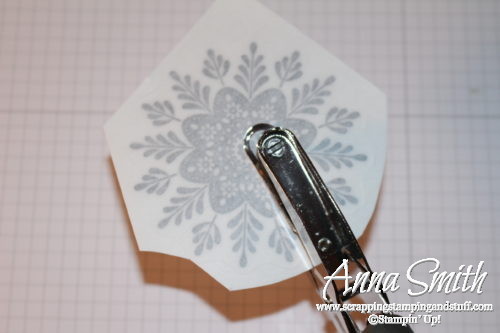
Just like with tip #2, these areas will allow contact to be made between the super sticky foam and the block. If you look carefully in the photo below, you can see where I punched holes out of the label. I would suggest using a 1/4″ standard hole punch instead of a 1/8″ punch, like the one I used. It will allow more area for the foam to cling to the block.

3 tips for getting your clear mount stamps to stick every time!

Are your sticker labels already mounted to the stamps and you want to try one of the ideas mentioned above? You can peel the labels off and alter them as you desire, then remount them. They will still stick after removing them, I promise. My daughter has an obsession with stickers, and it’s not unusual for me to find her peeling the stickers off of my stamps. I really can’t blame her for loving stamps. I just can’t.

Try this yourself and let me know if it’s helpful, or if you have other suggestions!

Product List

Paper Snips Scissors

Paper Snips Scissors
[103579]

1/8" Circle Handheld Punch

1/8″ Circle Handheld Punch
[134365]

Sharing is caring!

Filed Under: Cards

Previous Post: « World Cardmaking Day Sale!
Next Post: September Paper Pumpkin Kit – Something Good To Eat »

Reader Interactions

Comments

  1. Mary Kay Werry says

    October 8, 2016 at 1:25 PM

    love these ideas

    Reply

Leave a Reply Cancel reply

Your email address will not be published. Required fields are marked *

Recipe Rating


Primary Sidebar

Anna Helman

Independent Stampin' Up!® Demonstrator

  • Email
  • Facebook
  • Facebook Group
  • Instagram
  • Pinterest
  • RSS
  • Twitter
  • YouTube
Shop Stampin' Up!
Stampin' Up! catalogs
get updates
join Stampin' Up!
Stampin' Up! Rewards
Stampin' Up! special offers
Stampin' Up! clearance
Stampin' Up! 2025-2026 Annual Catalog
May 6, 2025 - May 4, 2026
View Online | Shop Online

Blog Archive

Categories

Footer

Important Links

  • Home
  • Shop Now
  • Get Updates
  • Join My Team
  • Rewards
  • Specials
  • Catalogs
  • Clearance

Anna Helman, Independent Stampin' Up!® Demonstrator

  • Email
  • Facebook
  • Facebook Group
  • Instagram
  • Pinterest
  • RSS
  • Twitter
  • YouTube

Get Ideas, Inspiration, and Special Offers!

Sign up to receive updates in your inbox

Thank you!

Please check your email for a special offer! 

.
All content on this blog is the property of Anna Helman, Stampin' Up!® Independent Demonstrator. Classes, services and projects offered here are not endorsed by Stampin' Up!® Projects, videos, photos, ideas and articles are shared for personal use only and may not be removed, duplicated or copied without permission. All artwork © Stampin' Up!®

Copyright © 2025 Anna Helman, handmake with love · Site Design by Catherine Carroll