• Nav Social Menu

    • Facebook
    • Facebook Group
    • Instagram
    • Pinterest
    • RSS
    • Twitter
    • YouTube

Handmake with Love

Anna Helman | formerly Scrapping, Stamping and Stuff

  • Blog
  • Start Here
    • About Me
    • Learn to Make Cards
    • Why Shop With Me?
    • Testimonials
    • Connect On Social
    • Get Email Updates
    • Stampin’ Up! Giveaway Winners
  • Products
    • Shop Now
    • Catalogs
    • Clearance
    • Why Choose Stampin Up?
    • Paper Pumpkin Kits
    • Product Shares
    • Rewards Program
    • Stamparatus
    • Cut And Emboss Machine
    • Mini Cut And Emboss Machine
    • Blends Alcohol Markers
    • Blending Brushes
  • Ideas
    • Video Tutorials
    • Project Gallery
    • Card Ideas
    • 3D Projects
    • Scrapbooking
    • Tips & Techniques
    • Kits
    • Learn to Make Cards
    • Printable Catalog Tabs
    • Social Media
  • Join
    • Join My Team
    • Stampin Up Demonstrator Resources
  • Classes
    • Classes in the Mail
    • In Person Events
  • Contact
    • Contact
    • Connect On Social

Refresh Your Ink Pads in 4 Simple Steps

30 Apr

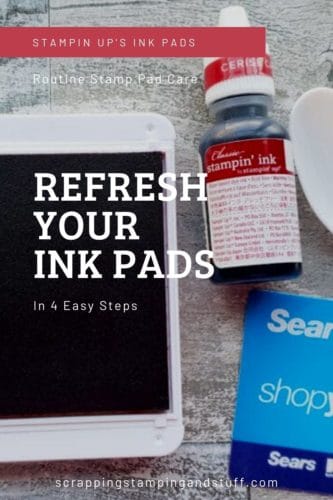
Hi and welcome! Today I have a great tip for you when it comes to the health and care of your ink pads. Did you know that by caring correctly for your ink pads, it can extend the life of them and improve the quality of your stamping? That’s why I want to share with you the routine I use when refreshing my own ink pads. Let’s take a look!

Refresh your ink pads in four simple steps, and they'll be looking and working like new! You'll love the amazing results!

Before we talk about refreshing ink pads, I would love to mention a few of the benefits of using Stampin Up ink pads for your crafting needs.

Benefits of Stampin Up Ink Pads

There are quite a few benefits to using Stampin Up’s ink pads, and I’ve listed a few below:

Large Stamping Area

Stampin Up’s ink pads are large. This is beneficial because it allows easier inking of larger size stamps.

Refills

Ink refill bottles are available. This allows you to continue using your ink pads for years and years. (Cost saver!)

Store Upside Down

This is such a great feature of our ink pads. They are designed to store the ink surface upside down so all the ink is at the surface of the pad when you open it to use it (see video for explanation).

Lock Shut

This is a huge benefit if you have young children around the house or if you have fumbly hands. If they get dropped, the lid won’t come off and if small hands find them, they require special skill to open!
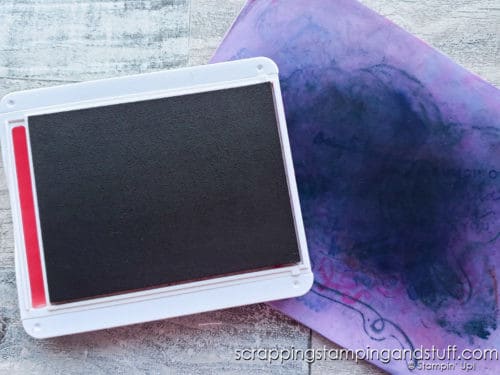
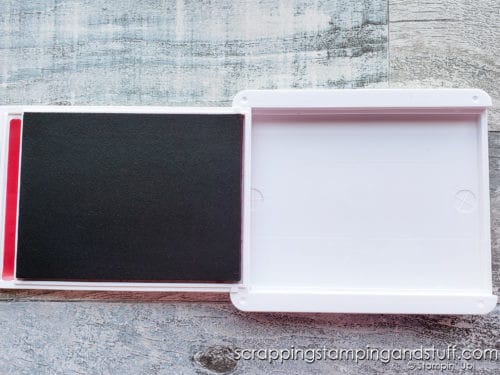
Color Labels

I love that these pads come with several color labels. One can be placed on the front of the pad to make it easy to see what color the pad is, even from the side. Another label can be placed on the inside, just next to the ink surface, to be visible when the ink pad is open (see below). One can also be placed on the re-inker bottle for easy identification. You’ll still have two more labels to use for markers, blending brushes, sponges, spritzer bottles, or other items.

Next, let’s take a look at why refreshing ink pads is important!

Why Refresh Ink Pads?

There are four steps I always take when caring for and refreshing my ink pads. It’s nice to do a little ‘tune-up’ every once in a while to help the pads last longer, and to improve the quality of your stamped images. A Healthy Ink Pad = A Happy Stamper 😁

Refresh your ink pads in four simple steps, and they'll be looking and working like new! You'll love the amazing results!

Now let’s talk about how to refresh those ink pads!

4 Steps To Refresh Ink Pads

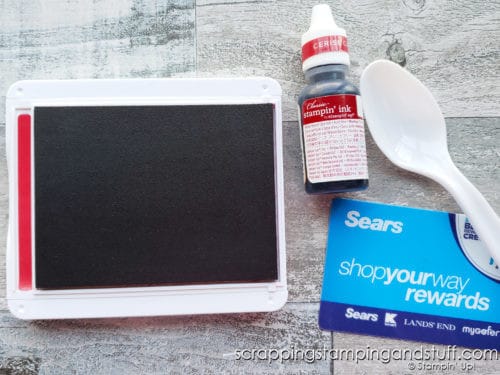
There are four steps I take when refreshing my ink pads. Here they are:
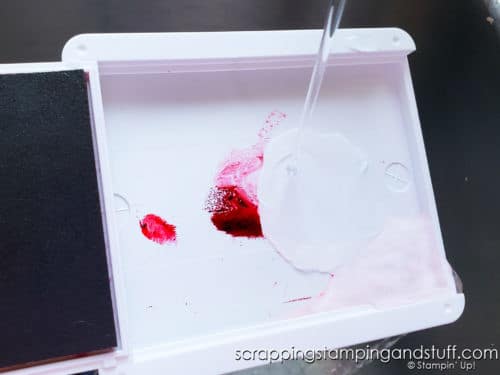
1. Rinse

Rinsing is the first step I take when refreshing my ink pads. I like to use the lid of my pads for picking up ink with my Water Painters. When I do, it leaves a mess of ink sitting in the lid of my pad. To clean this up, I simply rinse the lid of my ink pad (making sure not to get the actual pad wet) under running water. This cleans the lid up very nicely. Then I can dry it out with a rag or paper towel.

Refresh your ink pads in four simple steps, and they'll be looking and working like new! You'll love the amazing results!

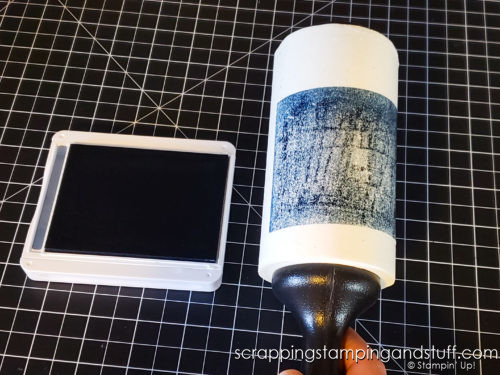
The lid is clean…next it’s time to lint roll!

2. Lint Roll

The next step to update your ink pads is removing any built up lint or fibers that stick to the pad itself. Paper fibers or fuzzies will stick to ink pads, especially if you use baby wipes to clean your stamps (Tip – use a Shammy instead!). Having lint and other materials stuck in your ink pad can be frustrating, because it affects the quality of your stamping. My solution to this is simple — a lint roller! To use it, simply expose a new sheet on the lint roller and gently roll over the ink pad, picking up unwanted fibers and lint.

Remove lint from ink pads fast with what you say? A lint roller? Try this trick today and clean up those messy pads!

3. Re-ink

After cleaning the surface of the pad with a lint roller, I re-ink the pads. Using a refill bottle, I gently move across the ink pad back and forth from top to bottom while squeezing gently to release ink. Next, you’ll want to make sure the ink is evenly distributed across the pad. To do this, simply reach for a plastic spoon. Move the rounded part of the spoon across the surface of the pad to move the ink around and even it out. This can also be done with a credit card or plastic shoppers card!

4. Shammy

Once the pad is re-inked, I like to clean them up really nicely and remove any excess ink around the edges of the pad. I do this with my Stampin Up Shammy. The Shammy is one of the best cleaning tools ever! I simply run the edge of the Shammy along the edge of the stamp pad to remove and clean up extra ink.

Refresh your ink pads in four simple steps, and they'll be looking and working like new! You'll love the amazing results!

Done! Now your ink pad looks like new!

Video

Here you can watch along with my video where I explain the four steps I take to refresh my ink pads. Feel free to watch along!

Once done, you’ll have a beautifully refreshed ink pad ready for crafting!

Refresh your ink pads in four simple steps, and they'll be looking and working like new! You'll love the amazing results!

Don’t Miss Out!

Please make me your Stampin’ Up! demonstrator!  Earn rewards points towards free stamps PLUS a gift when you order. Use host code: J799T23Y PLUS, with your first order, you’ll receive free catalogs in your thank you package!

April 2021 Host Code

Order These Products and Refresh Your Ink Pads Yourself!

Brights Classic Stampin' Pad Assortment

Brights Classic Stampin’ Pad Assortment
[147150]

Brights Classic Stampin' Ink Refill Assortment

Brights Classic Stampin’ Ink Refill Assortment
[147174]

Neutrals Classic Stampin' Pad Assortment

Neutrals Classic Stampin’ Pad Assortment
[147151]

Neutrals Classic Stampin' Ink Refill Assortment

Neutrals Classic Stampin’ Ink Refill Assortment
[147175]

Regals Collection Classic Stampin' Pads

Regals Collection Classic Stampin’ Pads
[147148]

Regals Classic Stampin' Ink Refill Assortment

Regals Classic Stampin’ Ink Refill Assortment
[147172]

Subtles Classic Stampin' Pad Assortment

Subtles Classic Stampin’ Pad Assortment
[147149]

Subtles Classic Stampin' Ink Refill Assortment

Subtles Classic Stampin’ Ink Refill Assortment
[147173]

2020–2022 In Color Classic Stampin’ Pad Bundle

2020–2022 In Color Classic Stampin’ Pad Bundle
[154957]

Simply Shammy

Simply Shammy
[147042] 

You Might Also Like:

Quick Tips For Prepping Your Stampin Up Stamp Sets


Thanks for joining me today. I hope you enjoyed my post on how to refresh your ink pads!

Sharing is caring!

Filed Under: Gallery, Learn to Stamp Tagged With: technique, tips and tricks

Previous Post: « Stamp Camp Registration Now Open!
Next Post: Stampin Up Basic Borders Dies & 6 Ways To Use Borders Dies »

Reader Interactions

Comments

  1. Barbara says

    May 2, 2021 at 1:35 PM

    Anna, thanks so much for the tips on the ink pads. I never thought about using one of the labels on the reinker…that’s brilliant!!!

    Reply

Trackbacks

  1. Wrong Color Ink On Your Ink Pad? Let's Fix It! says:
    August 24, 2021 at 5:00 AM

    […] If you’re not sure how to reink your pad, or if you want some other tips on how to refresh your stamp pads and get them looking like new, then take a look at this post on refreshing your ink pads. […]

    Reply

Leave a Reply Cancel reply

Your email address will not be published. Required fields are marked *

Recipe Rating


Primary Sidebar

Anna Helman

Independent Stampin' Up!® Demonstrator

  • Email
  • Facebook
  • Facebook Group
  • Instagram
  • Pinterest
  • RSS
  • Twitter
  • YouTube
Shop Stampin' Up!
Stampin' Up! catalogs
get updates
join Stampin' Up!
Stampin' Up! Rewards
Stampin' Up! special offers
Stampin' Up! clearance
Stampin' Up! 2025-2026 Annual Catalog
May 6, 2025 - May 4, 2026
View Online | Shop Online

Blog Archive

Categories

Footer

Important Links

  • Home
  • Shop Now
  • Get Updates
  • Join My Team
  • Rewards
  • Specials
  • Catalogs
  • Clearance

Anna Helman, Independent Stampin' Up!® Demonstrator

  • Email
  • Facebook
  • Facebook Group
  • Instagram
  • Pinterest
  • RSS
  • Twitter
  • YouTube

Get Ideas, Inspiration, and Special Offers!

Sign up to receive updates in your inbox

Thank you!

Please check your email for a special offer! 

.
All content on this blog is the property of Anna Helman, Stampin' Up!® Independent Demonstrator. Classes, services and projects offered here are not endorsed by Stampin' Up!® Projects, videos, photos, ideas and articles are shared for personal use only and may not be removed, duplicated or copied without permission. All artwork © Stampin' Up!®

Copyright © 2025 Anna Helman, handmake with love · Site Design by Catherine Carroll