Are you familiar with how to use a brayer? This is a tool that I don’t use all the time in my card making, but when I get it out, I really appreciate the things that it can do. I want to share several ways for how to use a brayer for card making. Let’s get started.
How to use a brayer for a card making video tutorial
Watch along here as I explain several different ways to use a brayer for your paper craft projects. Stick around until the end when I’m summarizing much of what I’ve learned about health, wellness, and natural healing in the last several years as I’ve dived into this in my personal life.
Ways to use a brayer for card making
When I began planning for this tutorial, I was going to share three ways to use a brayer, but as I started creating, I kept thinking of more and more ways. Let’s talk about them.
1. To ink a stamp
When you have a large stamp, it’s easiest to lay it upside down and apply ink to the top side. This is true whether you are using a stamping platform or a large acrylic block, either way. Sometimes when I ink the stamp using the ink pad directly, I end up with lines at the edge of where the pad was. Using a brayer to ink the stamp can be a great way to avoid those awkward lines.

2. Multiple colors of ink on a stamp
Just like mentioned above, using a brayer can be a great way to ink stamps when you want to use multiple colors of ink and blend them together. You can apply one color of ink at the top, another color of ink at the bottom, and then roll a bit between the colors to blend them. Or you can blend even more colors if you choose.
3. Stamping large stamps
Let’s talk about another way to use a brayer with large stamps. My favorite way to stamp a large stamp when I’m not using my stamping platform is to mount the stamp to my big F block, lay the stamp rubber side up on my work surface, and ink it. At this point, I lay the cardstock directly on top and apply pressure to the top to get the ink to transfer to the cardstock. An awesome way to apply that pressure and get an evenly stamped image is to use a brayer to do so.
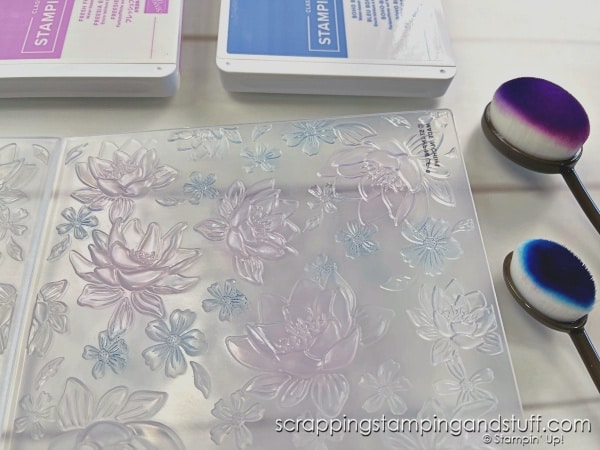
4. Applying ink to embossing folders
I love to play around with techniques for using embossing folders in different ways, and one of those techniques can involve applying ink to one side of an embossing folder and then running it through your Cut & Emboss machine. This creates an extra fun effect when either the raised or flat portion of your embossed paper has ink applied to it. Get ideas for other fun embossing folder techniques here.
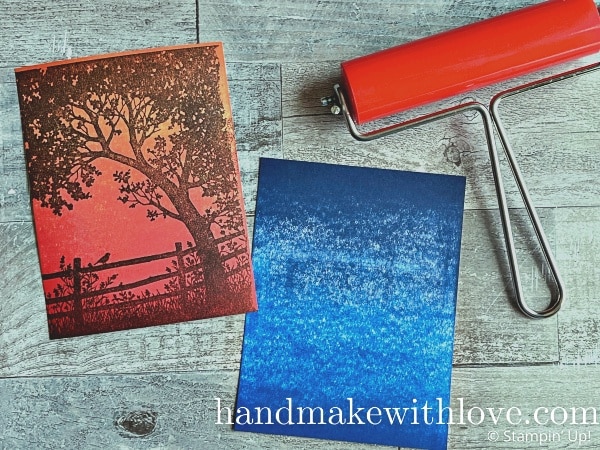
5. Applying ink to a background
I believe the most common way of using a brayer is to apply ink to a background. You can create amazing blended pieces using either one color of ink that fades or several colors of ink that blend together. Getting the hang of this can be a bit tricky so keep reading below for several tips.
Proper way to use a brayer for ink blending
If you ink a brayer directly from an ink pad, and then start rolling it across your paper to apply the ink, you’re going to notice that you end up with bare spots that are not inked properly. As the roller completes a full turn and the ink has been removed, you end up with less ink applied and uneven patches. The best way to avoid that is to do the following:
- Ink the brayer on your pad.
- Roll out the ink onto a glass mat or other glass or hard service. Roll it out until it is nice and thin and even.
- Roll the brayer through the ink to make sure it is covered evenly.
- With a piece of scrap paper under your work, begin off the edge of your project and start rolling onto your project, applying as little pressure as possible. Continue rolling (and moving the brayer left to right or right to left) until the color has moved onto your project as far as you desire.
- When ink has run out, reapply ink from your glass surface to the brayer and repeat.
- Continue this process until the ink is as dark as you want it to be.
- If desired, apply other colors of ink and blend them.
Getting the technique just right can definitely require some practice and learning along the way. I’ve learned a few things, and I want to share a few tips for helping you to be successful with using a brayer for card making. I’ll share them below.
Tips for success when using a brayer for card making
- Starting with a colored piece of cardstock can make it easier to do ink blending for a background. For example, if you’re going to blend a dark color of pink and you want the entire piece to end up pink, you may want to use a light pink cardstock to save some work of applying ink to the entire piece. This just depends on the end effect you desire.
- When blending backgrounds, a lighter color of ink will show less mistakes and be easier to blend for a beginner.
- When applying ink to the brayer, only roll the brayer in one direction and then lift it. For example, I roll the brayer away from me, and when I get to the end of the ink pad or ink on my work surface, I lift up. The roller continues to roll while I pull the brayer back towards me, lower it and again push it away to continue inking it. I do this several times in order to get ink evenly applied across the surface of the brayer.
- Roll the brayer using as little pressure as possible. This will make imperfections less noticeable.
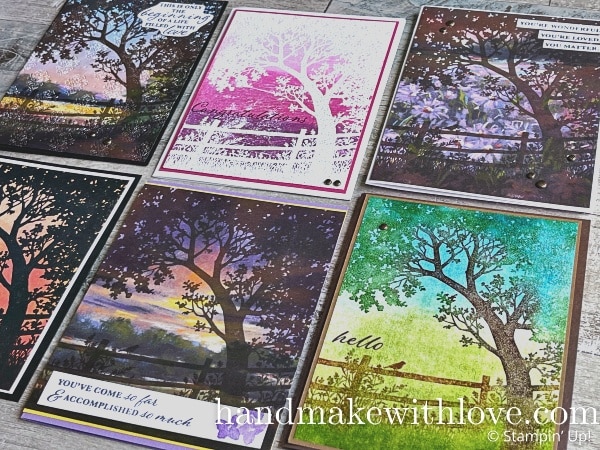
Sample Cards
Let’s look at the cards I shared in the video. Aren’t these lovely?
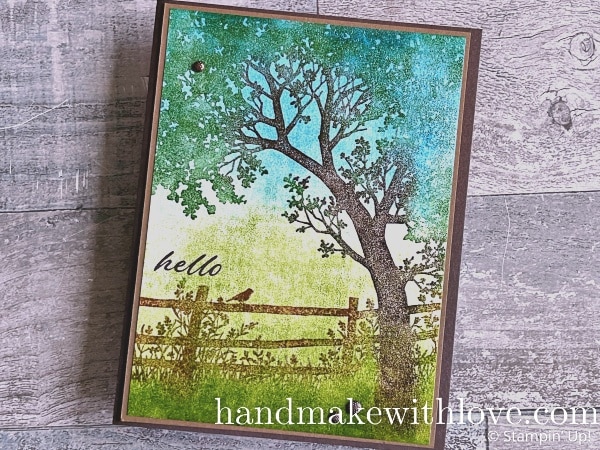
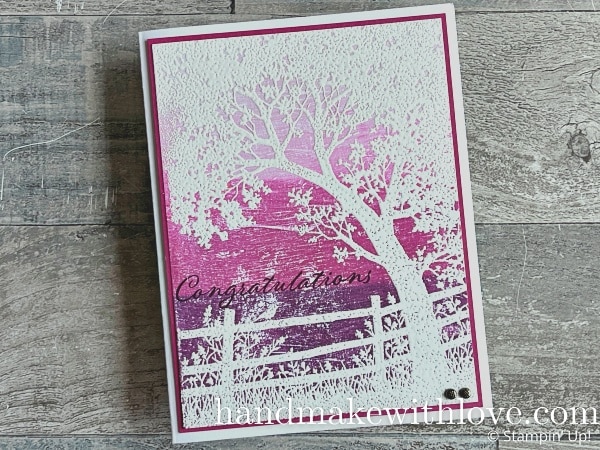
The cards above use brayered backgrounds, but I also made these very simple ones by stamping onto paper prints from the Splendid Autumn designer paper pack.
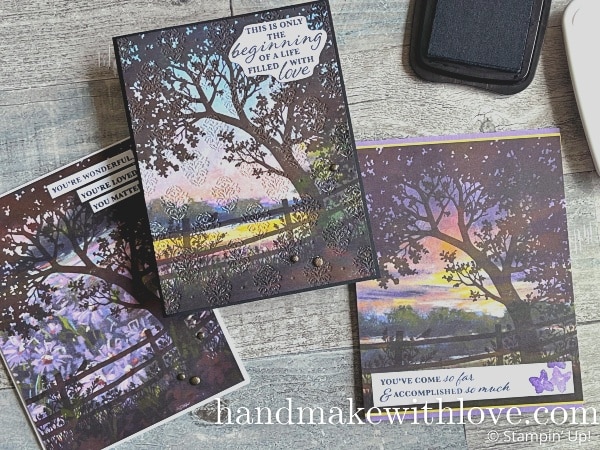
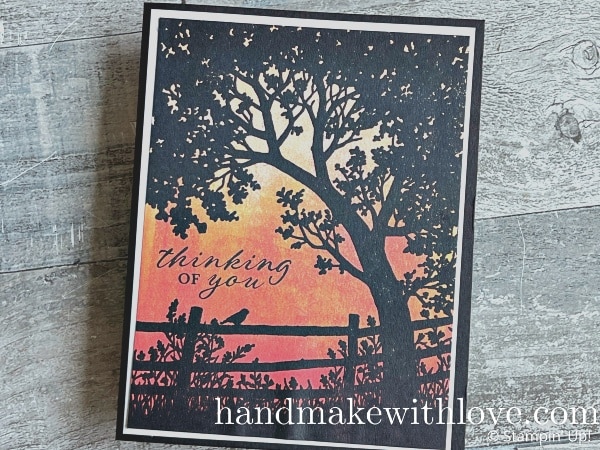
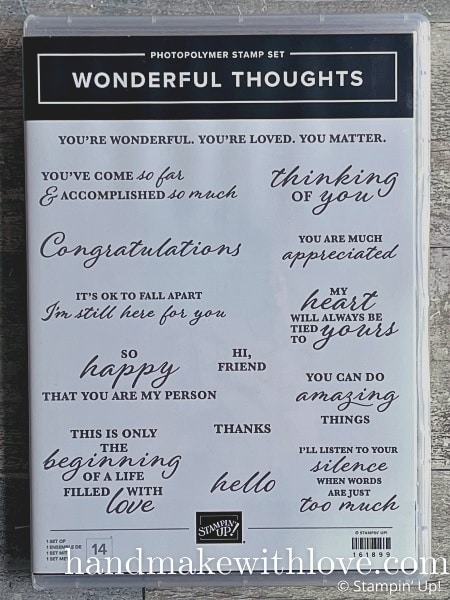
I made these cards using the Wonderful Thoughts greetings and…
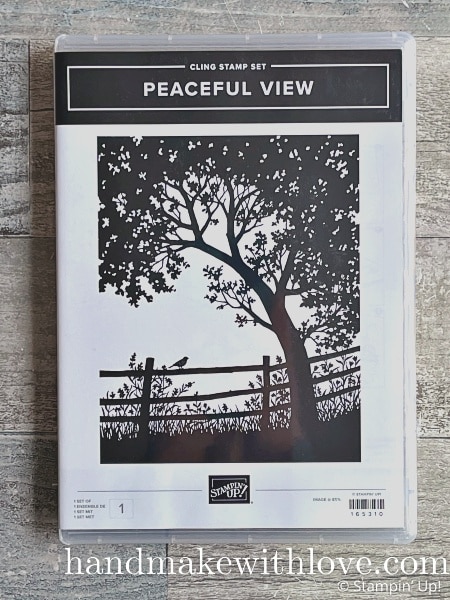
…Peaceful View silhouette stamp. I just LOVE this stamp!! I think you can understand why, seeing the cards I was able to create using it.
Do you have experience with using a brayer or is it something you are yet to try? Do you have great tips to share? Let me know at the bottom!
Materials list
Take a look here at the supplies I’ve used and order a brayer and try it out soon!
Product List![Peaceful View Cling Stamp Set [ 165310 ]](https://assets1.tamsnetwork.com/images/EC042017NF/165310s.jpg "Peaceful View Cling Stamp Set [ 165310 ]")
![Wonderful Thoughts Bundle (English) [ 161494 ]](https://assets1.tamsnetwork.com/images/EC042017NF/161494s.jpg "Wonderful Thoughts Bundle (English) [ 161494 ]")
![Wonderful Thoughts Photopolymer Stamp Set (English) [ 161899 ]](https://assets1.tamsnetwork.com/images/EC042017NF/161899s.jpg "Wonderful Thoughts Photopolymer Stamp Set (English) [ 161899 ]")
![Wonderful Thoughts Dies (English) [ 161491 ]](https://assets1.tamsnetwork.com/images/EC042017NF/161491s.jpg "Wonderful Thoughts Dies (English) [ 161491 ]")
![Splendid Autumn 6" X 6" (15.2 X 15.2 Cm) Designer Series Paper [ 164173 ]](https://assets1.tamsnetwork.com/images/EC042017NF/164173s.jpg "Splendid Autumn 6\" X 6\" (15.2 X 15.2 Cm) Designer Series Paper [ 164173 ]")
![Stampin' Brayer [ 162936 ]](https://assets1.tamsnetwork.com/images/EC042017NF/162936s.jpg "Stampin' Brayer [ 162936 ]")
![Damask Designs Embossing Folder [ 165214 ]](https://assets1.tamsnetwork.com/images/EC042017NF/165214s.jpg "Damask Designs Embossing Folder [ 165214 ]")
![Stampin' Cut & Emboss Machine [ 149653 ]](https://assets1.tamsnetwork.com/images/EC042017NF/149653s.jpg "Stampin' Cut & Emboss Machine [ 149653 ]")
![Sponge Daubers [ 133773 ]](https://assets1.tamsnetwork.com/images/EC042017NF/133773s.jpg "Sponge Daubers [ 133773 ]")
![Stampin' Pierce Mat [ 126199 ]](https://assets1.tamsnetwork.com/images/EC042017NF/126199s.jpg "Stampin' Pierce Mat [ 126199 ]")
![Simply Shammy [ 147042 ]](https://assets1.tamsnetwork.com/images/EC042017NF/147042s.jpg "Simply Shammy [ 147042 ]")
![Tuxedo Black Memento Ink Pad [ 132708 ]](https://assets1.tamsnetwork.com/images/EC042017NF/132708s.jpg "Tuxedo Black Memento Ink Pad [ 132708 ]")
![Early Espresso Classic Stampin' Pad [ 147114 ]](https://assets1.tamsnetwork.com/images/EC042017NF/147114s.jpg "Early Espresso Classic Stampin' Pad [ 147114 ]")
![Basic Beige Classic Stampin Pad [ 163806 ]](https://assets1.tamsnetwork.com/images/EC042017NF/163806s.jpg "Basic Beige Classic Stampin Pad [ 163806 ]")
![Strawberry Slush Classic Stampin' Pad [ 165286 ]](https://assets1.tamsnetwork.com/images/EC042017NF/165286s.jpg "Strawberry Slush Classic Stampin' Pad [ 165286 ]")
![Peach Pie Classic Stampin Pad [ 163810 ]](https://assets1.tamsnetwork.com/images/EC042017NF/163810s.jpg "Peach Pie Classic Stampin Pad [ 163810 ]")
![Petal Pink Classic Stampin' Pad [ 147108 ]](https://assets1.tamsnetwork.com/images/EC042017NF/147108s.jpg "Petal Pink Classic Stampin' Pad [ 147108 ]")
![Blackberry Bliss Classic Stampin' Pad [ 147092 ]](https://assets1.tamsnetwork.com/images/EC042017NF/147092s.jpg "Blackberry Bliss Classic Stampin' Pad [ 147092 ]")
![Berry Burst Classic Stampin' Pad [ 147143 ]](https://assets1.tamsnetwork.com/images/EC042017NF/147143s.jpg "Berry Burst Classic Stampin' Pad [ 147143 ]")
![Bubble Bath Classic Stampin' Pad [ 161664 ]](https://assets1.tamsnetwork.com/images/EC042017NF/161664s.jpg "Bubble Bath Classic Stampin' Pad [ 161664 ]")
![Azure Afternoon Classic Stampin' Pad [ 161663 ]](https://assets1.tamsnetwork.com/images/EC042017NF/161663s.jpg "Azure Afternoon Classic Stampin' Pad [ 161663 ]")
![Granny Apple Green Stampin' Pad [ 147095 ]](https://assets1.tamsnetwork.com/images/EC042017NF/147095s.jpg "Granny Apple Green Stampin' Pad [ 147095 ]")
![Garden Green Classic Stampin' Pad [ 147089 ]](https://assets1.tamsnetwork.com/images/EC042017NF/147089s.jpg "Garden Green Classic Stampin' Pad [ 147089 ]")
![Pecan Pie Classic Stampin' Pad [ 161665 ]](https://assets1.tamsnetwork.com/images/EC042017NF/161665s.jpg "Pecan Pie Classic Stampin' Pad [ 161665 ]")
![Blueberry Bushel Classic Stampin' Pad [ 147138 ]](https://assets1.tamsnetwork.com/images/EC042017NF/147138s.jpg "Blueberry Bushel Classic Stampin' Pad [ 147138 ]")
![Night Of Navy Classic Stampin' Pad [ 147110 ]](https://assets1.tamsnetwork.com/images/EC042017NF/147110s.jpg "Night Of Navy Classic Stampin' Pad [ 147110 ]")
![Poppy Parade Classic Stampin' Pad [ 147050 ]](https://assets1.tamsnetwork.com/images/EC042017NF/147050s.jpg "Poppy Parade Classic Stampin' Pad [ 147050 ]")
![Pumpkin Pie Classic Stampin' Pad [ 147086 ]](https://assets1.tamsnetwork.com/images/EC042017NF/147086s.jpg "Pumpkin Pie Classic Stampin' Pad [ 147086 ]")
![Daffodil Delight Classic Stampin' Pad [ 147094 ]](https://assets1.tamsnetwork.com/images/EC042017NF/147094s.jpg "Daffodil Delight Classic Stampin' Pad [ 147094 ]")
![Basic Black 8-1/2" X 11" Cardstock [ 121045 ]](https://assets1.tamsnetwork.com/images/EC042017NF/121045s.jpg "Basic Black 8-1/2\" X 11\" Cardstock [ 121045 ]")
![Basic White 8 1/2" X 11" Cardstock [ 166780 ]](https://assets1.tamsnetwork.com/images/EC042017NF/166780s.jpg "Basic White 8 1/2\" X 11\" Cardstock [ 166780 ]")
![Early Espresso 8-1/2" X 11" Cardstock [ 119686 ]](https://assets1.tamsnetwork.com/images/EC042017NF/119686s.jpg "Early Espresso 8-1/2\" X 11\" Cardstock [ 119686 ]")
![Highland Heather 8-1/2" X 11" Cardstock [ 146986 ]](https://assets1.tamsnetwork.com/images/EC042017NF/146986s.jpg "Highland Heather 8-1/2\" X 11\" Cardstock [ 146986 ]")
![Calypso Coral 8-1/2" X 11" Cardstock [ 122925 ]](https://assets1.tamsnetwork.com/images/EC042017NF/122925s.jpg "Calypso Coral 8-1/2\" X 11\" Cardstock [ 122925 ]")
![Daffodil Delight 8-1/2" X 11" Cardstock [ 119683 ]](https://assets1.tamsnetwork.com/images/EC042017NF/119683s.jpg "Daffodil Delight 8-1/2\" X 11\" Cardstock [ 119683 ]")
![Berry Burst 8-1/2" X 11" Cardstock [ 144243 ]](https://assets1.tamsnetwork.com/images/EC042017NF/144243s.jpg "Berry Burst 8-1/2\" X 11\" Cardstock [ 144243 ]")
![Pecan Pie 8 1/2" X 11" Cardstock [ 161717 ]](https://assets1.tamsnetwork.com/images/EC042017NF/161717s.jpg "Pecan Pie 8 1/2\" X 11\" Cardstock [ 161717 ]")
![Adhesive Backed Textured Dots [ 163338 ]](https://assets1.tamsnetwork.com/images/EC042017NF/163338s.jpg "Adhesive Backed Textured Dots [ 163338 ]")
![Stampin' Glass Mat Studio (Imperial) [ 163987 ]](https://assets1.tamsnetwork.com/images/EC042017NF/163987s.jpg "Stampin' Glass Mat Studio (Imperial) [ 163987 ]")
![Stampin' Seal+ [ 149699 ]](https://assets1.tamsnetwork.com/images/EC042017NF/149699s.jpg "Stampin' Seal+ [ 149699 ]")
Learn To Make Cards
Shop Supplies
Rewards Program
Join My Amazing Team
I hope this has helped you to learn how to use a brayer for card making!
Leave a Reply