• Nav Social Menu

    • Facebook
    • Facebook Group
    • Instagram
    • Pinterest
    • RSS
    • Twitter
    • YouTube

Handmake with Love

Anna Helman | formerly Scrapping, Stamping and Stuff

  • Blog
  • Start Here
    • About Me
    • Learn to Make Cards
    • Why Shop With Me?
    • Testimonials
    • Connect On Social
    • Get Email Updates
    • Stampin’ Up! Giveaway Winners
  • Products
    • Shop Now
    • Catalogs
    • Clearance
    • Why Choose Stampin Up?
    • Paper Pumpkin Kits
    • Product Shares
    • Rewards Program
    • Stamparatus
    • Cut And Emboss Machine
    • Mini Cut And Emboss Machine
    • Blends Alcohol Markers
    • Blending Brushes
  • Ideas
    • Video Tutorials
    • Project Gallery
    • Card Ideas
    • 3D Projects
    • Scrapbooking
    • Tips & Techniques
    • Kits
    • Learn to Make Cards
    • Printable Catalog Tabs
    • Social Media
  • Join
    • Join My Team
    • Stampin Up Demonstrator Resources
  • Classes
    • Classes in the Mail
    • In Person Events
  • Contact
    • Contact
    • Connect On Social

How To Stamp Small Pieces With The Stamparatus

20 Sep

Hi stampers 🙂 Thanks for stopping in today! Do you like to use small greetings on your cards, scrapbook pages, and other projects? Little tiny greetings are very popular right now, but they can be very frustrating to create. I have a handy tip to help solve this problem, so let’s talk about how to stamp small pieces with the Stamparatus!

In today's Stamparatus tip video, learn how to stamp small pieces of paper perfectly every time! Your tiny greetings will always be straight!

The Problem

The problem with tiny greetings is the difficulty in getting them lined up and stamped straight because the paper is so small. If you don’t get them stamped properly the first time, you can flip the paper over and try again. Then when you mess it up a second time (maybe I should say when I mess it up a second time) I can throw that one away or try to make it look straight by trimming off the edges, but that is difficult with small pieces. Ugh. Small greetings are so cute but can be so frustrating.

The Other Problem

The Stamparatus solves a lot of problems when it comes to stamping. It helps line up paper and stamps straight. It stamps evenly and completely, and in the case when you don’t stamp perfectly, you can stamp a second time in the exact same spot to fix the problem. This tool is amazing!

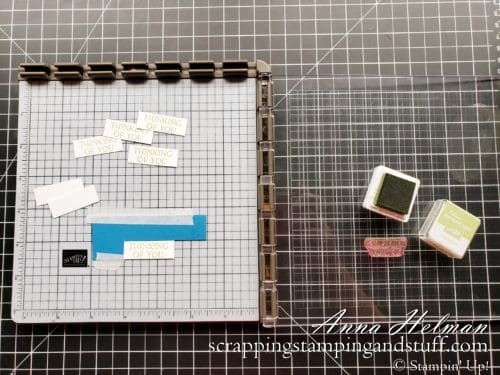
But…when it comes to stamping tiny pieces of paper, it can be a challenge. If you place your paper in the top corner, it will be difficult to stamp properly in the very corner. It’s also difficult to ink a stamp right beside the hinges.

There is a solution, however. Let’s talk about it!

In today's Stamparatus tip video, learn how to stamp small pieces of paper perfectly every time! Your tiny greetings will always be straight!

The Solution

The solution is to create a template to line up your small pieces on the base of your Stamparatus.

In today's Stamparatus tip video, learn how to stamp small pieces of paper perfectly every time! Your tiny greetings will always be straight!

Here’s how:

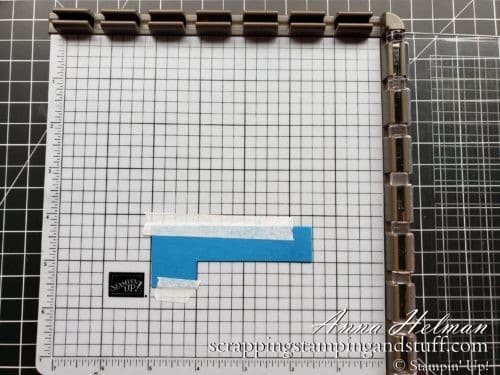
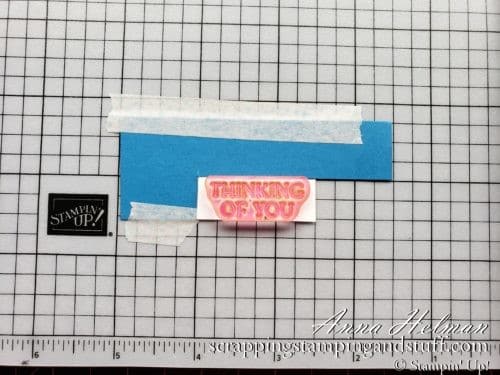
Use your trimmer to cut an inside corner out of a piece of cardstock. See what my blue cardstock looks like above. The size of the cardstock is not important, and the size of the corner isn’t either.

Line up the bottom edge straight with a line on the platform base. Tape the cardstock in place using washi tape.

In today's Stamparatus tip video, learn how to stamp small pieces of paper perfectly every time! Your tiny greetings will always be straight!

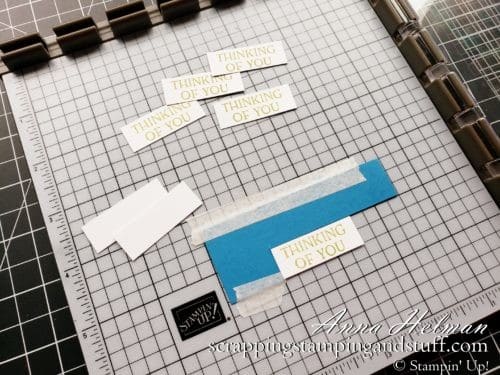
Place a piece of paper, cut to size, in the corner. Lay the stamp on top, making sure to center it.

In today's Stamparatus tip video, learn how to stamp small pieces of paper perfectly every time! Your tiny greetings will always be straight!

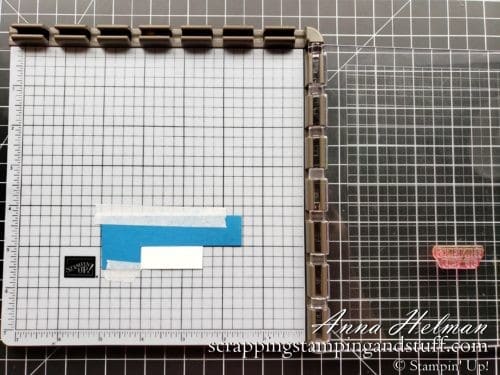
Rotate the clear plate over and press down on top of the stamp to adhere it to the plate. Then reopen the plate.

In today's Stamparatus tip video, learn how to stamp small pieces of paper perfectly every time! Your tiny greetings will always be straight!

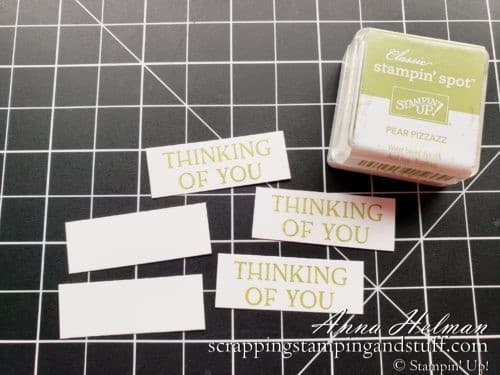
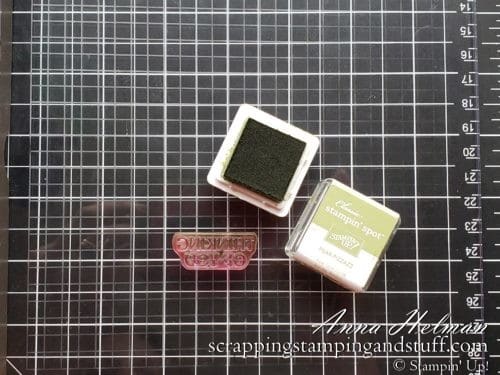
Ink the stamp. Small Stampin Spot ink pads are handy for this.

In today's Stamparatus tip video, learn how to stamp small pieces of paper perfectly every time! Your tiny greetings will always be straight!

Next, stamp it!

In today's Stamparatus tip video, learn how to stamp small pieces of paper perfectly every time! Your tiny greetings will always be straight!

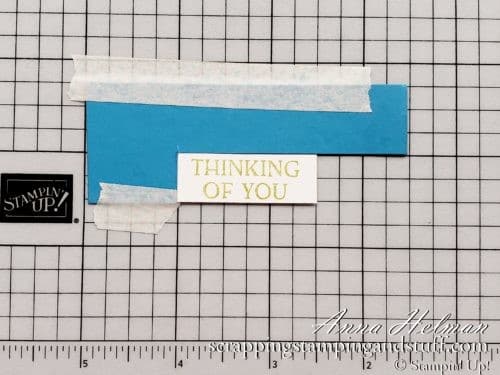
It’s quick and easy to remove your first piece of paper, put another in place, and repeat.

Video Tutorial

Watch along as I explain this handy trick!

Thanks for visiting. I hope you found this helpful!

Don’t Miss Out!

Please make me your Stampin’ Up! demonstrator!  Earn rewards points towards free stamps PLUS a gift when you order using September host code: 2FQZQEEY. PLUS, with your first order, you’ll receive free catalogs in your thank you package!

Stampin Up Hostess Code - Customer Rewards - Free Gift With Order

Sign Up For My Upcoming Virtual Card Classes!

Order the products I used and make this project yourself!

Stamparatus

Stamparatus
[146276]

Paper Trimmer

Paper Trimmer
[152392]

Blossoms In Bloom Photopolymer Stamp Set (English)

Blossoms In Bloom Photopolymer Stamp Set (English)
[152684]

Uninked Stampin' Spots

Uninked Stampin’ Spots
[141822]

Classic Stampin' Spots Assortment

Classic Stampin’ Spots Assortment
[153183]


You May Also Like:

The Stamparatus Stamp Positioning Tool

Make Multiple Die Cuts Fast With This Awesome Cardmaking Hack!

Circle Stamping Stamparatus Technique Tutorial

Sharing is caring!

Filed Under: Gallery, Learn to Stamp Tagged With: cardmaking tips and tricks, learn to stamp, stamparatus

Previous Post: « Stampin Up The Right Triangle Makes Beautiful Quilt Cards
Next Post: Stampin Up Magnetic Cutting Plate »

Reader Interactions

Comments

  1. Linda says

    September 21, 2020 at 8:45 PM

    Great tip. Do you have a video on the colored lines added to your paper cutter?

    Reply
    • Anna Helman says

      September 21, 2020 at 9:32 PM

      Yes, here is a link. If you do this, I suggest you use paint markers instead of sharpie because the sharpie rubbed off. https://youtu.be/LwSl9MLFt4Q

      Reply
  2. Joan Ostler says

    October 2, 2020 at 7:20 PM

    I watch all your videos. They are very helpful and you are so awesome in them. I have learned a lot and I wait anxiously for each new one. Thank you so much for all your help and creativity.

    Reply
    • Anna Helman says

      October 2, 2020 at 7:53 PM

      Thank you so much Joan! I truly appreciate your kind words and that you watch my videos regularly!

      Reply

Trackbacks

  1. How To Line Up Stamps Straight says:
    October 4, 2020 at 5:31 AM

    […] How To Stamp Small Pieces With The Stamparatus […]

    Reply

Leave a Reply Cancel reply

Your email address will not be published. Required fields are marked *

Recipe Rating


Primary Sidebar

Anna Helman

Independent Stampin' Up!® Demonstrator

  • Email
  • Facebook
  • Facebook Group
  • Instagram
  • Pinterest
  • RSS
  • Twitter
  • YouTube
Shop Stampin' Up!
Stampin' Up! catalogs
get updates
join Stampin' Up!
Stampin' Up! Rewards
Stampin' Up! special offers
Stampin' Up! clearance
Stampin' Up! 2025-2026 Annual Catalog
May 6, 2025 - May 4, 2026
View Online | Shop Online

Blog Archive

Categories

Footer

Important Links

  • Home
  • Shop Now
  • Get Updates
  • Join My Team
  • Rewards
  • Specials
  • Catalogs
  • Clearance

Anna Helman, Independent Stampin' Up!® Demonstrator

  • Email
  • Facebook
  • Facebook Group
  • Instagram
  • Pinterest
  • RSS
  • Twitter
  • YouTube

Get Ideas, Inspiration, and Special Offers!

Sign up to receive updates in your inbox

Thank you!

Please check your email for a special offer! 

.
All content on this blog is the property of Anna Helman, Stampin' Up!® Independent Demonstrator. Classes, services and projects offered here are not endorsed by Stampin' Up!® Projects, videos, photos, ideas and articles are shared for personal use only and may not be removed, duplicated or copied without permission. All artwork © Stampin' Up!®

Copyright © 2025 Anna Helman, handmake with love · Site Design by Catherine Carroll