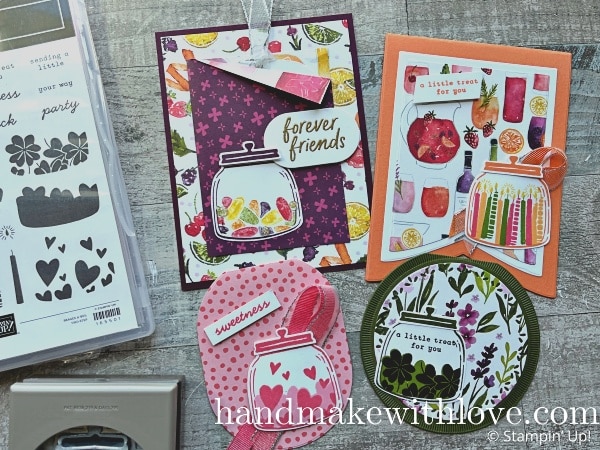
Even as creative types, us crafters can at times get stuck in our ways instead of thinking outside the box. Today I want to talk about creating custom shaped cards instead of using the same old every day rectangular card base. I’m using an adorable stamp and punch set called Stampin Up Sweet Jar, and I’m excited to share these sweet cards with you. Let’s take a look.
Custom Shaped Cards Video Tutorial
Watch along here as I share how to create these cards.
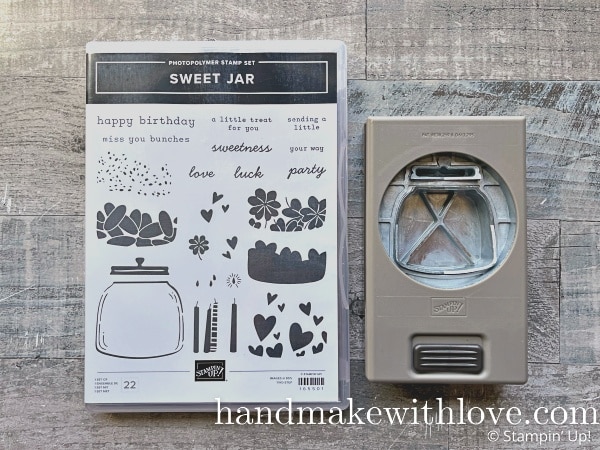
Stampin Up Sweet Jar Bundle
Here’s the cute stamp and punch set that I used to create these cheerful cards. As you probably know, stamp and punch sets are my absolute favorite because they are so easy to use. This one has quite a lot of pieces and parts that can be used in many different ways. You’ll see a few of the ways to use them on my cards below.
Let’s get started!
How To Create Custom Shaped Cards
Creating a custom shaped card is very easy to do. You’ll start with a folded card base and lay it on the platform for your Cut And Emboss Machine. Next, choose the die you want to use and lay it on top of the card base. Instead of laying the die completely on top of the cardstock, you’ll need to leave the top edge of the die hanging over the folded edge of the card. This will leave the folded edge, or part of the folded edge, intact to create the card fold. Watch along with the video for more details on this.
Now let’s look at several card ideas using different shapes.
Custom ShapeD Card Samples
Sweet Hearts
I created this first card using the Impressions Abloom die set. I really like the shape of this die and I thought it would be perfect for this card. The paper I used comes from the Celebratory Sips designer paper pack for this card as well as the others you will see.
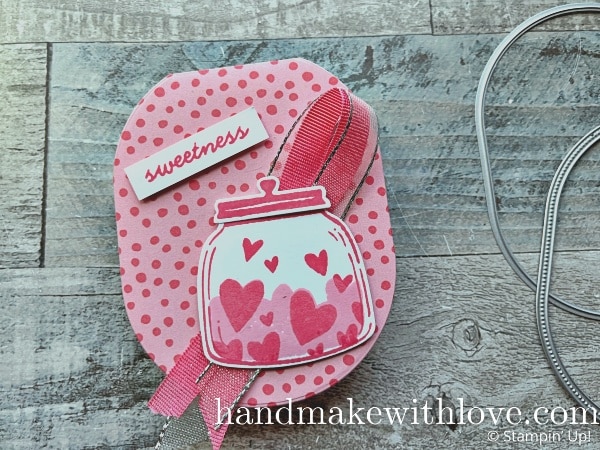
I’ll mention a bit more about the stamp set that I used. It includes one stamp to add detail inside the jar and then another one to add the background color behind the detail. I used Pretty In Pink for the background and Strawberry Slush for the detail of the hearts.
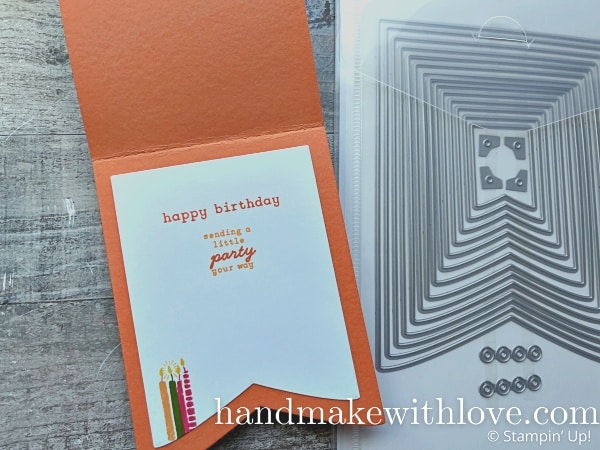
Bright Candles
For the next card, I used our Party Banners die set, which is a favorite of mine! It is a huge set that includes banners in 14 different sizes. It was perfect for this card, because I was able to use the smaller sizes to create the mats for the front and inside.
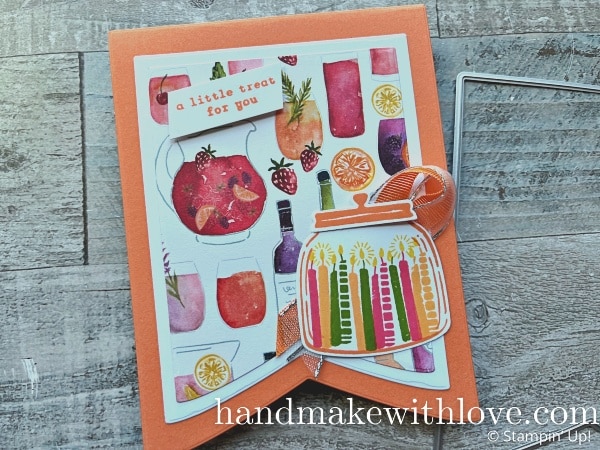
I had fun stamping the candles in the jar on this one. If you want to see how I stamped multiple colors on the candles, make sure to watch along with the video.
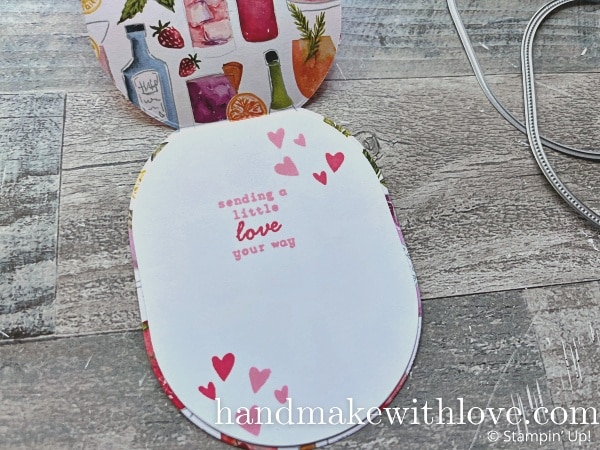
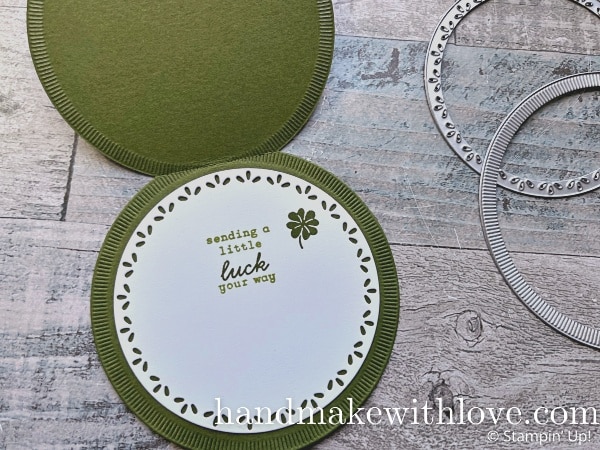
Lucky Hearts
My third card might be my favorite shape of the three I created. I used the Spotlight On Nature die set, which is probably my absolute favorite collection of dies at the moment. It has an assortment of beautifully decorated circles in different sizes.
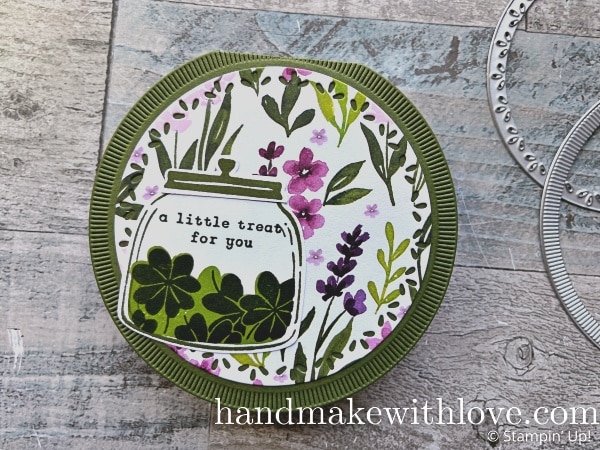
For this card, you can see I filled the jar with four leaf clovers. So cute!
Here’s a fourth card, which does not have a custom shaped base, but I wanted to share it with you because I used the Sweet Jar bundle to create it as well. I made this card recently during one of my team gatherings on Zoom. It’s a super easy design to create.
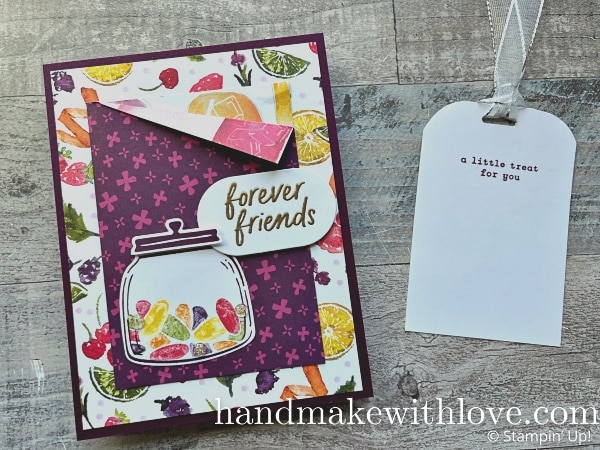
I colored the jelly bean stamp with markers to get all the different colors. Looks yummy!
Which of these cards is your favorite?
Materials List
Take a look at the products I used to create these fun cards!
Product List![Sweet Jar Bundle (English) [ 165507 ]](https://assets1.tamsnetwork.com/images/EC042017NF/165507s.jpg "Sweet Jar Bundle (English) [ 165507 ]")
![Sweet Jar Builder Punch [ 165506 ]](https://assets1.tamsnetwork.com/images/EC042017NF/165506s.jpg "Sweet Jar Builder Punch [ 165506 ]")
![Sweet Jar Photopolymer Stamp Set (English) [ 165501 ]](https://assets1.tamsnetwork.com/images/EC042017NF/165501s.jpg "Sweet Jar Photopolymer Stamp Set (English) [ 165501 ]")
![Spotlight On Nature Dies [ 163580 ]](https://assets1.tamsnetwork.com/images/EC042017NF/163580s.jpg "Spotlight On Nature Dies [ 163580 ]")
![Party Banners Dies [ 165264 ]](https://assets1.tamsnetwork.com/images/EC042017NF/165264s.jpg "Party Banners Dies [ 165264 ]")
![Impressions Abloom Dies [ 165610 ]](https://assets1.tamsnetwork.com/images/EC042017NF/165610s.jpg "Impressions Abloom Dies [ 165610 ]")
![Stampin' Cut & Emboss Machine [ 149653 ]](https://assets1.tamsnetwork.com/images/EC042017NF/149653s.jpg "Stampin' Cut & Emboss Machine [ 149653 ]")
![Paper Trimmer [ 152392 ]](https://assets1.tamsnetwork.com/images/EC042017NF/152392s.jpg "Paper Trimmer [ 152392 ]")
![Bone Folder [ 102300 ]](https://assets1.tamsnetwork.com/images/EC042017NF/102300s.jpg "Bone Folder [ 102300 ]")
![Take Your Pick [ 144107 ]](https://assets1.tamsnetwork.com/images/EC042017NF/144107s.jpg "Take Your Pick [ 144107 ]")
![Celebratory Sips 12" X 12" (30.5 X 30.5 Cm) Designer Series Paper [ 165586 ]](https://assets1.tamsnetwork.com/images/EC042017NF/165586s.jpg "Celebratory Sips 12\" X 12\" (30.5 X 30.5 Cm) Designer Series Paper [ 165586 ]")
![Basic White 8 1/2" X 11" Cardstock [ 166780 ]](https://assets1.tamsnetwork.com/images/EC042017NF/166780s.jpg "Basic White 8 1/2\" X 11\" Cardstock [ 166780 ]")
![Timid Tiger 8 1/2" X 11" Cardstock [ 165626 ]](https://assets1.tamsnetwork.com/images/EC042017NF/165626s.jpg "Timid Tiger 8 1/2\" X 11\" Cardstock [ 165626 ]")
![Mossy Meadow 8-1/2" X 11" Cardstock [ 133676 ]](https://assets1.tamsnetwork.com/images/EC042017NF/133676s.jpg "Mossy Meadow 8-1/2\" X 11\" Cardstock [ 133676 ]")
![Pretty In Pink Classic Stampin Pad [ 163807 ]](https://assets1.tamsnetwork.com/images/EC042017NF/163807s.jpg "Pretty In Pink Classic Stampin Pad [ 163807 ]")
![Strawberry Slush Classic Stampin' Pad [ 165286 ]](https://assets1.tamsnetwork.com/images/EC042017NF/165286s.jpg "Strawberry Slush Classic Stampin' Pad [ 165286 ]")
![Mossy Meadow Classic Stampin' Pad [ 147111 ]](https://assets1.tamsnetwork.com/images/EC042017NF/147111s.jpg "Mossy Meadow Classic Stampin' Pad [ 147111 ]")
![Old Olive Classic Stampin' Pad [ 147090 ]](https://assets1.tamsnetwork.com/images/EC042017NF/147090s.jpg "Old Olive Classic Stampin' Pad [ 147090 ]")
![Brights Stampin' Write Markers [ 161696 ]](https://assets1.tamsnetwork.com/images/EC042017NF/161696s.jpg "Brights Stampin' Write Markers [ 161696 ]")
![Granny Apple Green Stampin' Pad [ 147095 ]](https://assets1.tamsnetwork.com/images/EC042017NF/147095s.jpg "Granny Apple Green Stampin' Pad [ 147095 ]")
![Peach Pie Classic Stampin Pad [ 163810 ]](https://assets1.tamsnetwork.com/images/EC042017NF/163810s.jpg "Peach Pie Classic Stampin Pad [ 163810 ]")
![Daffodil Delight Classic Stampin' Pad [ 147094 ]](https://assets1.tamsnetwork.com/images/EC042017NF/147094s.jpg "Daffodil Delight Classic Stampin' Pad [ 147094 ]")
![Timid Tiger Classic Stampin' Pad [ 165278 ]](https://assets1.tamsnetwork.com/images/EC042017NF/165278s.jpg "Timid Tiger Classic Stampin' Pad [ 165278 ]")
![Timid Tiger 3/8" (1 Cm) Faux Linen Ribbon [ 165275 ]](https://assets1.tamsnetwork.com/images/EC042017NF/165275s.jpg "Timid Tiger 3/8\" (1 Cm) Faux Linen Ribbon [ 165275 ]")
![Strawberry Slush 3/8" (1 Cm) Faux Linen Ribbon [ 165274 ]](https://assets1.tamsnetwork.com/images/EC042017NF/165274s.jpg "Strawberry Slush 3/8\" (1 Cm) Faux Linen Ribbon [ 165274 ]")
![Silver & White 1/2" (1.3 Cm) Sheer Ribbon [ 162149 ]](https://assets1.tamsnetwork.com/images/EC042017NF/162149s.jpg "Silver & White 1/2\" (1.3 Cm) Sheer Ribbon [ 162149 ]")
![Stampin' Seal+ [ 149699 ]](https://assets1.tamsnetwork.com/images/EC042017NF/149699s.jpg "Stampin' Seal+ [ 149699 ]")
![Stampin' Dimensionals [ 104430 ]](https://assets1.tamsnetwork.com/images/EC042017NF/104430s.jpg "Stampin' Dimensionals [ 104430 ]")
Learn To Make Cards
Shop Supplies
Rewards Program
Join My Amazing Team
I hope you enjoyed these projects today, as well as learning about how to create custom shaped cards!
Leave a Reply