Blending brushes are such an amazing tool for many techniques on your paper projects. I saw a card recently that used blending brushes to create a fun design on the card background, and it inspired me to play around with this technique. Today I want to share two different cards that I created using blending brush designs. Let’s take a look at them!

Video Tutorial
Watch along here!
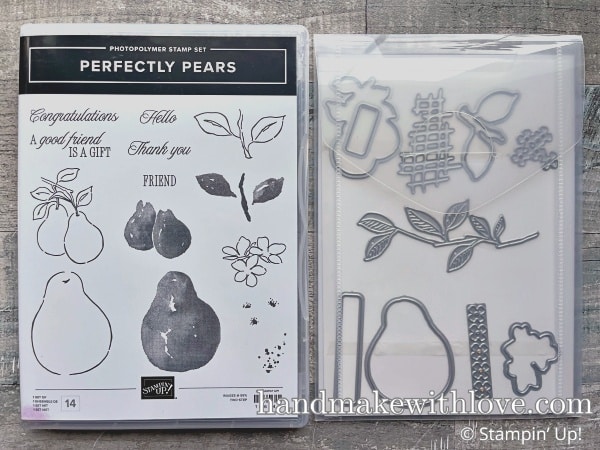
Perfectly Pears Bundle
Take a look at this cute stamp and die set! We also have coordinating designer paper and embellishments that are available as part of the Painterly Pears product suite. You’ll see all of these products on the card samples.
How To Create Blending Brush Designs
To try this technique on your projects, you’ll need to do the following:
- Prepare a die cut with a decorative edge like waves or zigzags.
- Mask off your card, leaving the area where you want the design to show unmasked.
- Place the die cut over the unmasked area, and blend a color of ink either above or below it.
- Repeat the previous step as many times as you like, with one or multiple colors of ink.
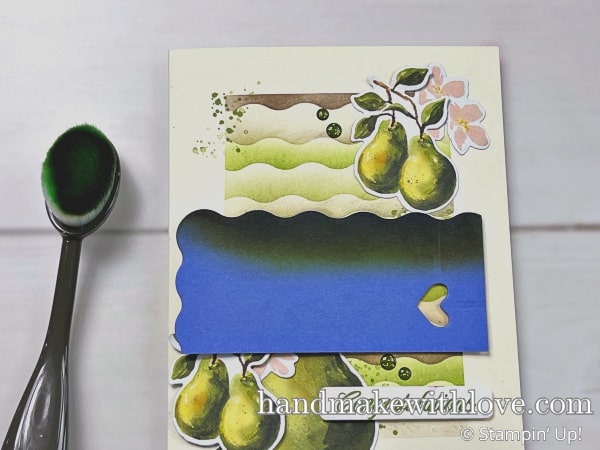
When done, remove the masking paper and admire your results!
Blending Brush Design Cards
Here’s the first card I created. I used a die from the Paper Tags set along with these colors of ink: Basic Beige, Granny Apple Green, Old Olive, and Early Espresso.

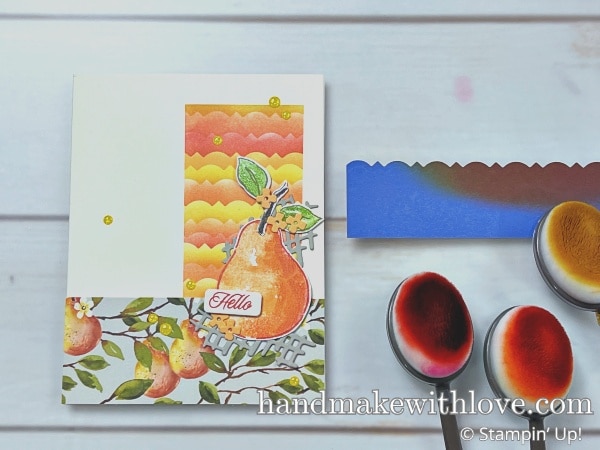
The other card I created uses Peach pie, Timid Tiger, Calypso Coral, and Daffodil Delight inks with a die cut from the Fancy Borders set…which is available while supplies last!
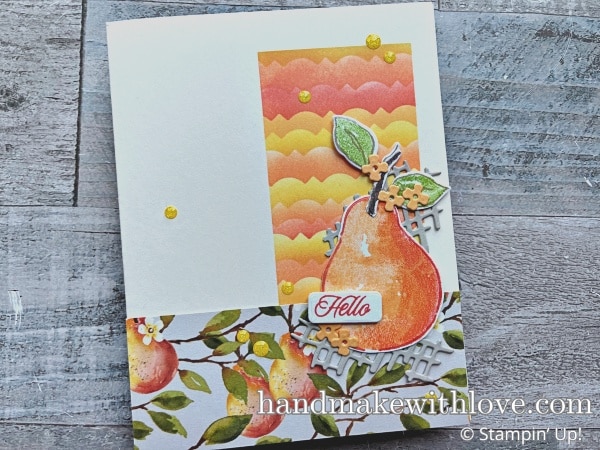
These are so fun! You’ll have to look for an appropriate die in your collection to try this with!
Materials List
Use these links to see and order the products I used on today’s cards!
Product List![Painterly Pears Suite Collection (English) [ 166159 ]](https://assets1.tamsnetwork.com/images/EC042017NF/166159s.jpg "Painterly Pears Suite Collection (English) [ 166159 ]")
![Perfectly Pears Bundle (English) [ 166154 ]](https://assets1.tamsnetwork.com/images/EC042017NF/166154s.jpg "Perfectly Pears Bundle (English) [ 166154 ]")
![Perfectly Pears Photopolymer Stamp Set (English) [ 166147 ]](https://assets1.tamsnetwork.com/images/EC042017NF/166147s.jpg "Perfectly Pears Photopolymer Stamp Set (English) [ 166147 ]")
![Perfectly Pears Dies [ 166153 ]](https://assets1.tamsnetwork.com/images/EC042017NF/166153s.jpg "Perfectly Pears Dies [ 166153 ]")
![Painterly Pears 12" X 12" (30.5 X 30.5 Cm) Designer Series Paper [ 166146 ]](https://assets1.tamsnetwork.com/images/EC042017NF/166146s.jpg "Painterly Pears 12\" X 12\" (30.5 X 30.5 Cm) Designer Series Paper [ 166146 ]")
![Mossy Meadow & Gold 1/4" (6.4 Mm) [ 166158 ]](https://assets1.tamsnetwork.com/images/EC042017NF/166158s.jpg "Mossy Meadow & Gold 1/4\" (6.4 Mm) [ 166158 ]")
![Low Profile Sparkle Dots [ 166157 ]](https://assets1.tamsnetwork.com/images/EC042017NF/166157s.jpg "Low Profile Sparkle Dots [ 166157 ]")
![Paper Tags Dies [ 165461 ]](https://assets1.tamsnetwork.com/images/EC042017NF/165461s.jpg "Paper Tags Dies [ 165461 ]")
![Fancy Borders Dies [ 165380 ]](https://assets1.tamsnetwork.com/images/EC042017NF/165380s.jpg "Fancy Borders Dies [ 165380 ]")
![Stampin' Cut & Emboss Machine [ 149653 ]](https://assets1.tamsnetwork.com/images/EC042017NF/149653s.jpg "Stampin' Cut & Emboss Machine [ 149653 ]")
![Small Blending Brushes [ 160518 ]](https://assets1.tamsnetwork.com/images/EC042017NF/160518s.jpg "Small Blending Brushes [ 160518 ]")
![Paper Trimmer [ 152392 ]](https://assets1.tamsnetwork.com/images/EC042017NF/152392s.jpg "Paper Trimmer [ 152392 ]")
![Bone Folder [ 102300 ]](https://assets1.tamsnetwork.com/images/EC042017NF/102300s.jpg "Bone Folder [ 102300 ]")
![Basic Beige 8 1/2" X 11" Cardstock [ 164511 ]](https://assets1.tamsnetwork.com/images/EC042017NF/164511s.jpg "Basic Beige 8 1/2\" X 11\" Cardstock [ 164511 ]")
![Basic White 8 1/2" X 11" Cardstock [ 166780 ]](https://assets1.tamsnetwork.com/images/EC042017NF/166780s.jpg "Basic White 8 1/2\" X 11\" Cardstock [ 166780 ]")
![Basic Beige Classic Stampin Pad [ 163806 ]](https://assets1.tamsnetwork.com/images/EC042017NF/163806s.jpg "Basic Beige Classic Stampin Pad [ 163806 ]")
![Granny Apple Green Stampin' Pad [ 147095 ]](https://assets1.tamsnetwork.com/images/EC042017NF/147095s.jpg "Granny Apple Green Stampin' Pad [ 147095 ]")
![Old Olive Classic Stampin' Pad [ 147090 ]](https://assets1.tamsnetwork.com/images/EC042017NF/147090s.jpg "Old Olive Classic Stampin' Pad [ 147090 ]")
![Early Espresso Classic Stampin' Pad [ 147114 ]](https://assets1.tamsnetwork.com/images/EC042017NF/147114s.jpg "Early Espresso Classic Stampin' Pad [ 147114 ]")
![Peach Pie Classic Stampin Pad [ 163810 ]](https://assets1.tamsnetwork.com/images/EC042017NF/163810s.jpg "Peach Pie Classic Stampin Pad [ 163810 ]")
![Timid Tiger Classic Stampin' Pad [ 165278 ]](https://assets1.tamsnetwork.com/images/EC042017NF/165278s.jpg "Timid Tiger Classic Stampin' Pad [ 165278 ]")
![Calypso Coral Classic Stampin' Pad [ 147101 ]](https://assets1.tamsnetwork.com/images/EC042017NF/147101s.jpg "Calypso Coral Classic Stampin' Pad [ 147101 ]")
![Daffodil Delight Classic Stampin' Pad [ 147094 ]](https://assets1.tamsnetwork.com/images/EC042017NF/147094s.jpg "Daffodil Delight Classic Stampin' Pad [ 147094 ]")
![Stampin' Seal+ [ 149699 ]](https://assets1.tamsnetwork.com/images/EC042017NF/149699s.jpg "Stampin' Seal+ [ 149699 ]")
![Stampin' Dimensionals [ 104430 ]](https://assets1.tamsnetwork.com/images/EC042017NF/104430s.jpg "Stampin' Dimensionals [ 104430 ]")
Learn To Make Cards
Shop Supplies
Rewards Program
Join My Amazing Team
I hope you can use these blending brush designs on an upcoming project!
Leave a Reply