• Nav Social Menu

    • Facebook
    • Facebook Group
    • Instagram
    • Pinterest
    • RSS
    • Twitter
    • YouTube

Handmake with Love

Anna Helman | formerly Scrapping, Stamping and Stuff

  • Blog
  • Start Here
    • About Me
    • Learn to Make Cards
    • Why Shop With Me?
    • Testimonials
    • Connect On Social
    • Get Email Updates
    • Stampin’ Up! Giveaway Winners
  • Products
    • Shop Now
    • Catalogs
    • Clearance
    • Why Choose Stampin Up?
    • Paper Pumpkin Kits
    • Product Shares
    • Rewards Program
    • Stamparatus
    • Cut And Emboss Machine
    • Mini Cut And Emboss Machine
    • Blends Alcohol Markers
    • Blending Brushes
  • Ideas
    • Video Tutorials
    • Project Gallery
    • Card Ideas
    • 3D Projects
    • Scrapbooking
    • Tips & Techniques
    • Kits
    • Learn to Make Cards
    • Printable Catalog Tabs
    • Social Media
  • Join
    • Join My Team
    • Stampin Up Demonstrator Resources
  • Classes
    • Classes in the Mail
    • In Person Events
  • Contact
    • Contact
    • Connect On Social

Adhere Vellum INVISIBLY With This Handy Trick

3 Feb

How many times have you been frustrated by trying to attach vellum to a project without the adhesive showing through to the front side? You’re not alone, I think we’ve all been there. Since I discovered the trick that I’m going to share today, it is almost always the way I adhere vellum when I can’t hide the adhesive behind another element of my project. Since I’m sharing card making tricks all week long, I definitely wanted to share this trick, so let’s talk about it!

Learn to adhere vellum invisibly using this handy trick and glue you likely already have in your card making or scrapbooking collection.

How To Adhere Vellum Invisibly Video

Watch along here for all the details, or keep reading!
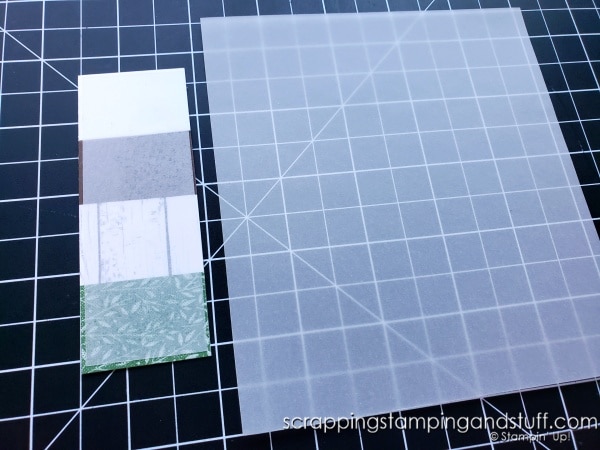
Materials Needed

Here’s what you’ll need to use this handy trick to attach vellum without the adhesive showing through:

  • Silicone Craft Sheet
  • Multipurpose Glue
  • Sponge
  • Vellum

How To Adhere Vellum Invisibly – Step By Step

1. Put a small amount of glue onto the corner of the silicone craft sheet.

Learn to adhere vellum invisibly using this handy trick and glue you likely already have in your card making or scrapbooking collection.

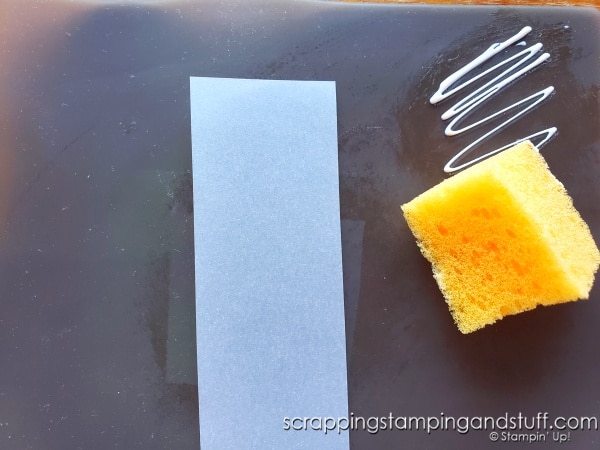
2. Swirl the sponge into the glue to give a thin coating of glue on the sponge.

3. Lay the vellum on the silicone craft sheet.

4. Dab the sponge all over the vellum, while holding the vellum in place with your other hand so it doesn’t shift.

5. Place vellum on your project and press down.
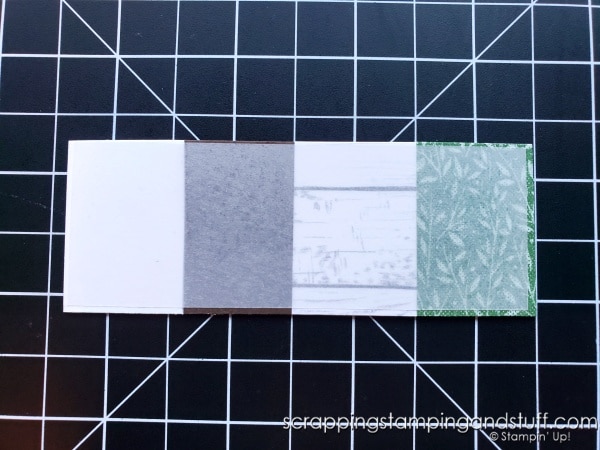
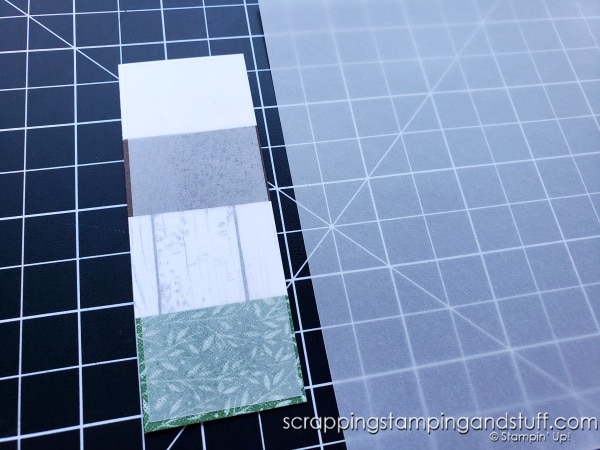
Learn to adhere vellum invisibly using this handy trick and glue you likely already have in your card making or scrapbooking collection.

The Results

Below you can see the results of how the vellum looks over a few different types of paper. Over the light colored cardstock, light designer paper, and dark designer paper, you can’t see the glue at all. Over the dark cardstock you can see some tiny speckles where the glue was thicker on the sponge. Overall, I’m totally happy with this trick and I hope it helps you as well!

Learn to adhere vellum invisibly using this handy trick and glue you likely already have in your card making or scrapbooking collection.

Materials List

Here are links to the supplies I used.

Product List
Silicone Craft Sheet
[127853]
Multipurpose Liquid Glue
[110755]
Vellum 8-1/2" X 11" Cardstock
Vellum 8-1/2″ X 11″ Cardstock
[101856]
Add All to Cart

Learn To Make Cards
Shop Supplies
Rewards Program
Join My Amazing Team

Thanks for visiting to see this fantastic trick to adhere vellum invisibly!

Sharing is caring!

Filed Under: Gallery, Learn to Stamp Tagged With: cardmaking hacks, cardmaking tips and tricks, learn to stamp

Previous Post: « Make Any Size Die Cut With This Card Making Hack!
Next Post: Get Your Slimline Cards To Lay FLAT! »

Reader Interactions

Comments

  1. Doris D. says

    February 3, 2022 at 7:40 AM

    Who knew!! Thanks for the tip.

    Reply
    • Anna Helman says

      February 3, 2022 at 11:24 AM

      You’re welcome! I’m glad this helps!

      Reply
  2. Beth S says

    February 3, 2022 at 9:12 AM

    Great tip. Thank you!

    Reply
    • Anna Helman says

      February 3, 2022 at 11:24 AM

      You’re welcome!

      Reply

Leave a Reply Cancel reply

Your email address will not be published. Required fields are marked *

Recipe Rating


Primary Sidebar

Anna Helman

Independent Stampin' Up!® Demonstrator

  • Email
  • Facebook
  • Facebook Group
  • Instagram
  • Pinterest
  • RSS
  • Twitter
  • YouTube
Shop Stampin' Up!
Stampin' Up! catalogs
get updates
join Stampin' Up!
Stampin' Up! Rewards
Stampin' Up! special offers
Stampin' Up! clearance
Stampin' Up! 2025-2026 Annual Catalog
May 6, 2025 - May 4, 2026
View Online | Shop Online

Blog Archive

Categories

Footer

Important Links

  • Home
  • Shop Now
  • Get Updates
  • Join My Team
  • Rewards
  • Specials
  • Catalogs
  • Clearance

Anna Helman, Independent Stampin' Up!® Demonstrator

  • Email
  • Facebook
  • Facebook Group
  • Instagram
  • Pinterest
  • RSS
  • Twitter
  • YouTube

Get Ideas, Inspiration, and Special Offers!

Sign up to receive updates in your inbox

Thank you!

Please check your email for a special offer! 

.
All content on this blog is the property of Anna Helman, Stampin' Up!® Independent Demonstrator. Classes, services and projects offered here are not endorsed by Stampin' Up!® Projects, videos, photos, ideas and articles are shared for personal use only and may not be removed, duplicated or copied without permission. All artwork © Stampin' Up!®

Copyright © 2025 Anna Helman, handmake with love · Site Design by Catherine Carroll