• Nav Social Menu

    • Facebook
    • Facebook Group
    • Instagram
    • Pinterest
    • RSS
    • Twitter
    • YouTube

Handmake with Love

Anna Helman | formerly Scrapping, Stamping and Stuff

  • Blog
  • Start Here
    • About Me
    • Learn to Make Cards
    • Why Shop With Me?
    • Testimonials
    • Connect On Social
    • Get Email Updates
    • Stampin’ Up! Giveaway Winners
  • Products
    • Shop Now
    • Catalogs
    • Clearance
    • Why Choose Stampin Up?
    • Paper Pumpkin Kits
    • Product Shares
    • Rewards Program
    • Stamparatus
    • Cut And Emboss Machine
    • Mini Cut And Emboss Machine
    • Blends Alcohol Markers
    • Blending Brushes
  • Ideas
    • Video Tutorials
    • Project Gallery
    • Card Ideas
    • 3D Projects
    • Scrapbooking
    • Tips & Techniques
    • Kits
    • Learn to Make Cards
    • Printable Catalog Tabs
    • Social Media
  • Join
    • Join My Team
    • Stampin Up Demonstrator Resources
  • Classes
    • Classes in the Mail
    • In Person Events
  • Contact
    • Contact
    • Connect On Social

Cardmaking 101 Lesson 3: Paper and How to Prepare a Card Base

15 Aug

Welcome to Cardmaking 101 Lesson 3! Today, we will be talking all about paper! We’ve already talked about the basics of cardmaking and learned more about stamps. Now we’ll move on to paper! The paper you choose for your project has a huge effect on the outcome of your card, so let’s get down to business!

Paper Sizes

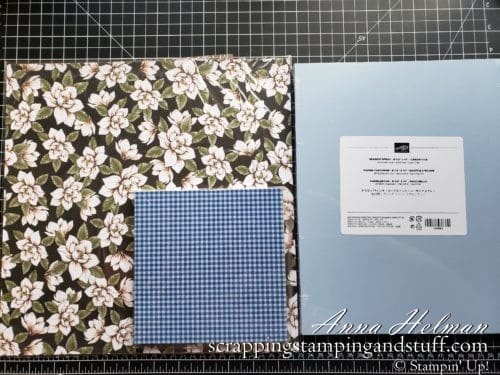
When shopping for paper, you will likely find 3 sizes – 8 1/2″ x 11″, 12″ x 12″, and 6″ x 6″. Often, cardstock comes in 8 1/2″ x 11″ which is perfect for making card bases, and 12″ x 12″ which is great for scrapbook pages or cutting down for cards. Printed designer papers are available in 12″ x 12″ and 6″ x 6″, both of which can also be cut into various sizes for cardmaking.

Cardmaking 101 Lesson 3: All About Paper. Learn about types and weights of paper, how to prepare a card base, and sizes for cutting card mats.

Types of Paper for Cardmaking

Cardstock

Cardstock provides a strong base for cards, and you’ll want to make sure to use a high quality cardstock. Lower quality papers and lighter weight cardstock makes for lightweight cards that often won’t even sit up to be displayed without sagging. If you’re putting time into making a handmade card, you’ll want the result to be a quality card that can be set on a shelf or desk without bending or sagging. Use quality cardstock! Stampin’ Up! cardstock is the best I have used, and I often hear the same thing from other papercrafters. I highly suggest it!

Designer Paper

Stampin’ Up! designer series paper comes in 12″ x 12″ and 6″ x 6″ sizes. It is heavier than most printed papers on the market, and all designer papers are double sided. Double sided may not sound like a big benefit, but when you happen to come across a design you’re not crazy about, the other side may be a life saver to avoid wasting that paper. In addition, many of our papers are considered ‘specialty’ which means they have some type of special accents. It may be glitter, foil, raised areas, or something else, but these specialty papers are one of a kind and add a special pop to handmade projects.

Paper Weights

The weight of Stampin’ Up! standard cardstock is 80 lb. This is an excellent weight for making high quality cards. In addition to our standard cardstock, we also offer thick cardstock in whisper white and very vanilla. When making a card base from one of these colors, I strongly suggest using thick cardstock so that the card doesn’t sag when set upright. Our thick cardstock weight is 100 lb.

How to Prepare a Card Base

Let’s talk about how to prepare a card base! To prepare a standard sized card (4 1/2″ x 5 1/2″) which fits in an A2 envelope, you can either purchase prepackaged cards and envelopes, or follow the instructions shown below.

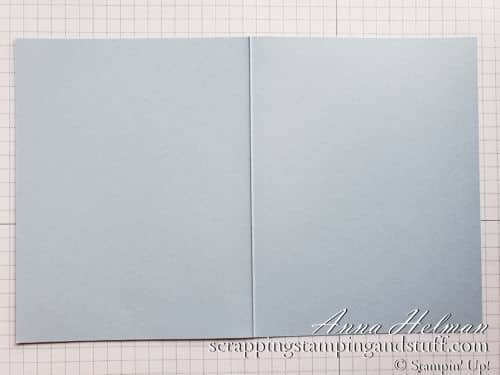
Begin with an 8 1/2″ x 11″ piece of cardstock. Lay it horizontally on your paper cutter, and cut at the 5 1/2″ mark, which will divide the paper exactly in half, giving you two card bases.

Cardmaking 101 Lesson 3: All About Paper. Learn about types and weights of paper, how to prepare a card base, and sizes for cutting card mats.

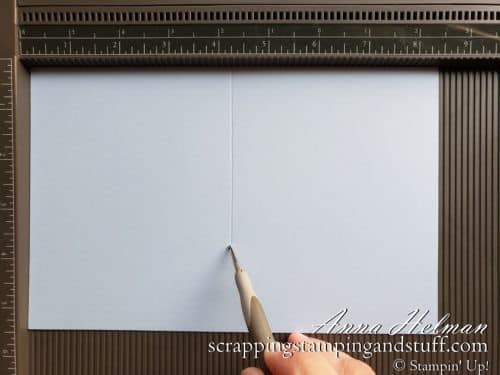
Next you’ll want to score a centerline onto one of the card bases. Lay one card base horizontally on the Stampin’ Up! Simply Scored scoring board, and score it at the 4 1/2″ mark.

Cardmaking 101 Lesson 3: All About Paper. Learn about types and weights of paper, how to prepare a card base, and sizes for cutting card mats.

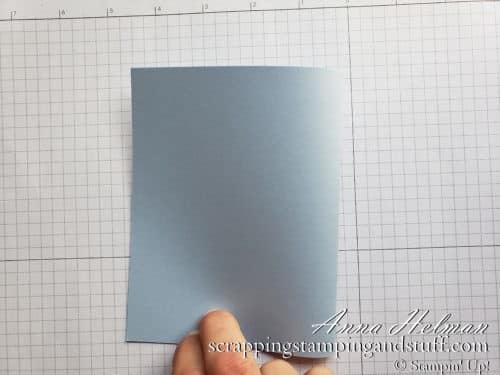
Next, fold the card in half by first lining up the corners, then creasing it along the centerline.

Cardmaking 101 Lesson 3: All About Paper. Learn about types and weights of paper, how to prepare a card base, and sizes for cutting card mats.

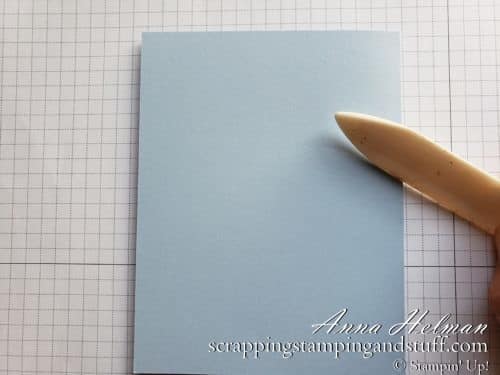
Next, run a bone folder along the crease to help it lay flat.

Cardmaking 101 Lesson 3: All About Paper. Learn about types and weights of paper, how to prepare a card base, and sizes for cutting card mats.

Here you can see the card base, opened back up, which is ready to be used!

Cardmaking 101 Lesson 3: All About Paper. Learn about types and weights of paper, how to prepare a card base, and sizes for cutting card mats.

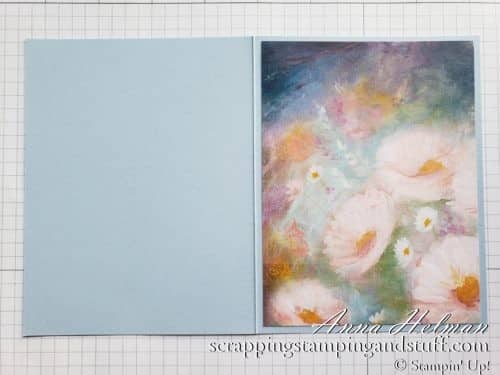
How to Prepare a Card Front

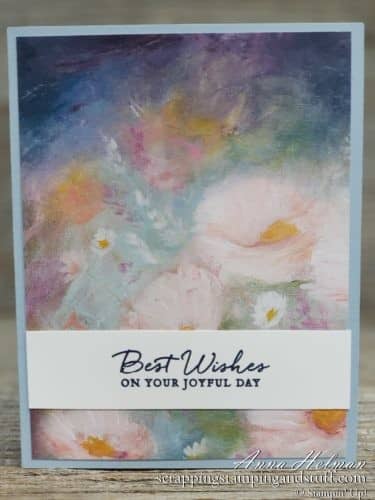
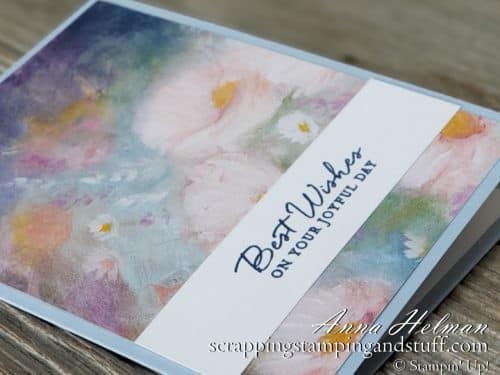
The ‘card front’ is what you will attach to the front of the card. Below it is the piece of designer paper. The measurements for a card front like the one shown below are 4″ x 5 1/4″. I cut this one from a piece of 12″ x 12″ Perennial Essence designer series paper, then attached it with Snail adhesive.

Cardmaking 101 Lesson 3: All About Paper. Learn about types and weights of paper, how to prepare a card base, and sizes for cutting card mats.

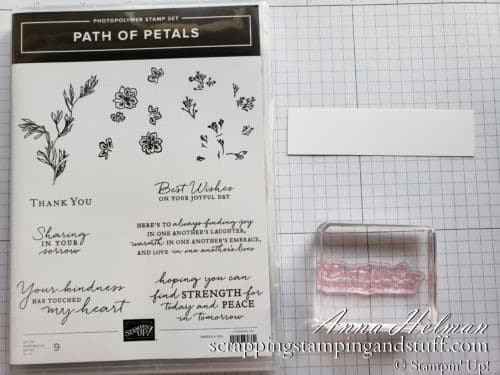
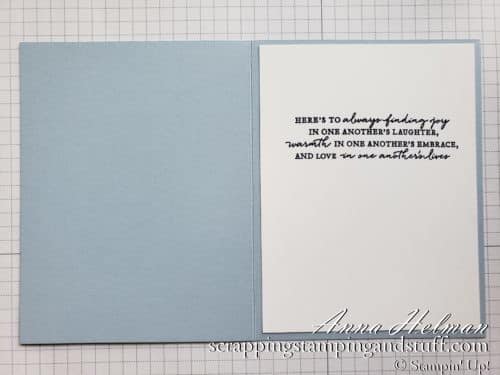
I don’t want to leave you hanging with an unfinished card, so let’s finish it! I cut a piece of 1″ x 4″ whisper white cardstock, and stamped a greeting on it from the Path of Petals stamp set.

Cardmaking 101 Lesson 3: All About Paper. Learn about types and weights of paper, how to prepare a card base, and sizes for cutting card mats.

Below you can see the greeting after it was attached.

Cardmaking 101 Lesson 3: All About Paper. Learn about types and weights of paper, how to prepare a card base, and sizes for cutting card mats.

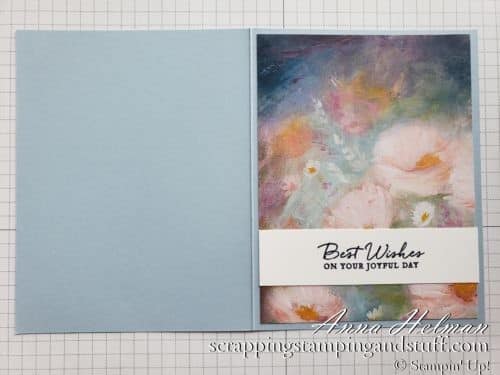
I wanted to put a mat on the inside of the card as well, so I cut a piece of white cardstock in the same size as the front – 4″ x 5 1/4″. I stamped a greeting on it, and then attached it.

Cardmaking 101 Lesson 3: All About Paper. Learn about types and weights of paper, how to prepare a card base, and sizes for cutting card mats.

The Finished Card

Here is the finished card! Very simple and very easy!

Easy handmade wedding card idea with Stampin' Up! Perennial Essence Designer Series Paper and Path of Petals Stamp Set

Easy handmade wedding card idea with Stampin' Up! Perennial Essence Designer Series Paper and Path of Petals Stamp Set

Hopefully this post helped you learn more about paper, in relation to your papercrafting projects! Order the products I used using the links below, and contact me anytime with questions! Stop back in for my next Cardmaking 101 post which will be all about ink!

Please make me your Stampin’ Up! demonstrator!

  • With your first order, you’ll receive a FREE annual catalog from me! Seasonal catalogs are also mailed to regular customers.
  • Please use hostess code GZS46UCA when you order.
  • Keep track of your Stampin’ Rewards and earn free stamps from me!
  • When you order $150 or more, you’ll earn hostess credit through Stampin’ Up!
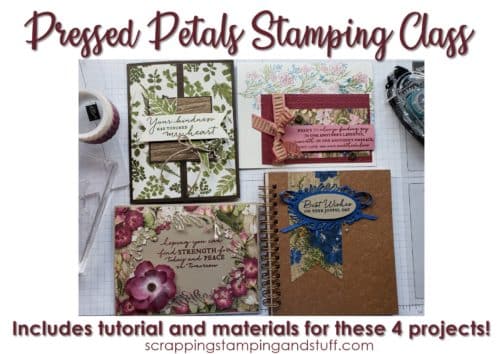
  • Check out my current Project in the Mail, Pressed Petals (shown below)!

Online stamping class in the mail! Receive the materials to make these beautiful handmade card ideas. Class uses the Stampin Up Pressed Petals product suite, Path of Petals stamp set, Petal Labels dies, and Pressed Petals designer paper.

Order the products I used and make this project yourself!

Path Of Petals Photopolymer Stamp Set

Path Of Petals Photopolymer Stamp Set
[149383]

Perennial Essence Designer Series Paper

Perennial Essence Designer Series Paper
[149100]

Whisper White 8-1/2" X 11" Cardstock

Whisper White 8-1/2″ X 11″ Cardstock
[100730]

Balmy Blue 8-1/2" X 11" Cardstock

Balmy Blue 8-1/2″ X 11″ Cardstock
[146982]

Night Of Navy Classic Stampin' Pad

Night Of Navy Classic Stampin’ Pad
[147110]

Snail Adhesive

Snail Adhesive
[104332]

Simply Scored

Simply Scored
[122334]

Bone Folder

Bone Folder
[102300]
Sharing is caring!

Filed Under: Cards, Learn to Stamp Tagged With: #simplestamping, 2019-2020 annual catalog, blue, cardmaking 101, path of petals stamp set, perennial essence dsp

Previous Post: « Stampin Up Harvest Hellos Pumpkin Card
Next Post: Stampin Up Good Morning Magnolia Scrapbook Page »

Reader Interactions

Leave a Reply Cancel reply

Your email address will not be published. Required fields are marked *

Recipe Rating


Primary Sidebar

Anna Helman

Independent Stampin' Up!® Demonstrator

  • Email
  • Facebook
  • Facebook Group
  • Instagram
  • Pinterest
  • RSS
  • Twitter
  • YouTube
Shop Stampin' Up!
Stampin' Up! catalogs
get updates
join Stampin' Up!
Stampin' Up! Rewards
Stampin' Up! special offers
Stampin' Up! clearance
Stampin' Up! 2025-2026 Annual Catalog
May 6, 2025 - May 4, 2026
View Online | Shop Online

Blog Archive

Categories

Footer

Important Links

  • Home
  • Shop Now
  • Get Updates
  • Join My Team
  • Rewards
  • Specials
  • Catalogs
  • Clearance

Anna Helman, Independent Stampin' Up!® Demonstrator

  • Email
  • Facebook
  • Facebook Group
  • Instagram
  • Pinterest
  • RSS
  • Twitter
  • YouTube

Get Ideas, Inspiration, and Special Offers!

Sign up to receive updates in your inbox

Thank you!

Please check your email for a special offer! 

.
All content on this blog is the property of Anna Helman, Stampin' Up!® Independent Demonstrator. Classes, services and projects offered here are not endorsed by Stampin' Up!® Projects, videos, photos, ideas and articles are shared for personal use only and may not be removed, duplicated or copied without permission. All artwork © Stampin' Up!®

Copyright © 2025 Anna Helman, handmake with love · Site Design by Catherine Carroll