• Nav Social Menu

    • Facebook
    • Facebook Group
    • Instagram
    • Pinterest
    • RSS
    • Twitter
    • YouTube

Handmake with Love

Anna Helman | formerly Scrapping, Stamping and Stuff

  • Blog
  • Start Here
    • About Me
    • Learn to Make Cards
    • Why Shop With Me?
    • Testimonials
    • Connect On Social
    • Get Email Updates
    • Stampin’ Up! Giveaway Winners
  • Products
    • Shop Now
    • Catalogs
    • Clearance
    • Why Choose Stampin Up?
    • Paper Pumpkin Kits
    • Product Shares
    • Rewards Program
    • Stamparatus
    • Cut And Emboss Machine
    • Mini Cut And Emboss Machine
    • Blends Alcohol Markers
    • Blending Brushes
  • Ideas
    • Video Tutorials
    • Project Gallery
    • Card Ideas
    • 3D Projects
    • Scrapbooking
    • Tips & Techniques
    • Kits
    • Learn to Make Cards
    • Printable Catalog Tabs
    • Social Media
  • Join
    • Join My Team
    • Stampin Up Demonstrator Resources
  • Classes
    • Classes in the Mail
    • In Person Events
  • Contact
    • Contact
    • Connect On Social

Introducing Stampin’ Up! Cling Stamps!

9 Jan

Happy Hump Day! I hope you’re excited about our new Occasions Catalog products and Sale-a-bration items like I am. We have a big change with our stamps in these catalogs, and I want to share some info with you regarding that change. What’s the change? We no longer have traditional Clear-Mount Rubber or Wood-Mount Rubber stamps (in the new catalog – we still do in the Annual Catalog however). Don’t worry – our previous stamps have been improved! Our new replacements are the Stampin’ Up! Cling Stamps and they are fantastic! You will no longer have stamps falling off blocks, and you won’t have to come up with different techniques to get them to stick. Cling Stamps mean the problem is solved! I’m going to walk you through the steps to place labels on the back of a set of Cling Stamps, and in the process of doing so we’ll discuss some differences with these new stamps.

Placing labels on the back of our new Cling Stamps is basically the same as always, but let’s take a look anyway. First, remove the paper backing from the stamp itself and also the sticker backing from the label sheet.

Your rubber stamps will never fall off your clear blocks again! Photo instructions for how to use Stampin' Up! Cling Stamps.

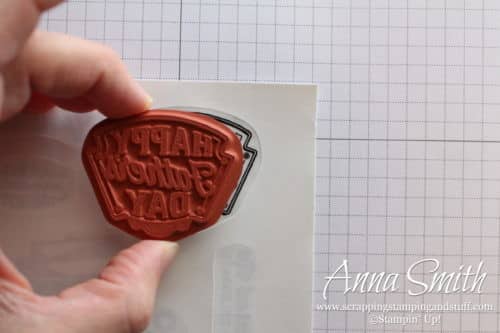
Line up the stamp directly on top of the label, and press the stamp down onto the label.

Your rubber stamps will never fall off your clear blocks again! Photo instructions for how to use Stampin' Up! Cling Stamps.

Peel the stamp away from the label sheet. Be careful not to pull too hard until the label begins to release. It is possible to tear the foam part of the stamp if you pull before the label releases.

Your rubber stamps will never fall off your clear blocks again! Photo instructions for how to use Stampin' Up! Cling Stamps.

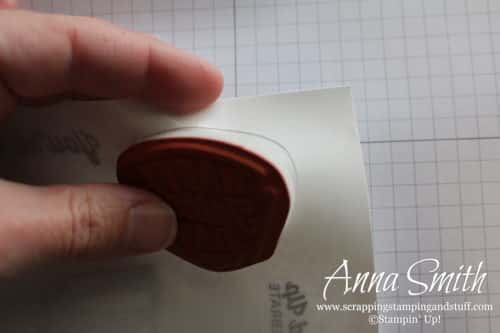
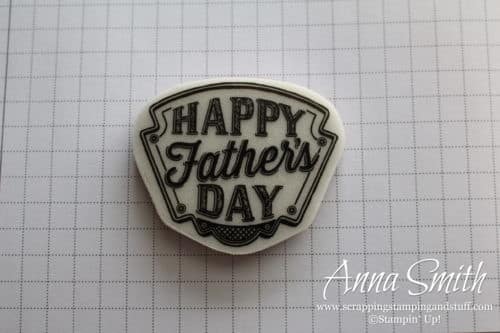
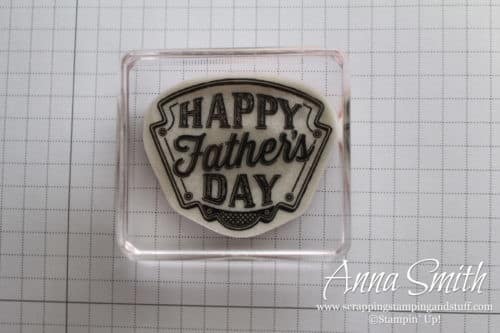
Below we have the stamp with the label attached. Here’s the difference from our previous clear-mount stamps…the label you are looking at is sticky on top. This sticky surface will allow it to cling to a clear block with essentially no effort.

Your rubber stamps will never fall off your clear blocks again! Photo instructions for how to use Stampin' Up! Cling Stamps.

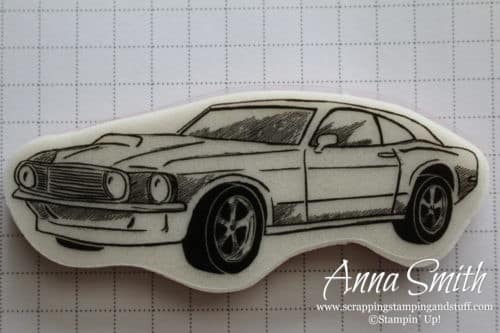
Below you can see that I have attached the label onto another stamp in the Geared Up Garage stamp set. If you look very closely, you can see that I didn’t get the label lined up exactly and a small amount of it is extending above the top of the stamp. The reason I show this is because this is a problem. If you try to remove this stamp from a block by pulling on the top side where the label extends too far, it will not let go of the block. Therefore, if you have labels sticking over the edge of any stamps, simply trim off the excess.

Your rubber stamps will never fall off your clear blocks again! Photo instructions for how to use Stampin' Up! Cling Stamps.

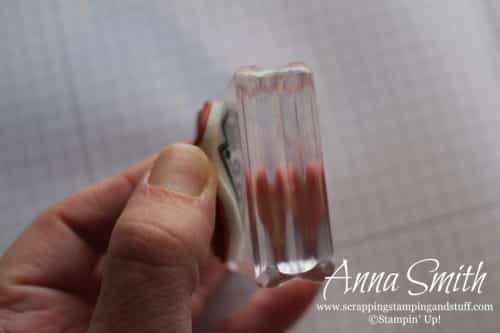
Back to our original stamp, I attached it to an acrylic block by applying very little pressure.

Your rubber stamps will never fall off your clear blocks again! Photo instructions for how to use Stampin' Up! Cling Stamps.

After stamping, you’ll need to remove the stamp from the block. You can’t just hurriedly pull it off like with our clear-mount stamps. You need to lift on one corner until it begins to release. Then you can remove the rest quickly. If you pull it quickly before it begins to release, you could tear the foam part of the stamp.

Your rubber stamps will never fall off your clear blocks again! Photo instructions for how to use Stampin' Up! Cling Stamps.

Here you can see how I like to store my stamps in the case. I removed the paper backing from the rubber sheet, then placed it foam side down in the case. It sticks in place, then I place the stamps back inside it. This allows me to quickly see if all stamps are in the set before I put it away.

Your rubber stamps will never fall off your clear blocks again! Photo instructions for how to use Stampin' Up! Cling Stamps.

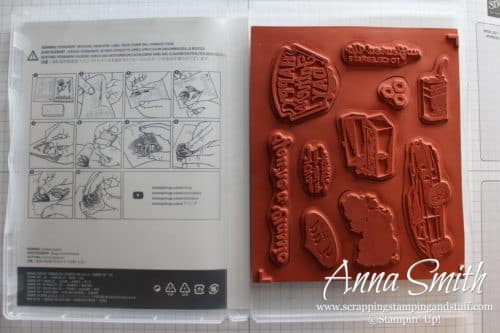
Here you can see what the set looks like from the bottom of the case. Since the label side of the stamps stamps is sticky, it is important to press the label side directly onto the case to keep them from collecting any dirt or dust.

Your rubber stamps will never fall off your clear blocks again! Photo instructions for how to use Stampin' Up! Cling Stamps.

What happens if the sticky label does collect dirt or dust? Rinse them with water, or clean them with Stampin’ Mist or a gentle detergent. Do NOT use baby wipes or any type of cloth to dry them because you don’t want the stamps to collect any cloth fibers. You’ll have to try these wonderful new stamps and let me know what you think!

Please make me your Stampin’ Up! demonstrator!

  • Please use hostess code WKM7TJFA when you order. With an order of $50+, you’ll receive Sale-a-bration benefits PLUS a link to access dozens of free stamping tutorials! See photo below!
  • Earn these items free during Sale-a-bration!
  • Keep track of your Stampin’ Rewards and earn free stamps from me!
  • When you order $150 or more, you’ll earn hostess credit through Stampin’ Up!

Use the links below to order and make this project yourself! 

Geared Up Garage Cling Stamp Set

Geared Up Garage Cling Stamp Set
[148590]
Sharing is caring!

Filed Under: Featured Products Tagged With: geared up garage

Previous Post: « Frog Fun with Stampin’ Up! So Hoppy Together
Next Post: OSAT Blog Hop Sale-a-brate Every Occasion With Stampin’ Up! Climbing Roses »

Reader Interactions

Comments

  1. Kathy cornetet says

    February 2, 2019 at 9:04 AM

    Please tell me what the cut out section is for in the new cling stamps.

    Reply
    • Anna Smith says

      February 19, 2019 at 5:04 PM

      I’m catching up on comments. I’m not sure what you mean by the cut out sections.

      Reply

Leave a Reply Cancel reply

Your email address will not be published. Required fields are marked *

Recipe Rating


Primary Sidebar

Anna Helman

Independent Stampin' Up!® Demonstrator

  • Email
  • Facebook
  • Facebook Group
  • Instagram
  • Pinterest
  • RSS
  • Twitter
  • YouTube
Shop Stampin' Up!
Stampin' Up! catalogs
get updates
join Stampin' Up!
Stampin' Up! Rewards
Stampin' Up! special offers
Stampin' Up! clearance
Stampin' Up! 2025-2026 Annual Catalog
May 6, 2025 - May 4, 2026
View Online | Shop Online

Blog Archive

Categories

Footer

Important Links

  • Home
  • Shop Now
  • Get Updates
  • Join My Team
  • Rewards
  • Specials
  • Catalogs
  • Clearance

Anna Helman, Independent Stampin' Up!® Demonstrator

  • Email
  • Facebook
  • Facebook Group
  • Instagram
  • Pinterest
  • RSS
  • Twitter
  • YouTube

Get Ideas, Inspiration, and Special Offers!

Sign up to receive updates in your inbox

Thank you!

Please check your email for a special offer! 

.
All content on this blog is the property of Anna Helman, Stampin' Up!® Independent Demonstrator. Classes, services and projects offered here are not endorsed by Stampin' Up!® Projects, videos, photos, ideas and articles are shared for personal use only and may not be removed, duplicated or copied without permission. All artwork © Stampin' Up!®

Copyright © 2025 Anna Helman, handmake with love · Site Design by Catherine Carroll