• Nav Social Menu

    • Facebook
    • Facebook Group
    • Instagram
    • Pinterest
    • RSS
    • Twitter
    • YouTube

Handmake with Love

Anna Helman | formerly Scrapping, Stamping and Stuff

  • Blog
  • Start Here
    • About Me
    • Learn to Make Cards
    • Why Shop With Me?
    • Testimonials
    • Connect On Social
    • Get Email Updates
    • Stampin’ Up! Giveaway Winners
  • Products
    • Shop Now
    • Catalogs
    • Clearance
    • Why Choose Stampin Up?
    • Paper Pumpkin Kits
    • Product Shares
    • Rewards Program
    • Stamparatus
    • Cut And Emboss Machine
    • Mini Cut And Emboss Machine
    • Blends Alcohol Markers
    • Blending Brushes
  • Ideas
    • Video Tutorials
    • Project Gallery
    • Card Ideas
    • 3D Projects
    • Scrapbooking
    • Tips & Techniques
    • Kits
    • Learn to Make Cards
    • Printable Catalog Tabs
    • Social Media
  • Join
    • Join My Team
    • Stampin Up Demonstrator Resources
  • Classes
    • Classes in the Mail
    • In Person Events
  • Contact
    • Contact
    • Connect On Social

Cute Mini Clipboard

14 Apr

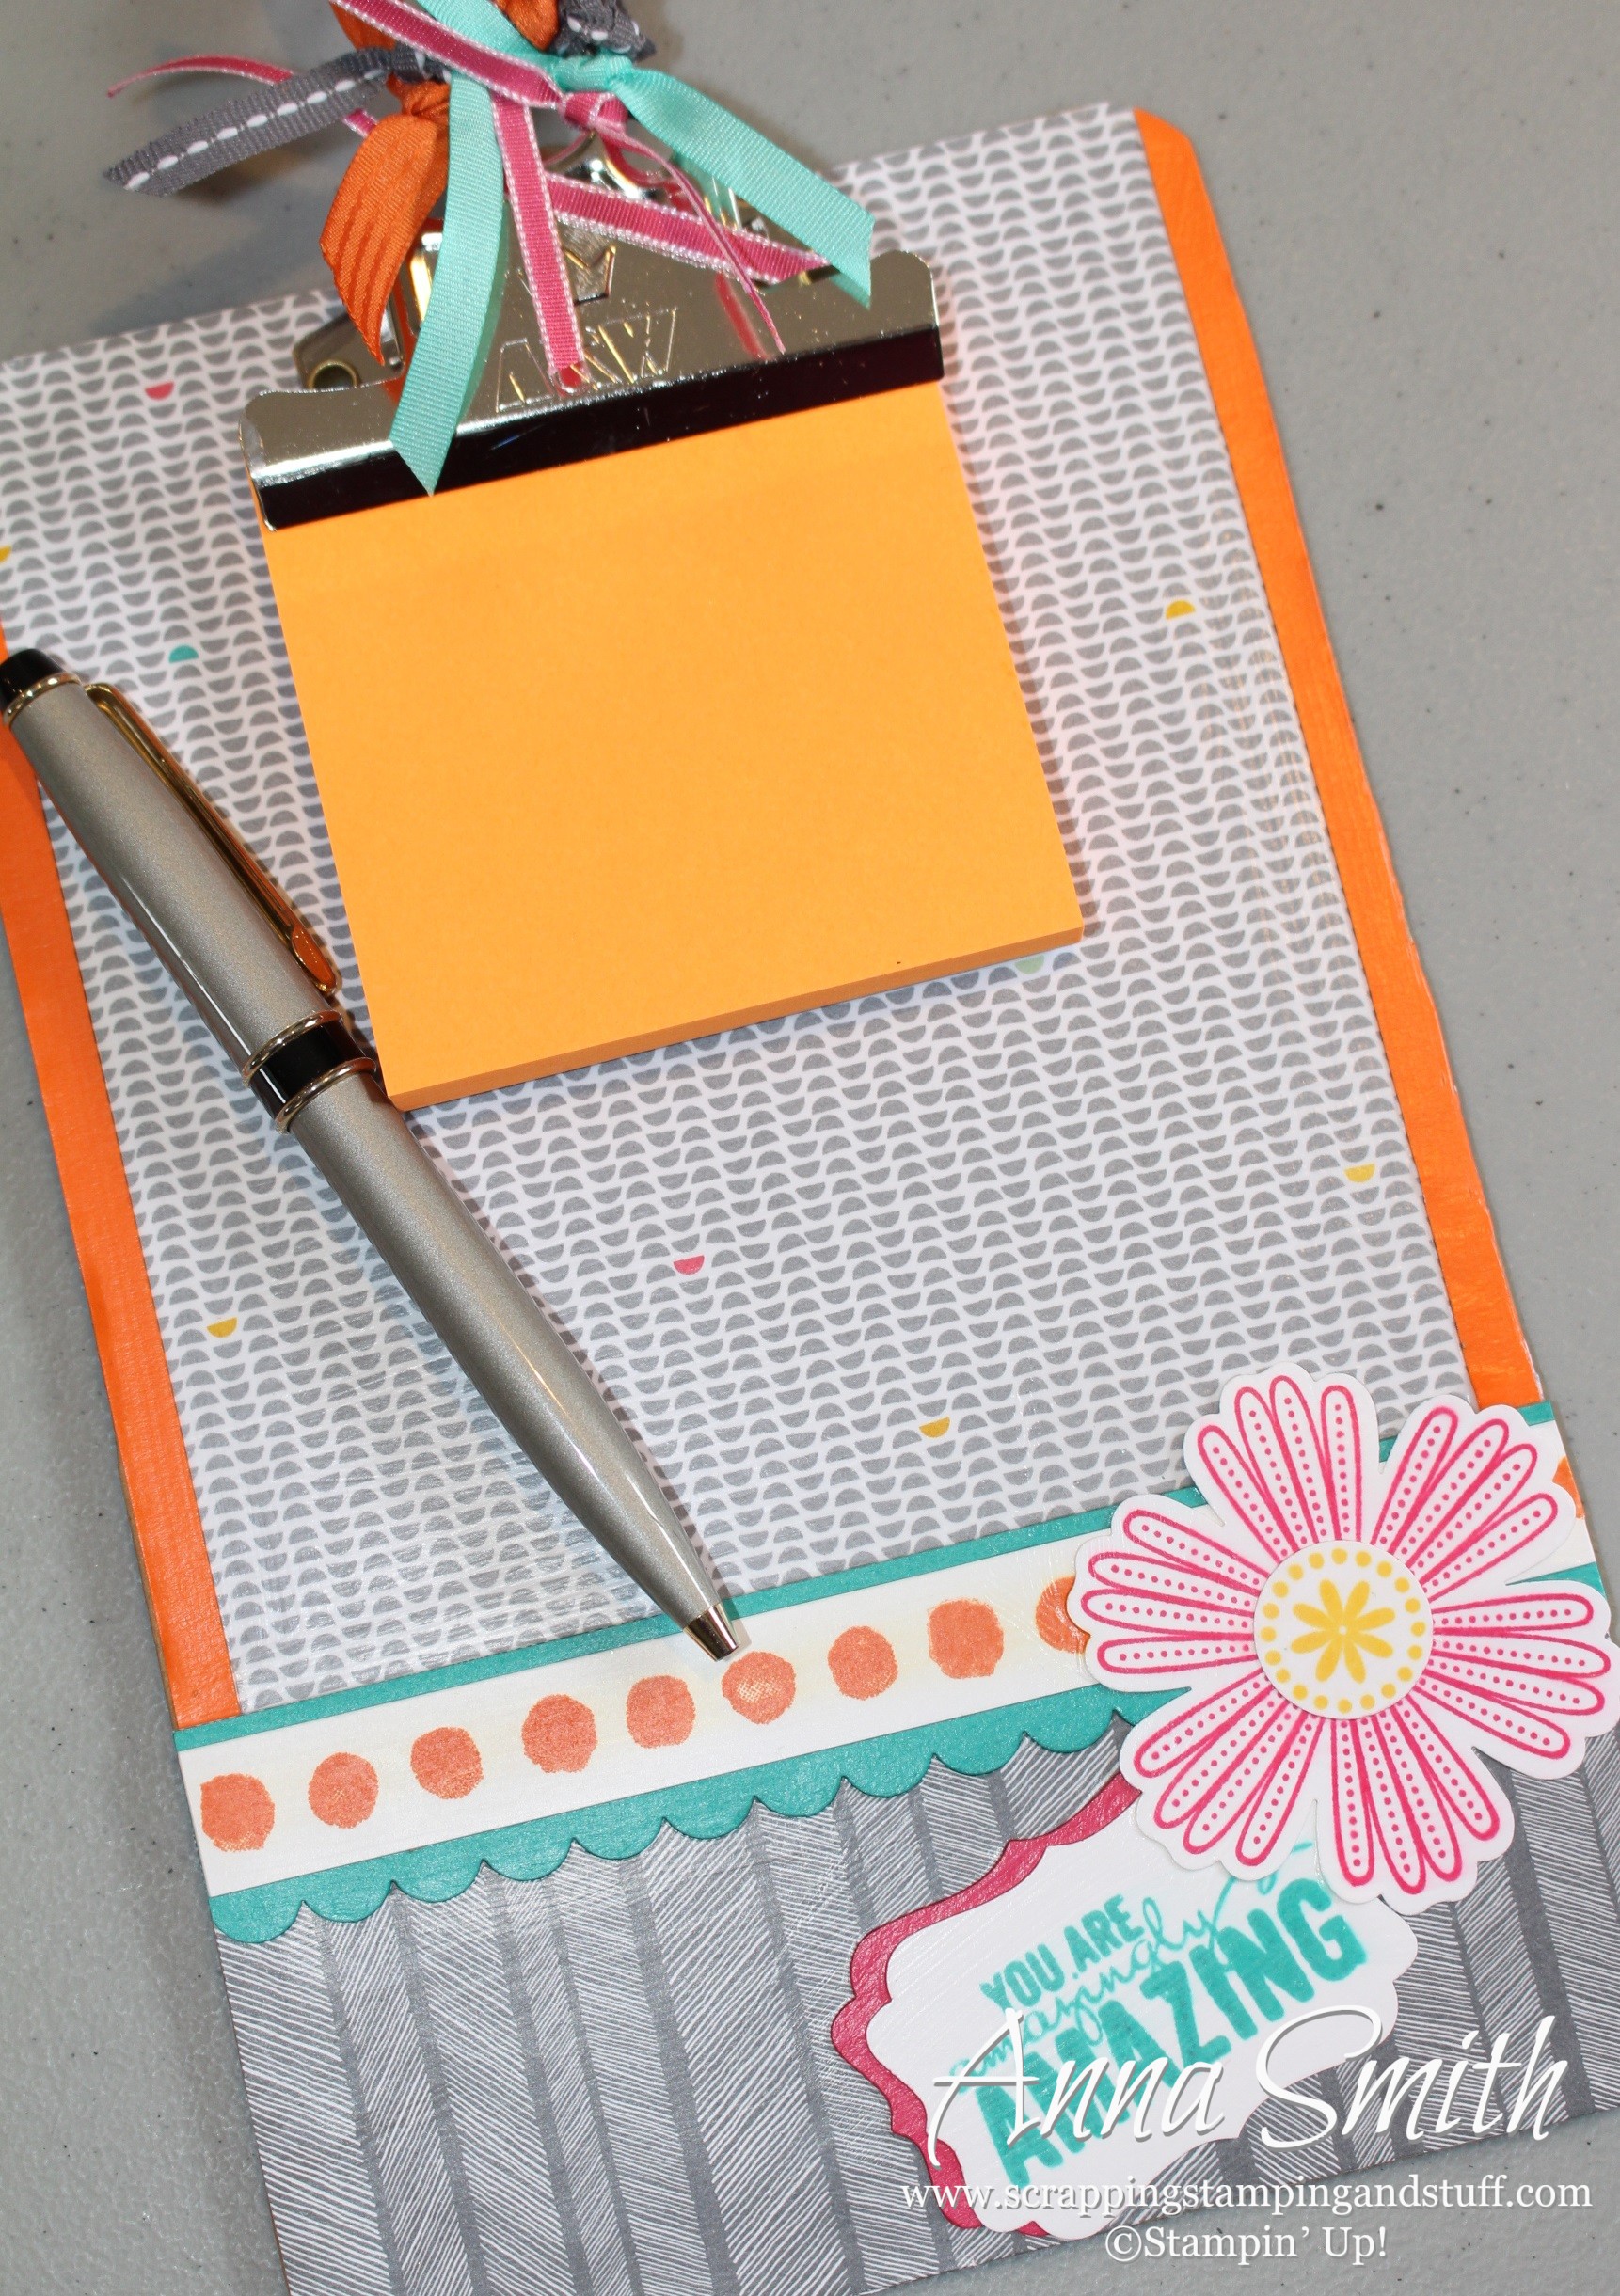
One of my upcoming party hosts asked if we could make something for a teacher gift. I shared a few ideas with her, and both her favorite and mine was the mini clipboard. Here is what I came up with for her, and I can’t wait to actually create these at her workshop.

Stampin' Up! Mini Clipboard

Stampin' Up! Mini Clipboard

Here’s what you will need:

  • Mini clipboard
  • Designer series paper
  • Decorative paper, stamps, punches
  • Mod podge
  • Paintbrush
  • 5 ” ribbon strips

To decorate your clipboard:

  • First you need to trim your designer paper to the size of your clipboard. You can measure and cut it with a trimmer, or simply trace the clipboard and cut it with scissors. Then you will have to trim out a slot so that the paper slips over the clip at the top of the board. This is the trickiest part.
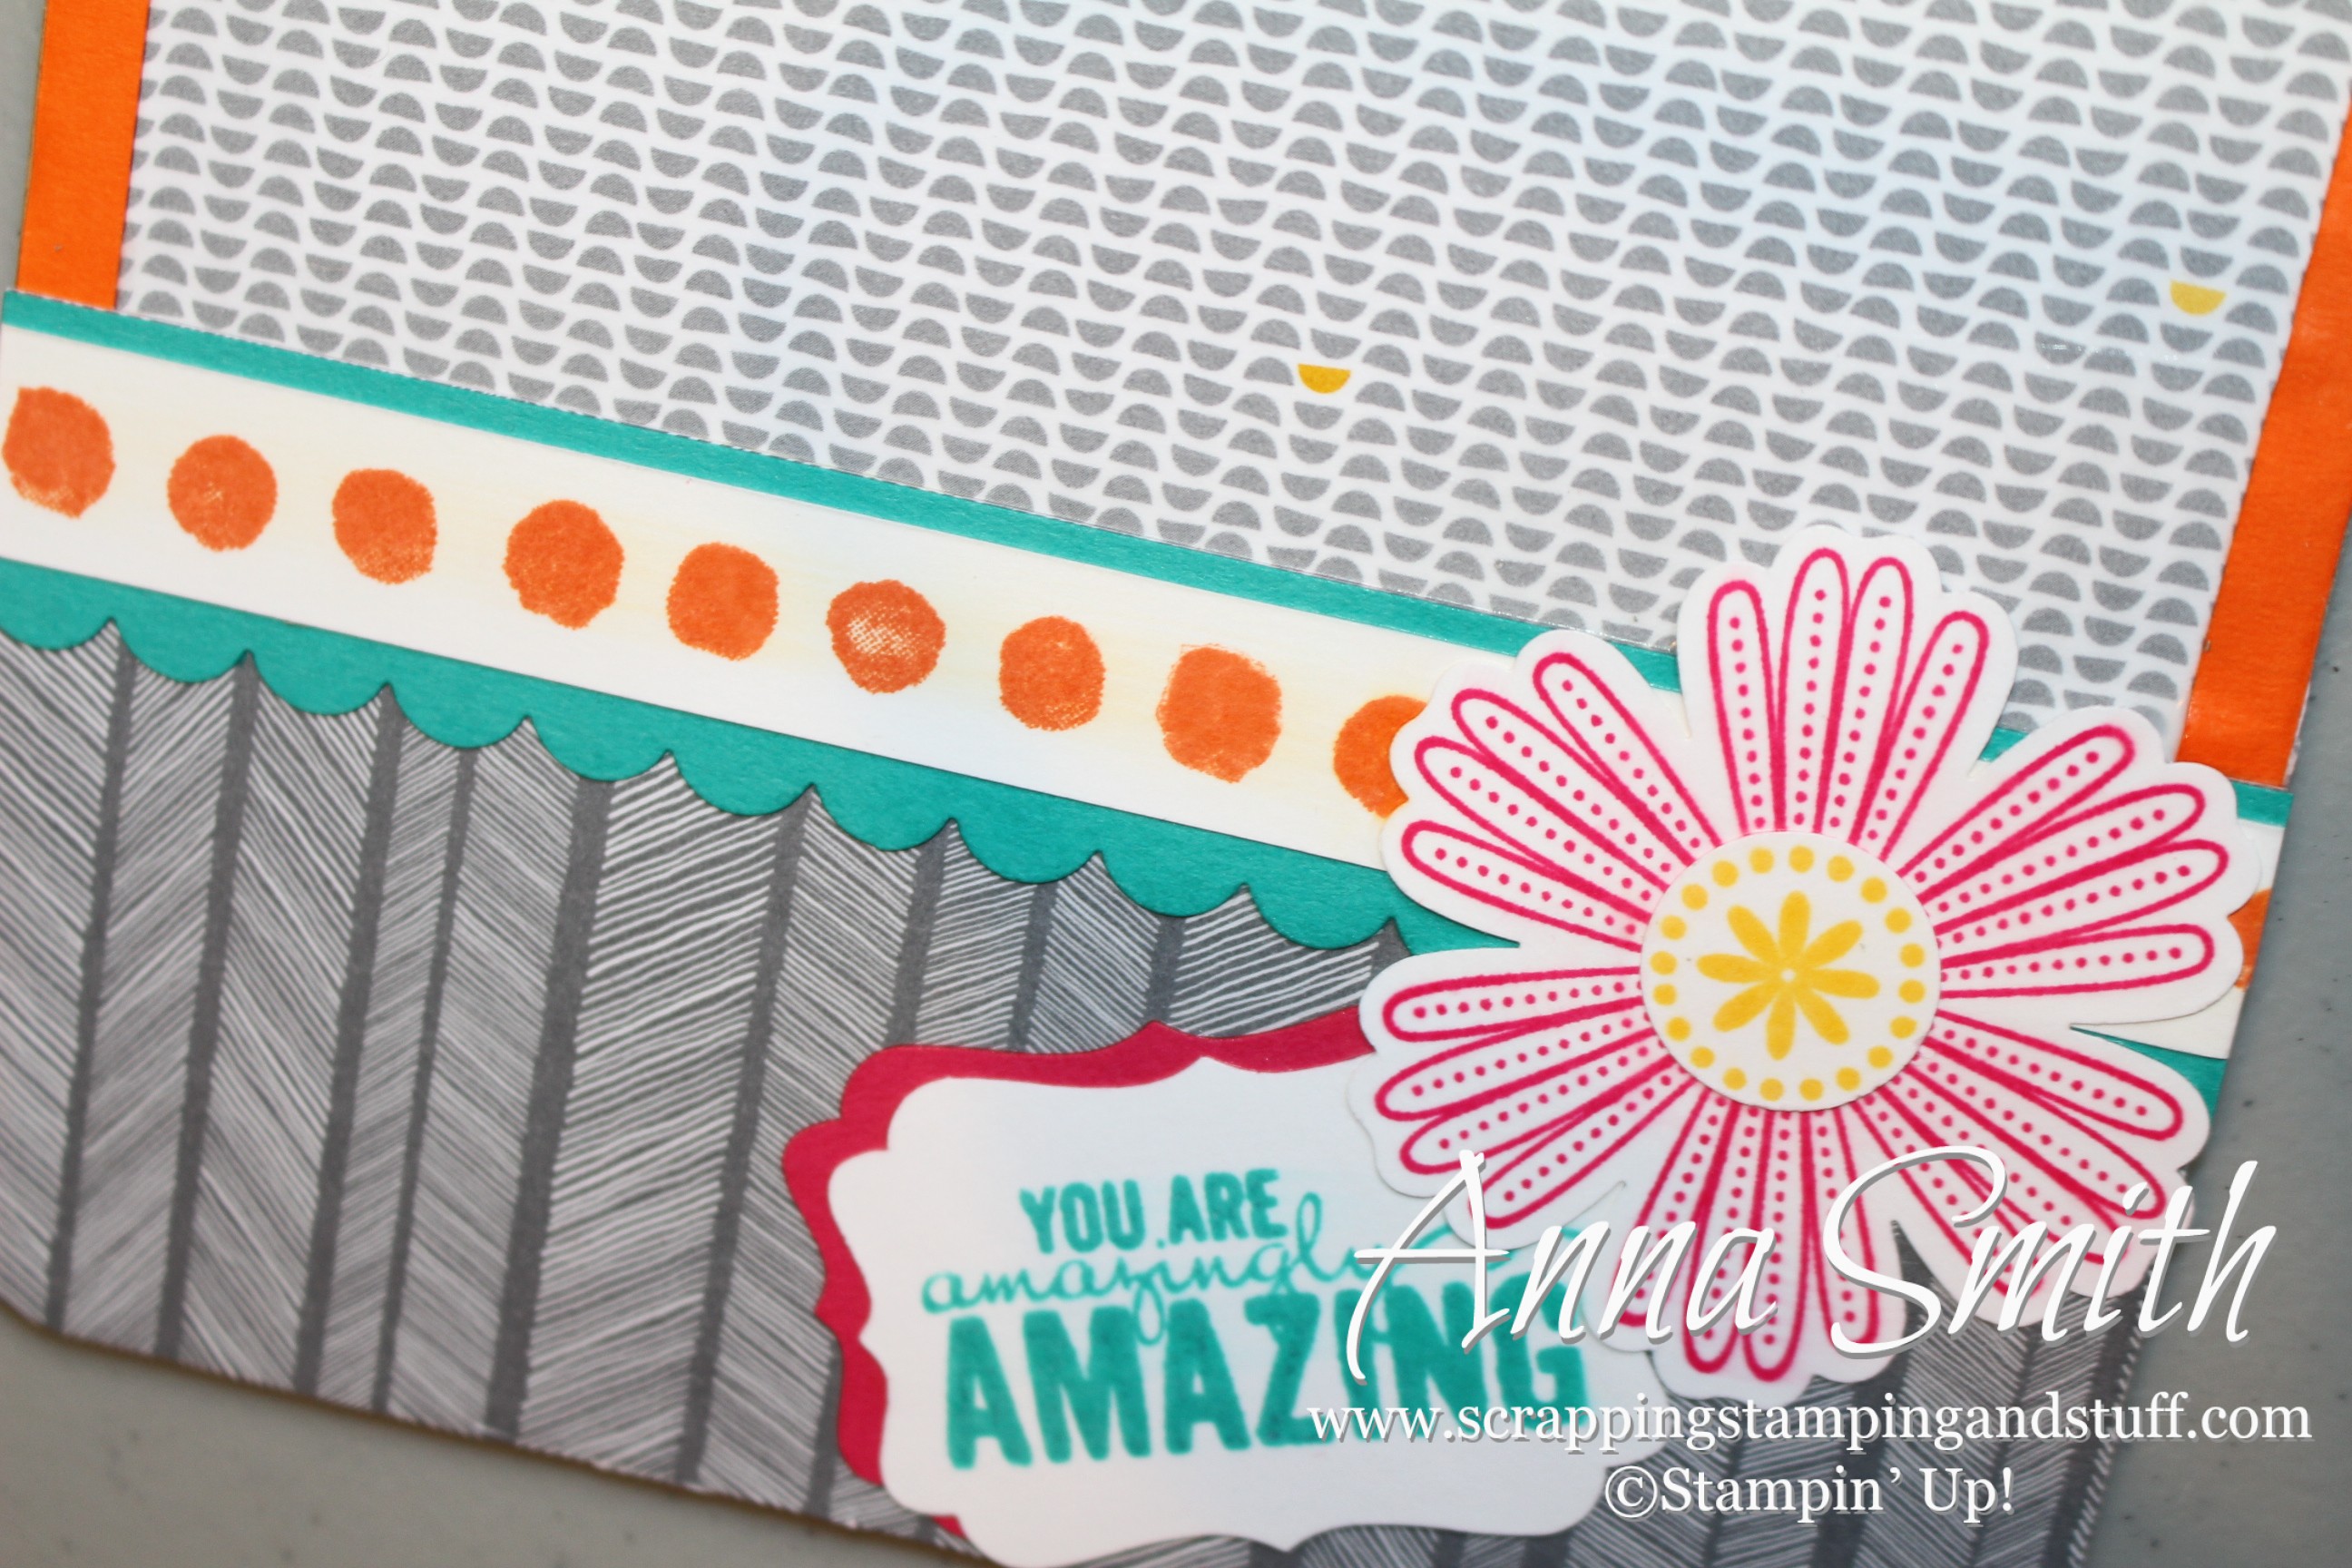
  • Next, cut paper pieces and use stamps and punches to create the decorations to go on your clipboard. See products below for a list of what I used.
  • Once all of your pieces are prepared, it’s time to start mod podging. For each piece of paper you attach, you need to use a paintbrush to apply Mod Podge to the clipboard AND to the back of the paper (this will help keep the paper from bubbling up as it dries). Then lay the paper on the clipboard in the correct location, and smooth the paper with your hands to make sure there are no air bubbles underneath. Next paint a thin layer of Mod Podge over top of the paper.
  • Complete the previous step for each piece of paper. You may want to wait briefly between layers to allow some drying time.
  • If any paper hangs over the edge of the clipboard, trim it with scissors.
  • Apply one final coat of Mod Podge over the entire clipboard, making sure to seal the edges. Allow to dry.
  • Tie ribbons to the top of the clipbard.

If you would like to use this on your refrigerator, you could attach magnet strips to the back. Enjoy!

Built for Free Using: My Stampin Blog

Sharing is caring!

Filed Under: Gift Ideas, Other Projects Tagged With: clipboard, gifts

Previous Post: « Crockpot Chicken Noodles
Next Post: The Wacky Watercooler April (Fool) Blog Hop »

Reader Interactions

Leave a Reply Cancel reply

Your email address will not be published. Required fields are marked *

Recipe Rating


Primary Sidebar

Anna Helman

Independent Stampin' Up!® Demonstrator

  • Email
  • Facebook
  • Facebook Group
  • Instagram
  • Pinterest
  • RSS
  • Twitter
  • YouTube
Shop Stampin' Up!
Stampin' Up! catalogs
get updates
join Stampin' Up!
Stampin' Up! Rewards
Stampin' Up! special offers
Stampin' Up! clearance
Stampin' Up! 2025-2026 Annual Catalog
May 6, 2025 - May 4, 2026
View Online | Shop Online

Blog Archive

Categories

Footer

Important Links

  • Home
  • Shop Now
  • Get Updates
  • Join My Team
  • Rewards
  • Specials
  • Catalogs
  • Clearance

Anna Helman, Independent Stampin' Up!® Demonstrator

  • Email
  • Facebook
  • Facebook Group
  • Instagram
  • Pinterest
  • RSS
  • Twitter
  • YouTube

Get Ideas, Inspiration, and Special Offers!

Sign up to receive updates in your inbox

Thank you!

Please check your email for a special offer! 

.
All content on this blog is the property of Anna Helman, Stampin' Up!® Independent Demonstrator. Classes, services and projects offered here are not endorsed by Stampin' Up!® Projects, videos, photos, ideas and articles are shared for personal use only and may not be removed, duplicated or copied without permission. All artwork © Stampin' Up!®

Copyright © 2025 Anna Helman, handmake with love · Site Design by Catherine Carroll