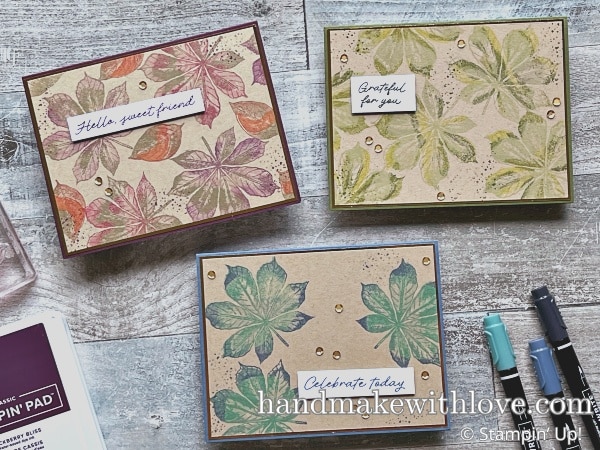
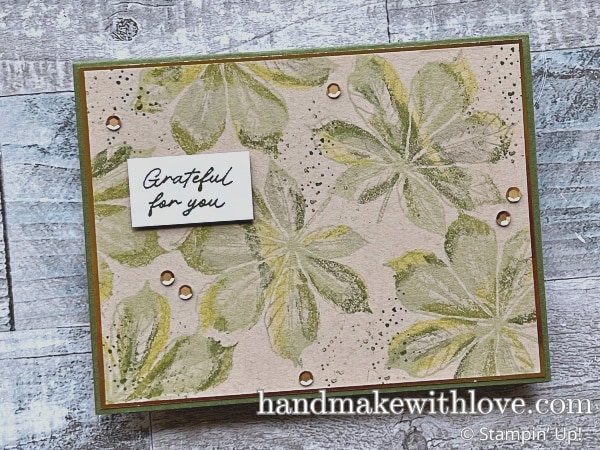
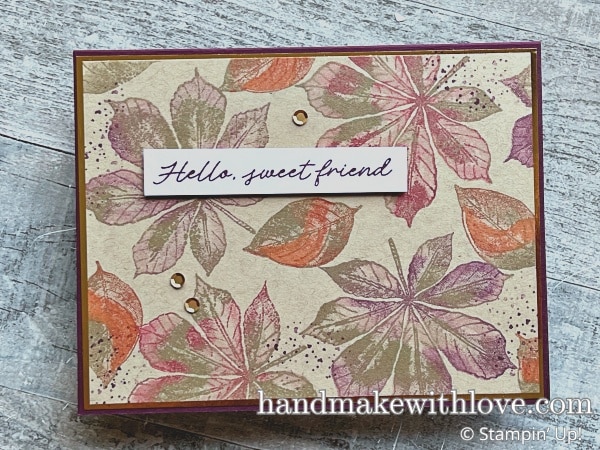
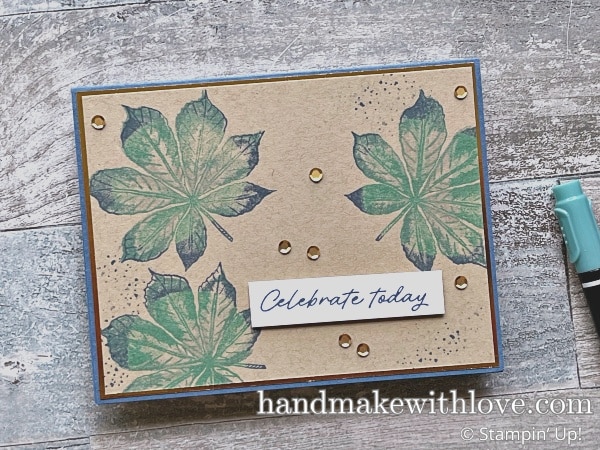
I just love today’s projects that I’m going to share! I had been looking for a reason to play around with the new Stampin Up Artistic Leaves stamp set, and I decided to use this set to highlight some realistic inking techniques. Don’t worry…they’re simple and anyone can do them. Let’s take a look!
Artistic Ink Techniques Video
Watch along here as I demonstrate how I created today’s cards!
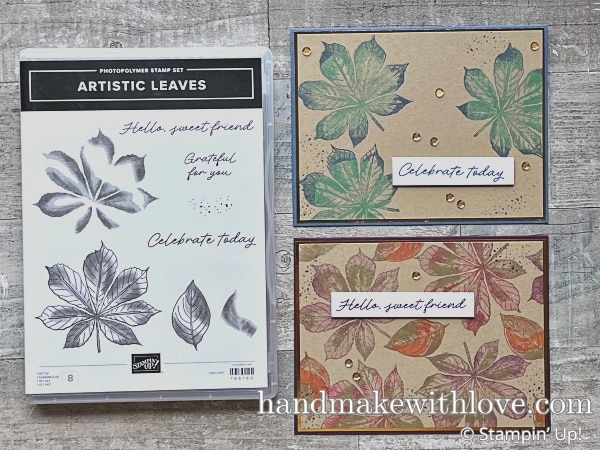
Stampin Up Artistic Leaves
Here’s the fantastic stamp set I used to create today’s cards.
This is one of our distinktive stamp sets, meaning it is designed to give a realistic appearance of shading, just by stamping it as intended. Here you can see two examples of how the stamps will create shading just by stamping them with no special techniques.
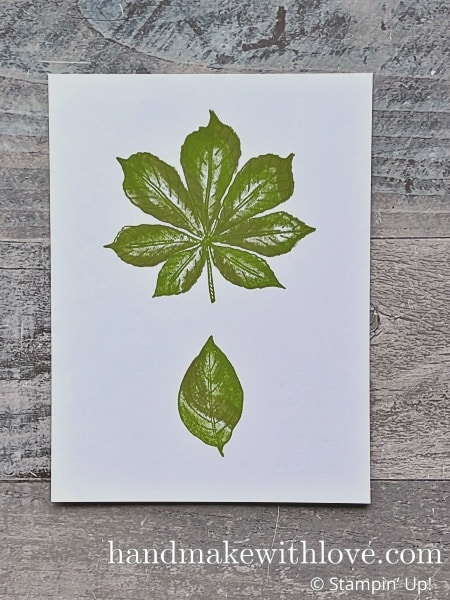
I’ll mention that with many two-step stamps, you have to use one stamp with a lighter color and the other one with a darker color. With this set, it doesn’t matter which stamp is light and which is dark. This means you can play around with tons of possibilities!
Beautiful, right?
But…let’s make this more fun and try some techniques to give them an even more amazing, realistic look.
Realistic Inking Techniques
Let’s talk about the three techniques I used to add multiple colors of ink to these stamps. For each one I’ll talk about how I inked the main stamp – the one that creates the majority of color for the leaf, and also how I inked the second stamp which fills in a smaller area.
1. Markers
For this technique, I used markers to add multiple colors of ink to my stamps. When you’re doing this, you always want to add the lightest color first, then move towards the darkest color being added last, so that your lighter markers don’t soak up darker inks. If you desire, you can ink the full stamp with a light color on an ink pad and then add darker areas with markers, or you can color the entire stamp with markers.
Main stamp colors: Ink fully with Soft Sea Foam, add Gray Granite with a marker
Second step stamp colors: Use markers to add Lemon Lime Twist, Old Olive, and Mossy Meadow
2. Blending Brushes
This time I inked each stamp with a main color using an ink pad, then added areas of another color with a blending brush. Again, use your lighter color first if possible, and add the darker colors with blending brushes.
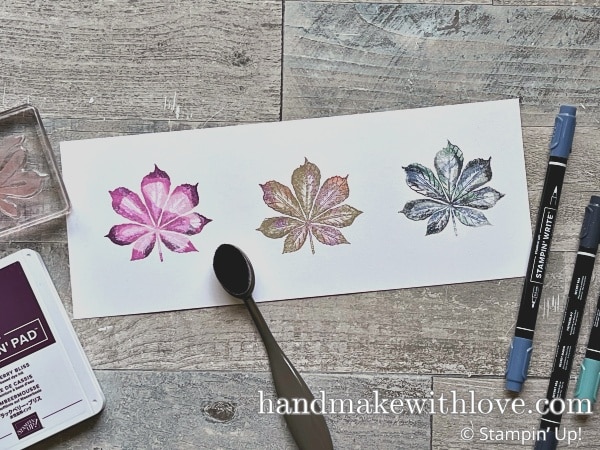
Big leaf main stamp colors: Ink fully with Crumb Cake, add Blackberry Bliss or Cherry Cobbler with a blending brush
Big leaf second step stamp colors: Ink fully with Bubble Bath, add Blackberry Bliss or Cherry Cobbler with a blending brush
Small leaf main stamp colors: Ink fully with Crumb Cake, add Cajun Craze with a blending brush
Small leaf second step stamp colors: Ink fully with Timid Tiger, add Cajun Craze with a blending brush
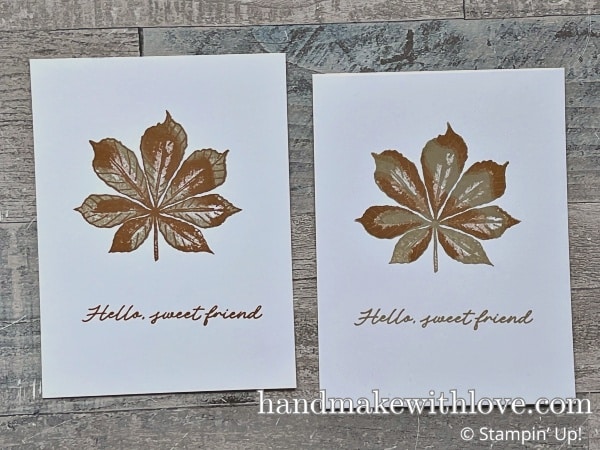
3. Rolling With Ink Pads
For this technique, first you’ll ink your stamp with a light color ink pad, then roll the outer edges of the same stamp on a darker color ink pad.
Main stamp colors: Ink fully with Coastal Cabana, roll stamp edges in Misty Moonlight
Second step stamp colors: Ink fully with Cloud Cover, roll stamp edges in Lost Lagoon
As I said earlier, anyone can do these techniques! If you’re using a stamp set you have in your collection, keep in mind the techniques work better with stamps that have at least semi-solid coverage, or in other words, don’t choose an outline stamp.
Which of these cards and techniques is your favorite? Comment at the bottom and tell me!
Materials List
Take a look at the supplies I used, and order if you’re interested, using these links!
Product List![Artistic Leaves Photopolymer Stamp Set (English) [ 166162 ]](https://assets1.tamsnetwork.com/images/EC042017NF/166162s.jpg "Artistic Leaves Photopolymer Stamp Set (English) [ 166162 ]")
![Regals Stampin' Write Markers [ 161699 ]](https://assets1.tamsnetwork.com/images/EC042017NF/161699s.jpg "Regals Stampin' Write Markers [ 161699 ]")
![Brights Stampin' Write Markers [ 161696 ]](https://assets1.tamsnetwork.com/images/EC042017NF/161696s.jpg "Brights Stampin' Write Markers [ 161696 ]")
![Neutrals Stampin' Write Markers [ 161697 ]](https://assets1.tamsnetwork.com/images/EC042017NF/161697s.jpg "Neutrals Stampin' Write Markers [ 161697 ]")
![Subtles Stampin' Write Markers [ 161698 ]](https://assets1.tamsnetwork.com/images/EC042017NF/161698s.jpg "Subtles Stampin' Write Markers [ 161698 ]")
![Blending Brushes [ 153611 ]](https://assets1.tamsnetwork.com/images/EC042017NF/153611s.jpg "Blending Brushes [ 153611 ]")
![Small Blending Brushes [ 160518 ]](https://assets1.tamsnetwork.com/images/EC042017NF/160518s.jpg "Small Blending Brushes [ 160518 ]")
![Basic White 8 1/2" X 11" Cardstock [ 166780 ]](https://assets1.tamsnetwork.com/images/EC042017NF/166780s.jpg "Basic White 8 1/2\" X 11\" Cardstock [ 166780 ]")
![Crumb Cake 8-1/2" X 11" Cardstock [ 120953 ]](https://assets1.tamsnetwork.com/images/EC042017NF/120953s.jpg "Crumb Cake 8-1/2\" X 11\" Cardstock [ 120953 ]")
![Mossy Meadow 8-1/2" X 11" Cardstock [ 133676 ]](https://assets1.tamsnetwork.com/images/EC042017NF/133676s.jpg "Mossy Meadow 8-1/2\" X 11\" Cardstock [ 133676 ]")
![Blackberry Bliss 8-1/2" X 11" Cardstock [ 133675 ]](https://assets1.tamsnetwork.com/images/EC042017NF/133675s.jpg "Blackberry Bliss 8-1/2\" X 11\" Cardstock [ 133675 ]")
![Misty Moonlight 8-1/2" X 11" Cardstock [ 153081 ]](https://assets1.tamsnetwork.com/images/EC042017NF/153081s.jpg "Misty Moonlight 8-1/2\" X 11\" Cardstock [ 153081 ]")
![Textured Metallic 12" X 12" (30.5 X 30.5 Cm) Specialty Paper [ 163772 ]](https://assets1.tamsnetwork.com/images/EC042017NF/163772s.jpg "Textured Metallic 12\" X 12\" (30.5 X 30.5 Cm) Specialty Paper [ 163772 ]")
![Soft Sea Foam Classic Stampin' Pad [ 147102 ]](https://assets1.tamsnetwork.com/images/EC042017NF/147102s.jpg "Soft Sea Foam Classic Stampin' Pad [ 147102 ]")
![Crumb Cake Classic Stampin' Pad [ 147116 ]](https://assets1.tamsnetwork.com/images/EC042017NF/147116s.jpg "Crumb Cake Classic Stampin' Pad [ 147116 ]")
![Bubble Bath Classic Stampin' Pad [ 161664 ]](https://assets1.tamsnetwork.com/images/EC042017NF/161664s.jpg "Bubble Bath Classic Stampin' Pad [ 161664 ]")
![Coastal Cabana Classic Stampin' Pad [ 147097 ]](https://assets1.tamsnetwork.com/images/EC042017NF/147097s.jpg "Coastal Cabana Classic Stampin' Pad [ 147097 ]")
![Misty Moonlight Classic Stampin' Pad [ 153118 ]](https://assets1.tamsnetwork.com/images/EC042017NF/153118s.jpg "Misty Moonlight Classic Stampin' Pad [ 153118 ]")
![Lost Lagoon Classic Stampin' Pad [ 161678 ]](https://assets1.tamsnetwork.com/images/EC042017NF/161678s.jpg "Lost Lagoon Classic Stampin' Pad [ 161678 ]")
![Cloud Cover Classic Stampin' Ink Refill [ 165279 ]](https://assets1.tamsnetwork.com/images/EC042017NF/165279s.jpg "Cloud Cover Classic Stampin' Ink Refill [ 165279 ]")
![Uninked Stampin' Spots [ 141822 ]](https://assets1.tamsnetwork.com/images/EC042017NF/141822s.jpg "Uninked Stampin' Spots [ 141822 ]")
![Neutrals Adhesive Backed Sequins [ 161627 ]](https://assets1.tamsnetwork.com/images/EC042017NF/161627s.jpg "Neutrals Adhesive Backed Sequins [ 161627 ]")
![Paper Trimmer [ 152392 ]](https://assets1.tamsnetwork.com/images/EC042017NF/152392s.jpg "Paper Trimmer [ 152392 ]")
![Bone Folder [ 102300 ]](https://assets1.tamsnetwork.com/images/EC042017NF/102300s.jpg "Bone Folder [ 102300 ]")
![Stampin' Seal+ [ 149699 ]](https://assets1.tamsnetwork.com/images/EC042017NF/149699s.jpg "Stampin' Seal+ [ 149699 ]")
Learn To Make Cards
Shop Supplies
Rewards Program
Join My Amazing Team
Thanks for visiting to see these lovely inking techniques and the Stampin Up Artistic Leaves stamp set!
Leave a Reply