Welcome friends and thanks so much for being here. I know you love when I share crafting tips with you, and today I decided to compile many of my die cutting tips into one place, to make them easy for you to find. Die cutting is such a fun way to add beautiful pieces to your projects, but honestly, it can be time consuming and frustrating at times. Let’s talk about some ways to reduce the frustration!
Die Cutting Tips Video Tutorial
Watch along here as I demonstrate all of these tips and share some encouragement at the end.
Best Die Cutting Tips
Let’s talk about these amazing tips! As I shared these tips in the video, I created this cute card.
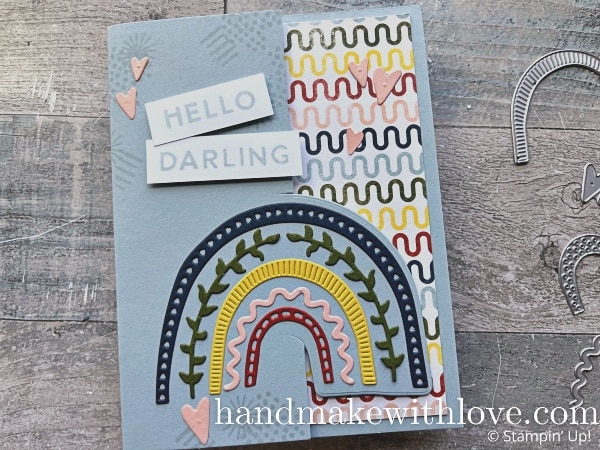
1. Use dies to create unique borders.
I love to use a die but only cut it part way so that it stays attached to the card. After I have made the cut, I use my trimmer to remove the excess paper. Watch along with the video to see exactly how to do this or you can learn more here where I shared about these cute cards!
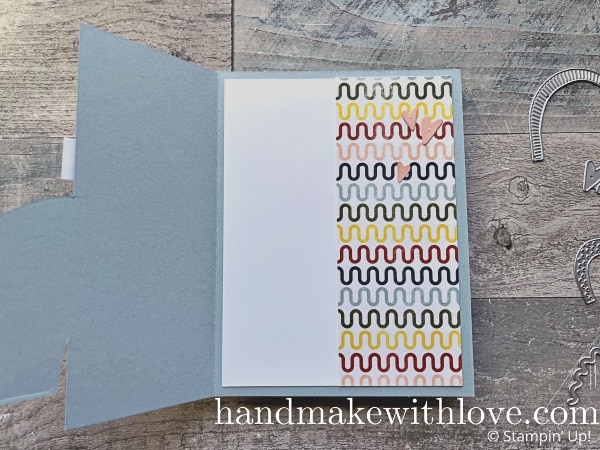
Here you can see today’s card from the inside, with half of the rainbow cut popping out from the left edge.
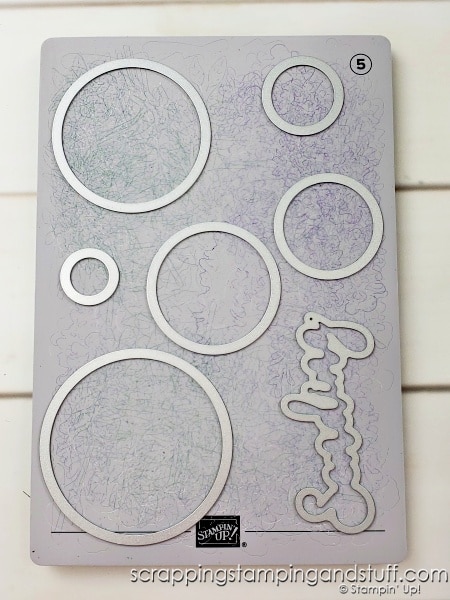
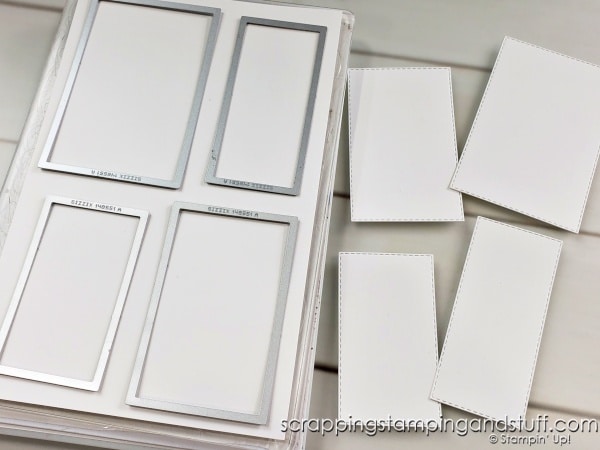
2. Cut everything at one time.
Die cutting can be time consuming, so I always try to put all of my dies on the platform at one time so that I can cut all of my pieces with one crank through the machine. If you have a hard time keeping dies in the right place, you can use removable tape.
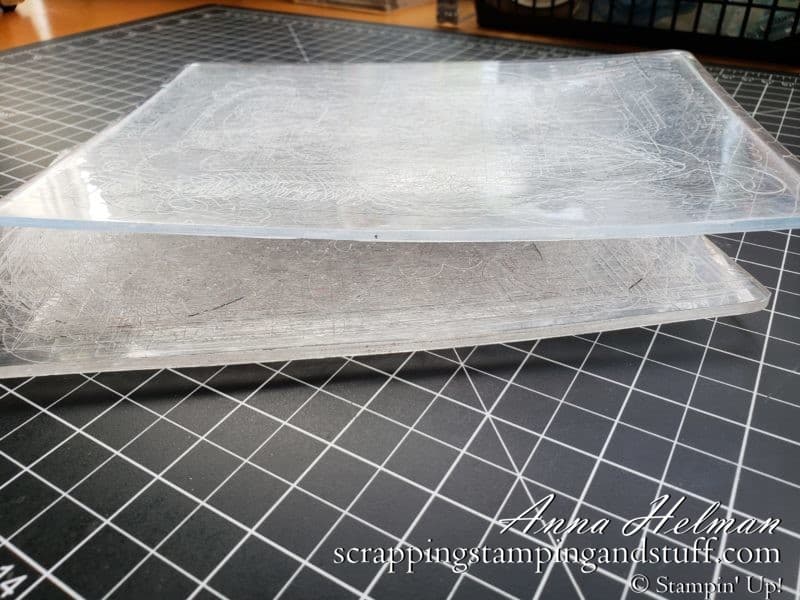
3. Keep cutting plates flat.
It is the absolute worst when your cutting plates get warped. How in the world are you supposed to keep a die in the correct place with warped plates? I have an awesome tip for keeping your plates flat which you can hear about in the video or take a look here.
4. Cut two layers at once.
I often lay two layers of cardstock on my platform and place the die on top to cut through two layers at once and get two die cuts with one crank. It almost always works perfectly!
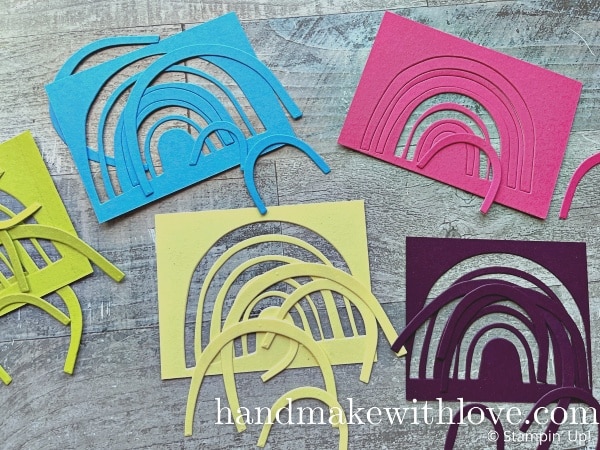
5. Cut all the dies from one color.
For today’s rainbow, it would be time-consuming to cut each piece from its own color. A great way to get all your different colors is to cut all the dies from one color and then repeat this until you have an assortment of colors. This doesn’t take much longer than prepping just one of each piece, and you’ll end up with a lot more die cuts to use on multiple projects.
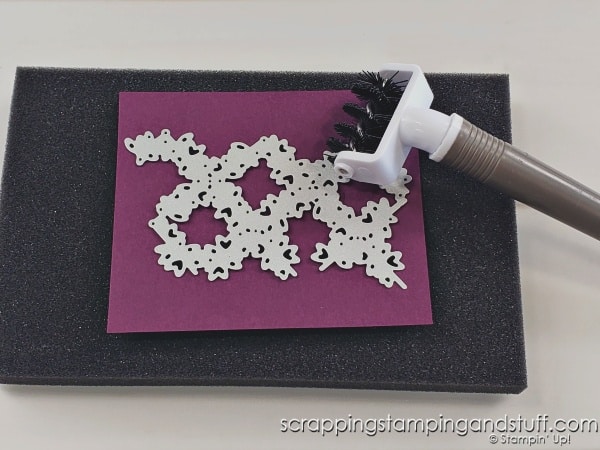
6. Use the roller brush for detailed die cuts.
If you get tired of poking all those little pieces out of your detailed die cuts, the roller brush is a lifesaver! To use it, cut your project, then lay the paper with the die on top on the foam pad. Then use the brush to roll back and forth across the die several times. The brush will poke most or all of those little pieces out, saving you tons of time!
7. Scrape the plate!
This may sound silly, but do you ever find yourself picking all those tiny leftover pieces off of your cutting plates one piece at a time? If so, just grab a piece of cardstock and scrape them all off at one time.
8. Better ways to adhere detailed die cuts.
I have three different tips for adhering detailed cuts, and I will share them below.
Ways To Adhere Detailed Die Cuts
Honestly, most of the time I adhere my detailed cuts by using just a few tiny bits of multipurpose glue on the backside of the paper. I know this isn’t everyone’s cup of tea because it’s a little tedious, so I’ll share three more awesome tips below.
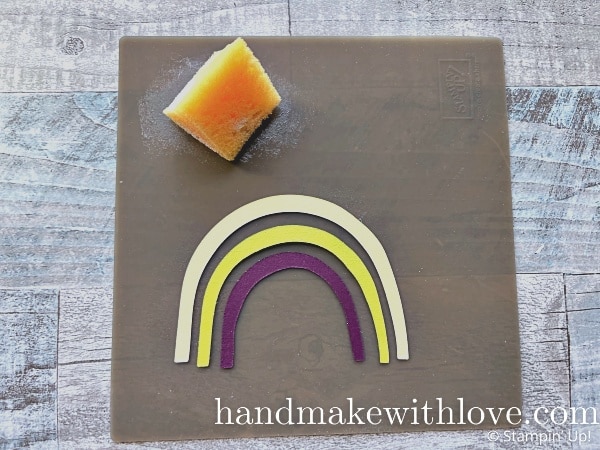
1. Sponge and glue
Place some glue on the silicone craft mat, use a sponge to spread it around a bit and get a thin layer. Lay your die cut upside down on the craft mat and gently sponge glue on the backside of it. Works great!
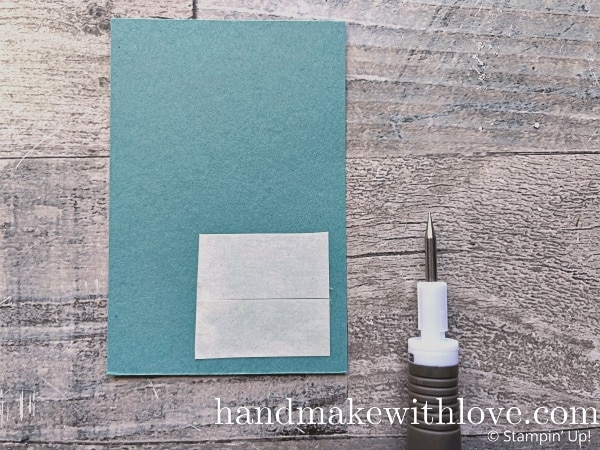
2. Tape
Did you know you can use tape for detailed cuts as well? Lay the die cut upside down on the silicone mat, apply tape, then use your fingers to gather the tape and push it behind the paper where it will not show.
3. Adhesive sheets
Before you do your die cutting, just cut a piece of adhesive sheet and attach it to the backside of your paper. After you have created the die cut, to attach it just remove the paper backing and stick it onto your paper. So easy!
Today’s Card
I almost forgot to talk about this adorable card!
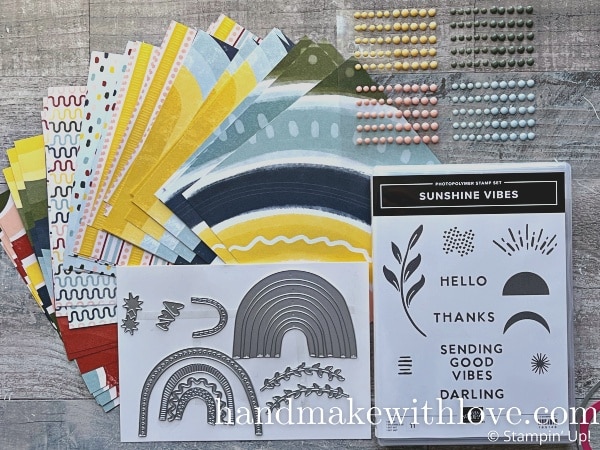
I made it with the Boho Vibes product suite which includes the Sunshine Vibes stamp and die bundle, as well as coordinating paper and gems. Super cute right?
Here’s the inside.
Wow, this was a lot of information! It has taken me several years to gather all of these tips. What handy tips have I forgotten that you love to use in your craft area? Tell me at the bottom!
Materials List
Take a look at the materials I’ve used on today’s card using these links.
Product List![Boho Vibes Suite Collection (English) [ 165156 ]](https://assets1.tamsnetwork.com/images/EC042017NF/165156s.jpg "Boho Vibes Suite Collection (English) [ 165156 ]")
![Boho Vibes 6" X 6" (15.2 X 15.2 Cm) Designer Series Paper [ 165144 ]](https://assets1.tamsnetwork.com/images/EC042017NF/165144s.jpg "Boho Vibes 6\" X 6\" (15.2 X 15.2 Cm) Designer Series Paper [ 165144 ]")
![Sunshine Vibes Bundle (English) [ 165152 ]](https://assets1.tamsnetwork.com/images/EC042017NF/165152s.jpg "Sunshine Vibes Bundle (English) [ 165152 ]")
![Sunshine Vibes Photopolymer Stamp Set (English) [ 165146 ]](https://assets1.tamsnetwork.com/images/EC042017NF/165146s.jpg "Sunshine Vibes Photopolymer Stamp Set (English) [ 165146 ]")
![Sunshine Vibes Dies [ 165151 ]](https://assets1.tamsnetwork.com/images/EC042017NF/165151s.jpg "Sunshine Vibes Dies [ 165151 ]")
![Muted Palette Dots [ 165155 ]](https://assets1.tamsnetwork.com/images/EC042017NF/165155s.jpg "Muted Palette Dots [ 165155 ]")
![Stampin' Cut & Emboss Machine [ 149653 ]](https://assets1.tamsnetwork.com/images/EC042017NF/149653s.jpg "Stampin' Cut & Emboss Machine [ 149653 ]")
![Paper Trimmer [ 152392 ]](https://assets1.tamsnetwork.com/images/EC042017NF/152392s.jpg "Paper Trimmer [ 152392 ]")
![Basic White 8 1/2" X 11" Cardstock [ 166780 ]](https://assets1.tamsnetwork.com/images/EC042017NF/166780s.jpg "Basic White 8 1/2\" X 11\" Cardstock [ 166780 ]")
![Cloud Cover 8 1/2" X 11" Cardstock [ 165621 ]](https://assets1.tamsnetwork.com/images/EC042017NF/165621s.jpg "Cloud Cover 8 1/2\" X 11\" Cardstock [ 165621 ]")
![Night Of Navy 8-1/2" X 11" Cardstock [ 100867 ]](https://assets1.tamsnetwork.com/images/EC042017NF/100867s.jpg "Night Of Navy 8-1/2\" X 11\" Cardstock [ 100867 ]")
![Crushed Curry 8-1/2" X 11" Cardstock [ 131199 ]](https://assets1.tamsnetwork.com/images/EC042017NF/131199s.jpg "Crushed Curry 8-1/2\" X 11\" Cardstock [ 131199 ]")
![Petal Pink 8-1/2" X 11" Cardstock [ 146985 ]](https://assets1.tamsnetwork.com/images/EC042017NF/146985s.jpg "Petal Pink 8-1/2\" X 11\" Cardstock [ 146985 ]")
![Cajun Craze 8-1/2" X 11" Cardstock [ 119684 ]](https://assets1.tamsnetwork.com/images/EC042017NF/119684s.jpg "Cajun Craze 8-1/2\" X 11\" Cardstock [ 119684 ]")
![Mossy Meadow 8-1/2" X 11" Cardstock [ 133676 ]](https://assets1.tamsnetwork.com/images/EC042017NF/133676s.jpg "Mossy Meadow 8-1/2\" X 11\" Cardstock [ 133676 ]")
![Cloud Cover Classic Stampin' Ink Refill [ 165279 ]](https://assets1.tamsnetwork.com/images/EC042017NF/165279s.jpg "Cloud Cover Classic Stampin' Ink Refill [ 165279 ]")
![Uninked Stampin' Spots [ 141822 ]](https://assets1.tamsnetwork.com/images/EC042017NF/141822s.jpg "Uninked Stampin' Spots [ 141822 ]")
![Take Your Pick [ 144107 ]](https://assets1.tamsnetwork.com/images/EC042017NF/144107s.jpg "Take Your Pick [ 144107 ]")
![Take Your Pick Putty Refill [ 150006 ]](https://assets1.tamsnetwork.com/images/EC042017NF/150006s.jpg "Take Your Pick Putty Refill [ 150006 ]")
![Take Your Pick Die Brush Tip [ 149655 ]](https://assets1.tamsnetwork.com/images/EC042017NF/149655s.jpg "Take Your Pick Die Brush Tip [ 149655 ]")
![Take Your Pick Crafter Tips [ 161602 ]](https://assets1.tamsnetwork.com/images/EC042017NF/161602s.jpg "Take Your Pick Crafter Tips [ 161602 ]")
![Silicone Craft Sheet [ 127853 ]](https://assets1.tamsnetwork.com/images/EC042017NF/127853s.jpg "Silicone Craft Sheet [ 127853 ]")
![Multipurpose Liquid Glue [ 110755 ]](https://assets1.tamsnetwork.com/images/EC042017NF/110755s.jpg "Multipurpose Liquid Glue [ 110755 ]")
![Sponge Daubers [ 133773 ]](https://assets1.tamsnetwork.com/images/EC042017NF/133773s.jpg "Sponge Daubers [ 133773 ]")
![Adhesive Sheets [ 152334 ]](https://assets1.tamsnetwork.com/images/EC042017NF/152334s.jpg "Adhesive Sheets [ 152334 ]")
![Stampin' Dimensionals [ 104430 ]](https://assets1.tamsnetwork.com/images/EC042017NF/104430s.jpg "Stampin' Dimensionals [ 104430 ]")
![Stampin' Seal [ 152813 ]](https://assets1.tamsnetwork.com/images/EC042017NF/152813s.jpg "Stampin' Seal [ 152813 ]")
Learn To Make Cards
Shop Supplies
Rewards Program
Join My Amazing Team
I hope these die cutting tips can help save you tons of time and frustration!
Leave a Reply